You’ll be totally amazed at how much better homemade Pickled Beets taste as opposed to those you buy in the grocery store. Here’s another way we’re “Saving Summer In A Jar,” with our canned pickled beets recipe. Give them a try and taste the difference yourself.

Pickled Beets Recipe:
I’m not going to tell you that I’m a big fan of Pickled Beets and that I can’t wait to make them every summer. Well at least I haven’t been in the past. That may all have changed now though.
Some time past, I purchased a jar of Pickled Beets from the grocery store. I’d stumbled across some information on the Internet about how good they were and how good they were for your body. So, I thought I’d give them a try. Big mistake for me. I placed the jar in the refrigerator to let them get cold and a few days later I gave them a try. Ughh….I hated them. I have no idea what brand I bought but, they had no appeal for me what so ever. They tasted more like DIRT than anything else. I was highly disappointed and knew that I’d never eat any more so, I ended up just tossing them in the trash that very day. Lesson learned.
Then, a couple of weeks ago, I visited the roadside produce stand of my friends Flora and Bill. They had just pulled some fresh beets and had them out for sale. Through our conversation, I ended up telling them about my past adventure with Pickled Beets. That’s when Flora, stepped inside her house and came back with a sample of some of HER pickled beets. They were delicious.
So, from there, I told her I had to have the recipe. She agreed and I told them that I’d come back the following week to get some beets because I wanted to make some of my own.
I cut Floras recipe in half because it made a few more jars than I thought I needed. I ended up with 6 pints but, could have easily had 7 and you’ll read about that further down. I must admit, they were a little more trying than I had anticipated. I had problems with the skins of the beets not “slipping off” as expected. Even though I had cooked them for the suggested amount of time, I may have let them cool longer than they should have. I pretty much ended up having to peel the skins away which added a bit of more time and energy to the process.
Also, please consider that beets will STAIN your surfaces very quickly. Be very careful of anything they may come into contact with. I’d suggest using plastic cutting boards and that you wear gloves any time you’re working with them. Use paper towels to clean up with as opposed to your kitchen towels…..unless you want to change their color to pink.
Let me know if you give them a try. I’d love to hear how yours turn out. Mine are sitting for a few weeks to achieve a better pickled flavor and I haven’t actually tried them yet. You can leave us a comment in the section at the bottom of this post and you’ll also find a printable recipe at the bottom. So…if you’re ready…..Let’s Get Cooking!
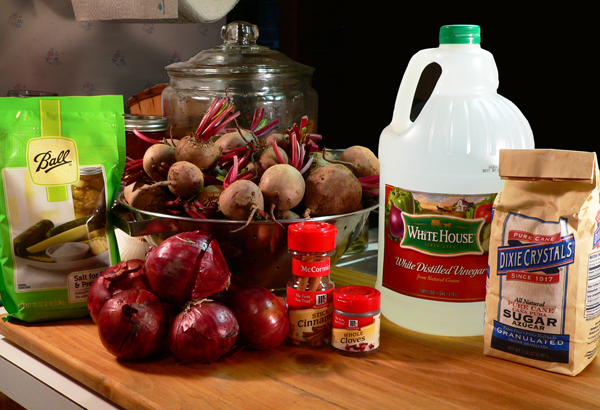
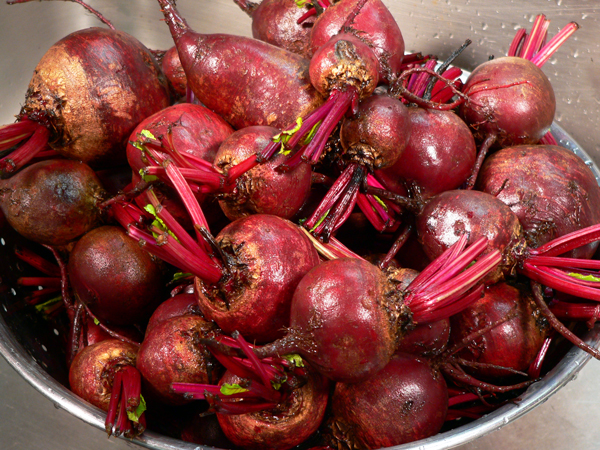
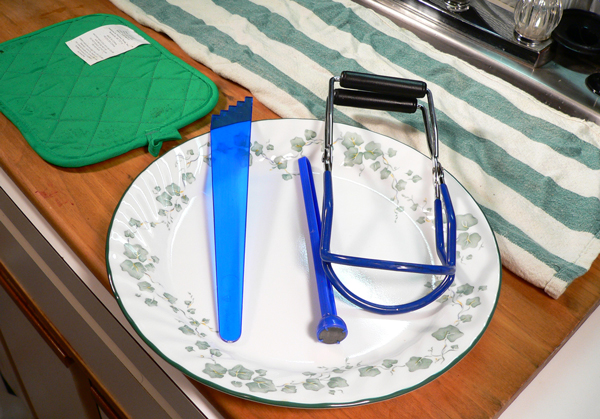
Pickled Beets Recipe: You’ll need these ingredients.
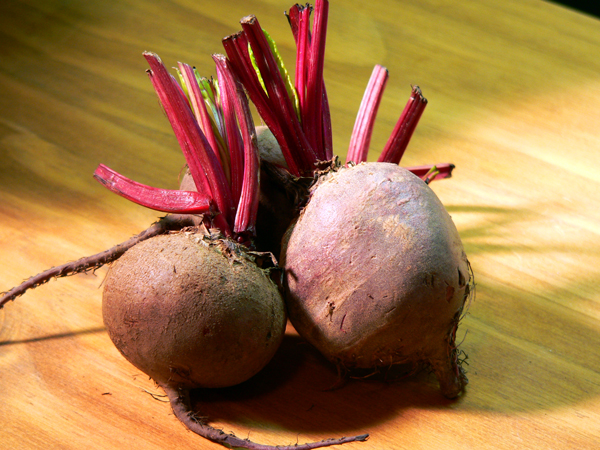
We’ll begin by trimming off the tops of the beets. Cut the leaves off, leaving about 2 inches of the stems and all of the roots intact. We do this to prevent the beets color from draining and bleeding while we process the beets. I was fortunate because the farm I bought the beets from cut the leaves away for me. It was a step I didn’t have to do myself.
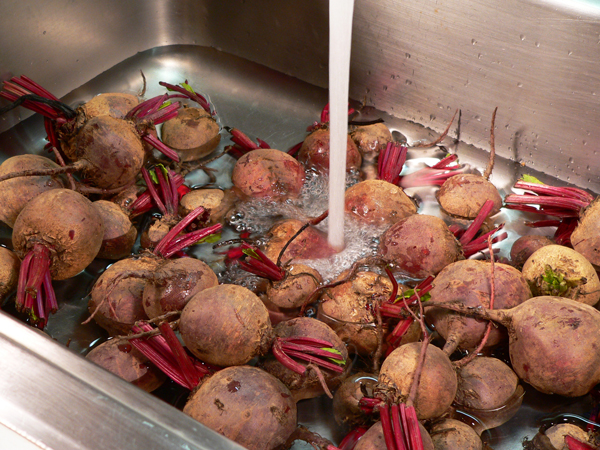
Place the beets in your sink and cover them with cool water.

Do NOT use a brush to clean the beets.
Just scrub each one gently with your fingers to remove any dirt. The beets are a root vegetable….meaning the beets themselves grow beneath the ground. Just rub them gently to remove any clumps of dirt and dust. We’re going to eventually cut off the tops and the roots…plus….we’ll slip the skins off completely in the next few steps.
Drain off the dirty water, rinse them again under cool running water and place in a colander to drain.

Place a large sauce pot on the stove and fill it about half full with water. Bring it to a low boil.

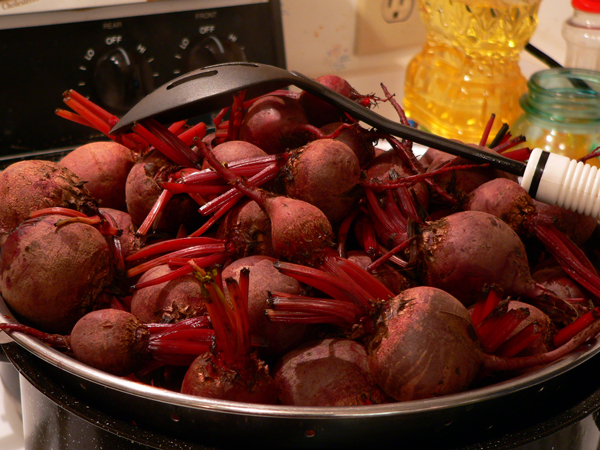
If you have various sizes of beets, you’ll need to sort them out by size as best as possible. The smaller ones will cook much quicker than the larger ones of course and, you don’t want the baby one’s to overcook.
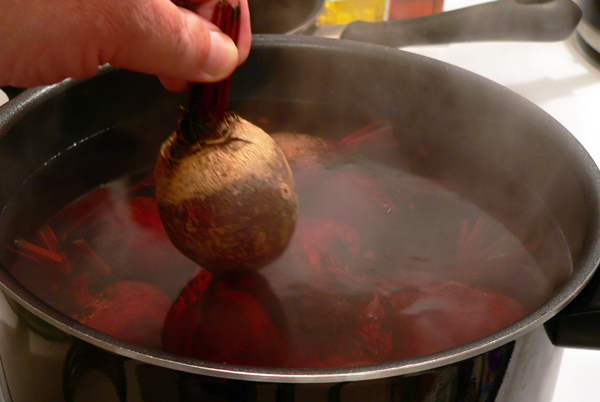
Here’s pretty much where my plan for cooking the beets went wrong. After adding the larger beets, I quickly realized that THIS pot wasn’t going to be big enough.
I should have just poured the water into my canning pot and proceeded with the plan but…..that would have been too easy. I would have needed to add more water and let it get up to boiling before proceeding. It was a good idea but going ahead and adding them to the pot that was ALREADY boiling seemed even better. Well…at least at THAT moment.
I had planned to start the larger beets cooking, then as time passed, I’d add the medium sized and when down to about 10-15 minutes, I would add the smaller ones. I figured that way, I could cook them all at the same time and then not overcook the really smaller beets. Only, it didn’t turn out that way. I had to cook the larger ones, remove them, then cook the medium, remove them, then cook the smaller one’s. Oh well….it was a good thought at least. It was also probably the reason the skins didn’t slip off as anticipated. We must learn from our mistakes…right?
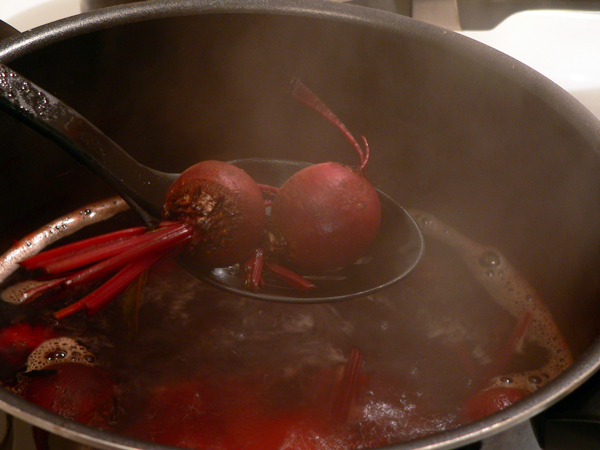
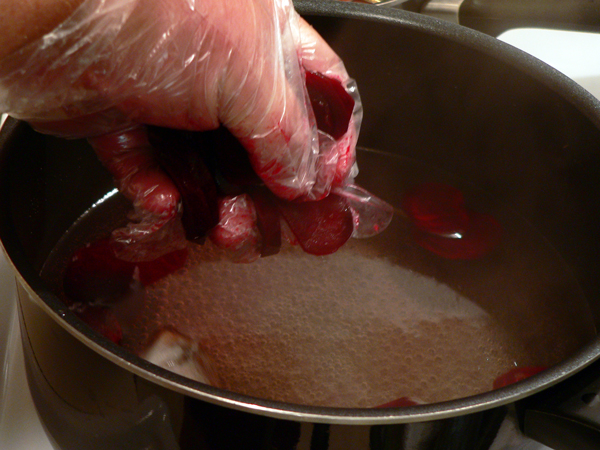
When they have finished cooking as suggested, remove them from the pot with a slotted spoon. I placed mine back in the colander.
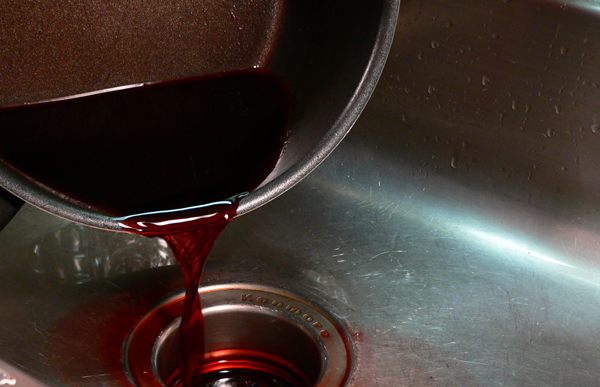
Be sure to DISCARD THE WATER you’ve been cooking the beets in.
Let the beets cool for a little bit. I placed them in my colander which was just sitting in the top of my canning pot.
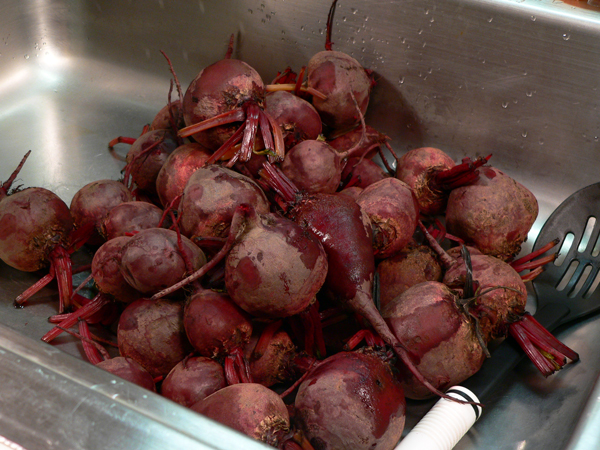
Then, I just placed them all back in the sink.
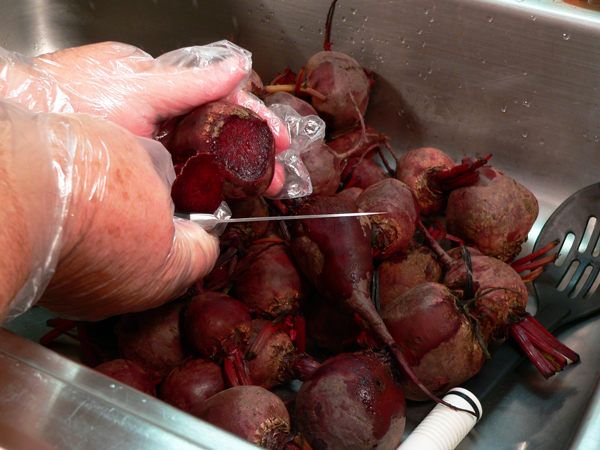
Use a paring knife and cut off the top stems, the roots and, then peel away the skins. Yeah right….not so fast on that peel away the skins part.
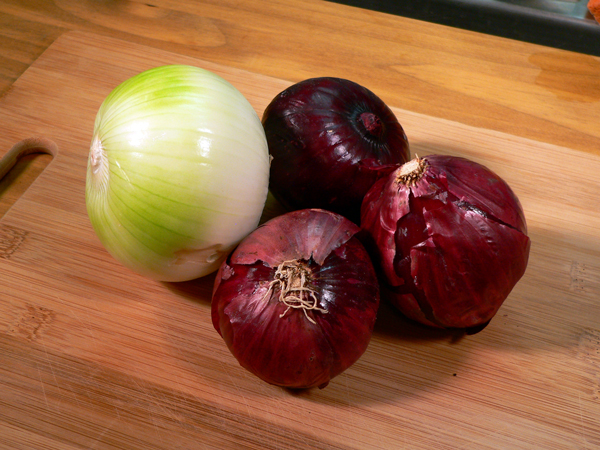
Prepare the onions next. I had decided to go with red onions in mine. I figured the color would just blend right in. I also had a large white onion….just in case I needed it.
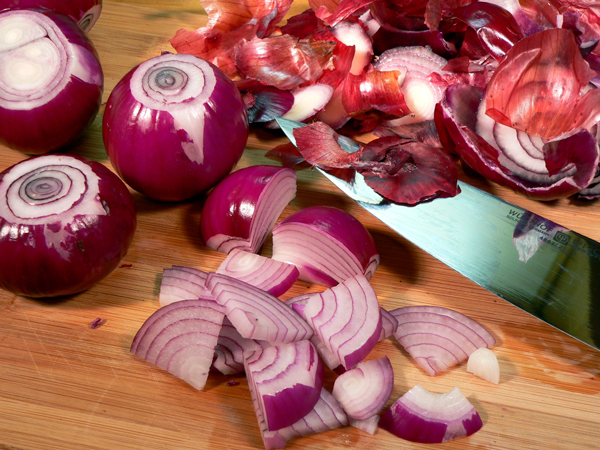
Looking at this picture brings tears to my eyes…how about you?
These onions had just come out of the garden and they really gave me a bit of a hard time as I sliced them up. I didn’t want to use full onion rings in my jars so I decided to cut the onion in half then, into quarters. After that, I cut the quarters into the slices you see here. I wanted to use smaller pieces in each jar. Try to keep the slices to about 1/4 inch in width.
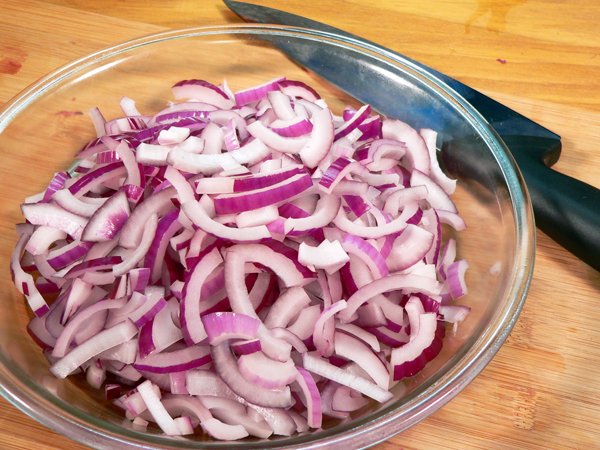
Since you’re probably crying already….go ahead and take the extra time to fully separate the slices. It will just make it easier to add them to the jars once we start filling the jars for the canner.

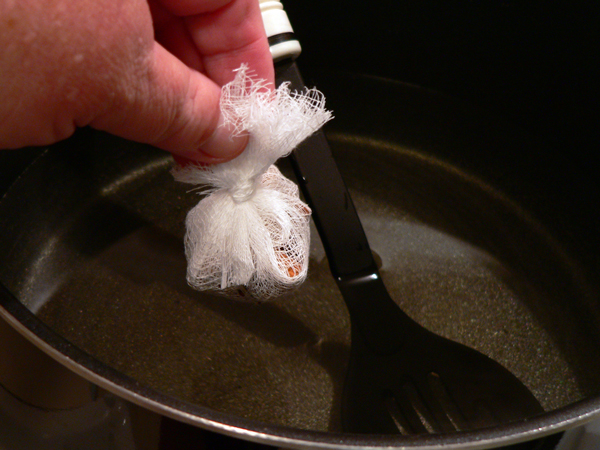
Then, go ahead and prepare the Cinnamon Sticks and Cloves. I used 2 of the Whole Cinnamon Sticks and about 12 Whole Cloves. You’ll want to break up the Cinnamon Sticks. They’re pretty hard so be careful as you try to break them. Place the spices on a layer of Cheesecloth.

Bunch up the side pieces of the Cheesecloth and tie up the top. This spice bag will be dropped into the vinegar solution we’re about to prepare and then later removed so we don’t have spices floating around in the jars.
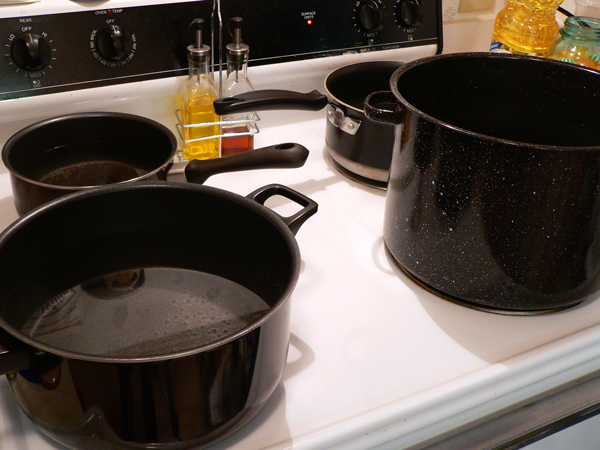
Here, I’ve setup the stove for the canning process.
This has become my standard way of doing things. The large canning pot is on the front right burner. On the left front is the pot that I normally use to cook up the item being canned. Back left is the pot I use to place my lids and bands in on low heat. The larger pot on the right rear contains water that I heat up and keep ready to add to the canning pot as needed during the canning process. This setup has worked pretty good for me over the years so why change?
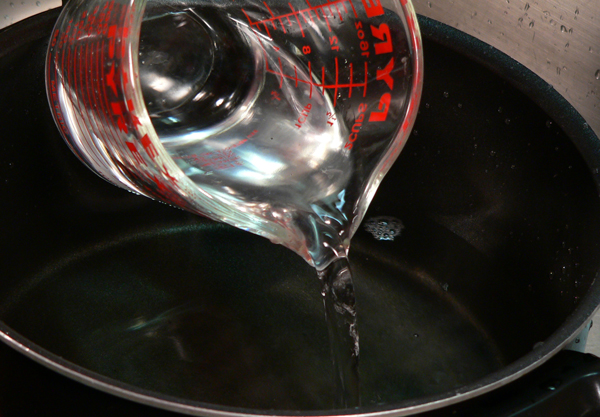
Add the vinegar to the pot. You must be sure you’re using a vinegar with 5% acidity. It will tell you right on the bottle. This is recommended for any type of pickling you will do. I’m using the White Vinegar as opposed to Apple Cider Vinegar.
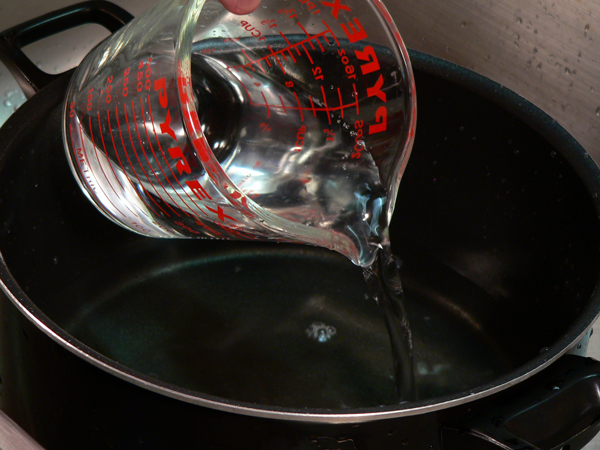
Now, add the water. I know it looks just like the picture above but, this really is water I’m pouring into the pot.
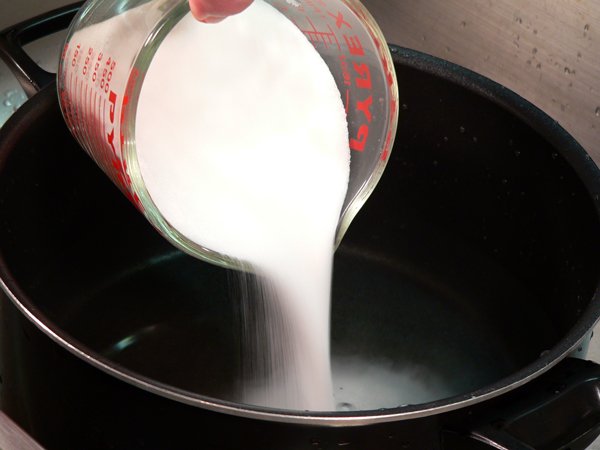
Add the two cups of sugar.
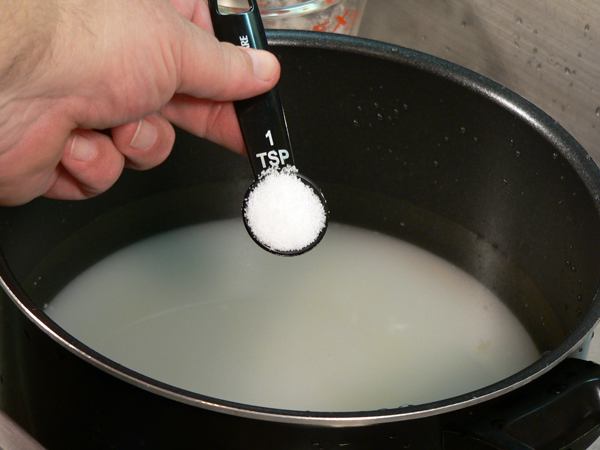
Add the “Pickling Salt” to the pot. This is not your ordinary table salt. You can typically find Pickling Salt with the canning supplies of your favorite store…or…in the spice section of your favorite grocer.
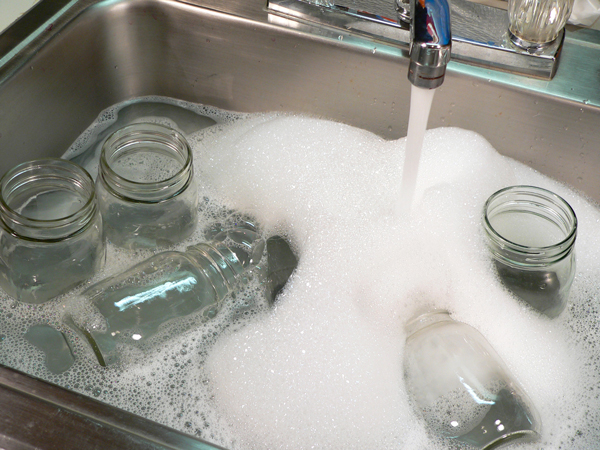
While the vinegar mixture is heating up, go ahead and fill your sink with some hot soapy water to wash your jars. Even new jars should be washed with detergent. It’s a good time to closely check the jars…especially the top rims….to make sure they aren’t chipped or cracked. I thought I was doing a pretty good job of doing that but, just as soon as I started to fill my jars, I found one that was chipped on the lip. Be sure to check the jars carefully.
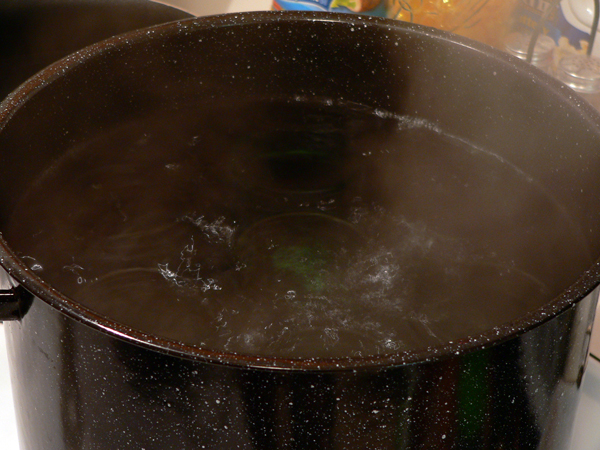
After you’ve washed and rinsed the jars….place them in your canning pot and bring the water to a boil. The jars need to boil for 15 minutes.
NOTE: It’s also acceptable to use your dishwasher to clean and sterilize the jars. The newer dishwashers have a cycle just for such purposes.
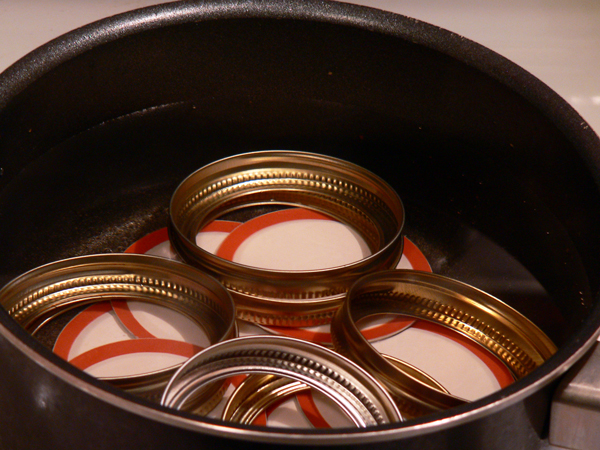
You will ALWAYS use NEW LIDS when canning. Bands may be re-used but, never try to can new products by using old lids. Be sure to wash the bands and check them to make sure they aren’t bent.
Place the lids and the bands in a small pot of warm water. I run hot tap water into my pot and then place it over the lowest heat setting on my stove. You just need to warm them slightly to soften up the rubber around the underside edge of the lids to ensure a proper seal. DO NOT boil the lids at any time. Just let them continue to warm up while everything else is coming up to speed.
Keep a watch on the vinegar, water and sugar mixture. Stir it frequently until the sugar has fully dissolved.
Once the sugar is fully dissolved…..drop in the tied bag of spices.
Things are about to get a little busy now. It’s one of the fun parts of the process of canning as things start to all come together.
It can be a bit daunting the first couple of times around but, the more you do it, the easier it gets. It’s always good to setup areas ahead of time so you know you have everything handy and at the ready as you will need them. I’ve got the long towel at the back to set my hot jars on as they come out of the canner. The hot pad is for my pot of beets once I remove them from the stove. I’ve found that cleanup goes much easier if I sit my jars in a plate to fill them. And, having the jar lifter and other tools ready just makes you that much more efficent. It’s kind of like setting up an “operating room” I think. I just needed someone to wipe the sweat from my brow at this point. Ha!
Now it’s time to get cooking. Grab some type of rubber glove and start placing the beets in the pot. The vinegar and sugar mixture should have just started to reach the low boil point by now.
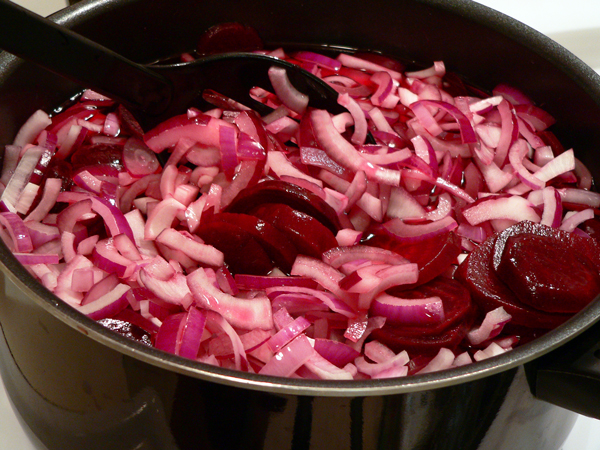
Add the sliced onions right on top of the beets. Then, gently start to stir the onions and beets together. You’ll probably need to increase the heat at this point as we want to bring the whole pot back up to a low boil. Once they begin to boil, keep stirring gently and let them boil for 5 minutes.
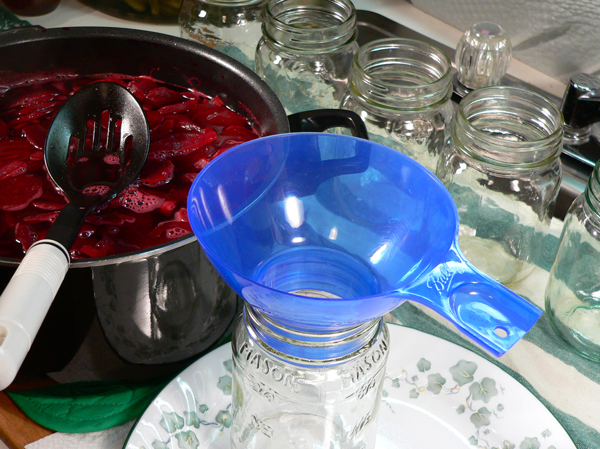
After 5 minutes, remove the beets from the stove and sit them next to your jars.
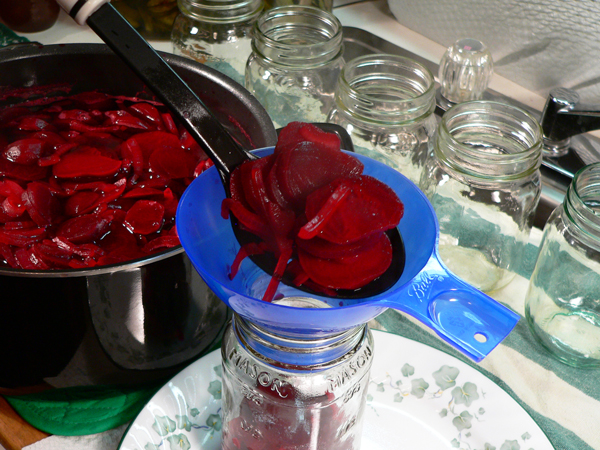
I used a large slotted spoon to place the beets and onions into the jars. The funnel really comes in handy at this point. Fill the jar up to 1/2 inch of the top with the beets and onions.
Here, I’m using the back of a spoon to lightly pack down the beets and onions. I even picked up the jar and shook them down a bit. You wouldn’t do that with jams or jellies but, it will help in this case to get the beets to settle more evenly in the jars.

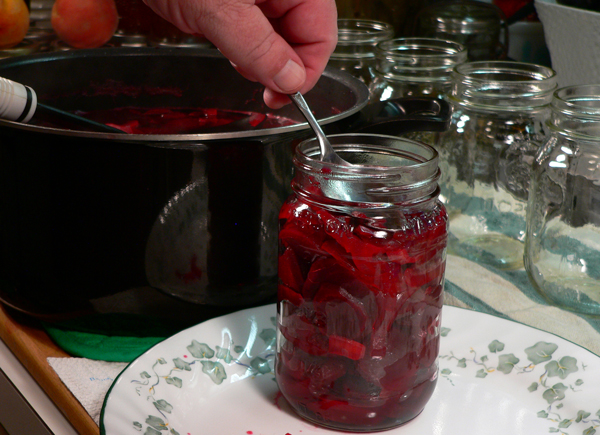
When the jar is properly packed with the beets and the onions…use a ladle to add the vinegar mixutre. Pour it in slowly and fill the jar up to 1/2 inch of the top.
Always check the jar for proper headspace. The recipe says we need 1/2 inch of headspace in our pickled beets. Headspace is the amount of space between the top of the beets and liquid and, the top of the jar itself. Recipes vary on the proper amount of headspace needed so, be sure to follow the directions carefully for whatever you might be canning.
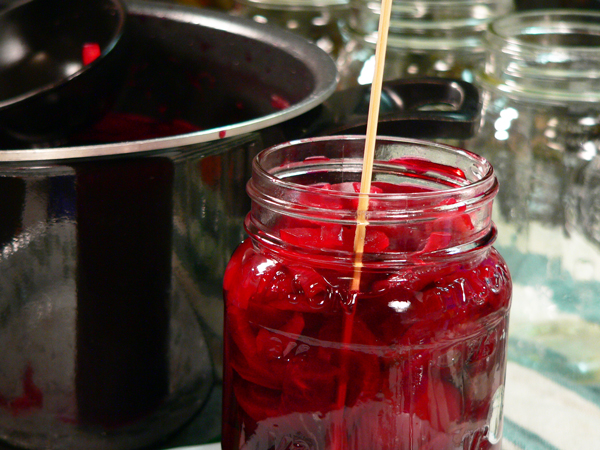
I’ve mentioned in some of my other canning recipes about using these wooden skewers. I find them to be a perfect little tool to run around the inside edges of the jar to help remove any air bubbles. Gently rotate the jars and look for the bubbles and just push the skewer into the bubble….it will usually just follow the skewer up to the top and burst. Get out as many of the air bubbles as you can see.
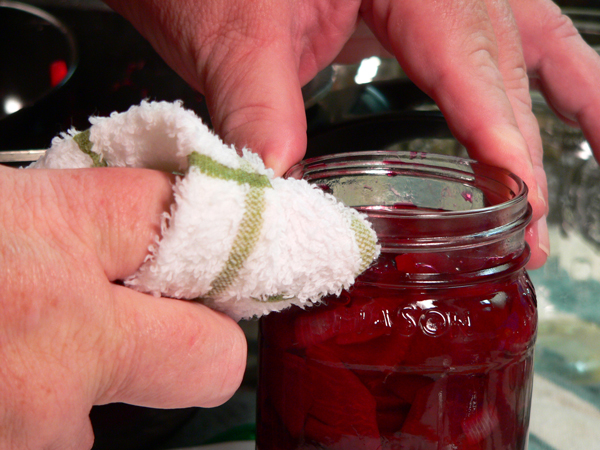
Use a clean damp cloth and carefully wipe off the top rim of the jar and around the edges where the band will go. You need to be sure to remove any food particles that might be on the very top of the rim and any juices around the top and outside. We want this area perfectly clean in order for the lids to seat properly and create a proper seal.
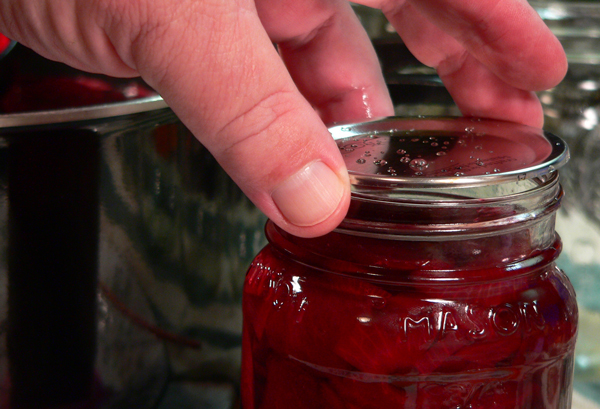
Use your magnetic wand and remove a lid from the warm water. Just shake off the lid and carefully center it on to the top of the jar. Try not to touch the red rubber ring on the underside of the lid.
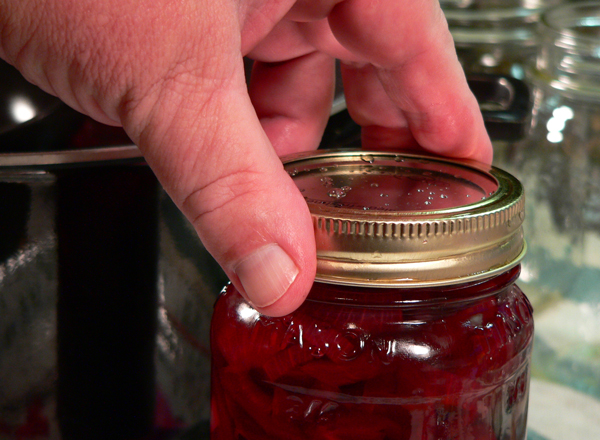
Using the magnetic wand again….remove a band from the warm water and center it over the lid. Make sure it’s going on straight and don’t force it. Screw the band down and just slightly tighten it. Don’t use any force at this point…you just need to get it “finger tight.”

Once all the jars are filled and have their lids properly tightened….place them in the rack inside your canner. The rack has handles that clip onto the outer top rim of the pot itself. Hook the handles over the edge while you add the jars. The jars are in the water at this point and you want to make sure they are sitting straight up.
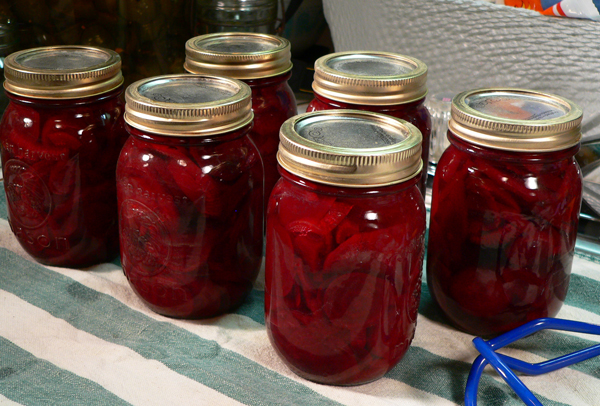
As it turned out, I ended up with just enough beets to fill six jars. I had already removed the one jar that I discovered had a chip on it. It would have gone in the center area above but….didn’t need it any way. Of course, I did pack my jars fairly tight with the beets and onions. I plan to enter a jar into our local fairs so I pack them a little on the tight side. And yes, I had a bit too much water in the canner. Once I lowered the rack of jars, I scooped out a little of the water so it wouldn’t all boil over.
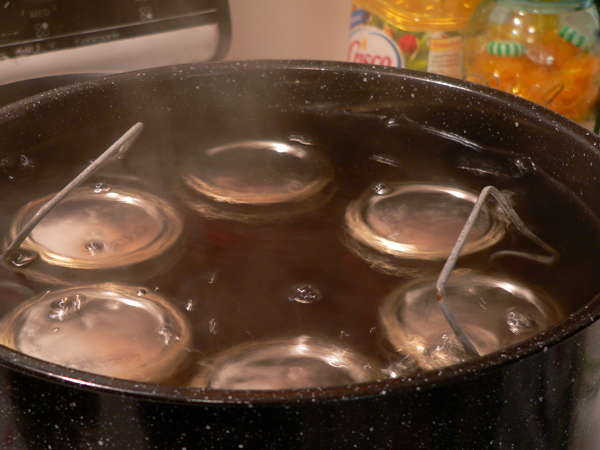
Use some oven mitts and lift the handles and rack up and off the top lip of the canner. Gently lower the rack into the boiling water. You’ll need about 2 inches of water over the top of the jars throughout the rest of the time they are going through this water bath process.
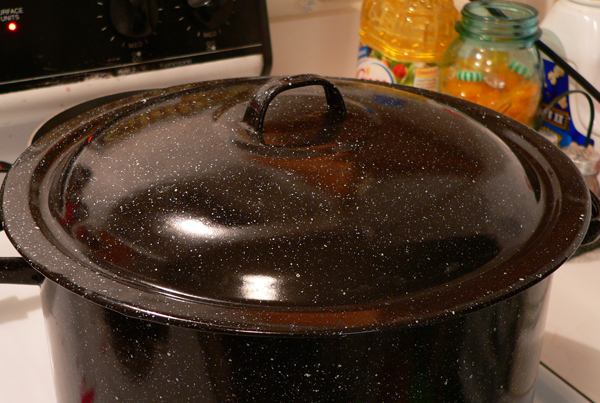
When the water has come back up to a boil, cover the canner with it’s lid.
You’ll need to check the recipe below for the proper length of time to process the beets in your area. It will vary based on the ALTITUDE of where you live. For me, I had to let them stay under water for 30 minutes. You’ll need to check them a couple of times to be sure they stay fully submerged at all times. The water can boil away pretty quickly. This is why I keep that extra pot of hot water on the burner right behind the canning pot. As I need it, I can just add hot water to the pot. It just always seem to come in handy to keep that extra pot of hot water going. Try it…you can thank me later. (Smile)
After they have gone through the proper amount of time for the water bath, remove the canner lid and set it aside. Then, use whatever you find handy to grab the handles and raise the rack back up out of the water. Slip the handles back onto the top lip of the canning pot. Grabbing the handles out of the water can be a bit tricky so be careful and don’t burn yourself….that water is still HOT. Take my word for it. Just saying!!!
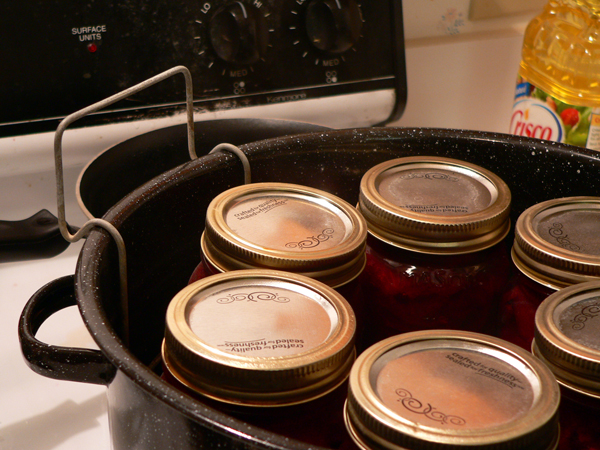
Just let the jars rest here for about 5 minutes. Then, use the jar lifter and carefully remove each one and sit it on a towel placed on your countertop. This should be an area free of any drafts….especially out of a direct path with any air conditioning vents.

The jars need to sit in this spot for 24 hours without being moved or disturbed.
DO NOT PRESS the center parts of the lids on the jars at this point. You should start to hear that sweet little “Ping” noise as the lids start to seal. To me…that’s the best part of the entire process. You’ve worked hard getting them to this point and that little ping as the air gets sucked out of the jar is a great reward in my book. As the air is pulled out, the center of the lid gets pulled down and it makes that “ping.” I love it!!!
After 24 hours, you will want to look closely at the tops to see if you can tell if they are properly sealed or not. It’s OK at this point to press down on the lids. If pressing on the lid doesn’t make any noise….you’re good. But, if the center of the lid springs back up when pressed, for some reason, the jar did not seal. It might have had some small food particle under the lid or something else that kept it from sealing correctly.
The beets would be OK to eat but, you need to go ahead and refrigerate them at this point to keep them safe. Sealed jars can be stored in a draft free, cool and dark location for up to one year or longer.
The beets will also need a couple of weeks to properly “pickle” and get a good taste. They will just get better over time so….try to be patient. You’ve done good so I know you’ll want to enjoy some soon. Congratulations…you’ve made your very own homemade “Pickled Beets.”
Enjoy!!!


