Easy, step-by-step, photo illustrated instructions that teach you how to make Southern Fried Chicken Livers at home. Printable recipe included.
Southern Fried Chicken Livers

Fried Chicken Livers Recipe
Fried Chicken Livers are an “acquired taste.” Either you like them, or you don’t. Simple as that.
Mama didn’t cook these when I was growing up. At least not that I recall. But, they do happen to be one of those old fashioned Southern food favorites that a lot of folks around my area really enjoy.
On the other hand, a lot of my friends just prefer to use them as “catfish bait.” It seems the big fish really like them as well.
They’re messy. No denying that fact. So, whether you’re fishing with them, or getting ready to fry them, be ready for it. They do splatter a bit when frying. Sometimes they’ll make a loud POP and splatter even more. Just be sure to protect your arms while you’re watching over them. A splatter screen comes in real handy if you have one. Smile.
I don’t eat them often, but like my Beef Liver with Onions and Gravy, I just get a desire to have them every once in awhile.
Cracker Barrel has them on their menu. Kentucky Fried Chicken use to have them, and still do in a few locations that I’ve seen around South Carolina. And, you’ll find them in some of the mom-and-pop type restaurants, or some of the area barbecue places.
Some places even feature them on the all-you-can-eat buffet, but I find those are normally dried out from sitting around on the buffet or usually just over cooked to begin with. I much prefer making them at home.
At home, I cook them just enough to be done, but not over cooked. This makes for a very soft and tender chicken liver with just enough breading to have a bit of a crisp to it. Livers are tender to begin with, but they often get overcooked.
It only takes about 3 minutes on each side, and they’re done. It’s pretty easy so it makes the slight mess well worth the effort.
Chicken livers are supposedly full of iron, protein, and Vitamin A, just in case you need some encouragement to try them. Smile. They actually taste pretty good to me.
I hope you’ll give them a try and if you do, be sure to leave a Comment in the section at the end of the recipe.
Ready for some Fried Chicken Livers? Alright then, let’s head on into the kitchen, and… Let’s Get Cooking!

Fried Chicken Livers, you’ll need these ingredients.

Place your chicken livers in a colander and gently rinse them with cool running water.
Chicken Livers are fragile, so work with them gently. When rinsed, let them drain in the colander.
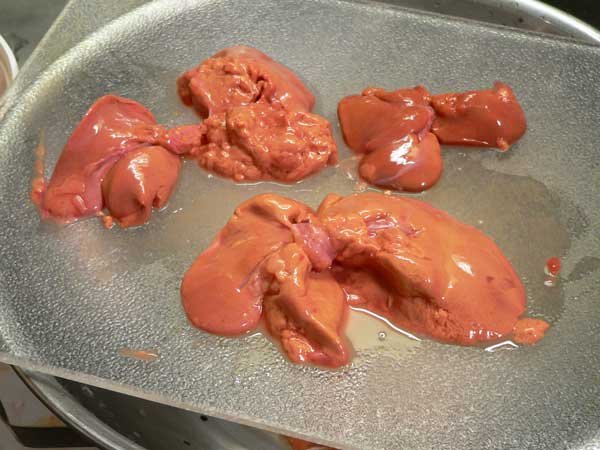
You’ll probably find a variety of sizes in your container as you can see here.
I suggest you cut the larger ones apart and trim away any tough connective tissue.
A good sharp knife will let you cut the larger pieces in half and trim away the tough parts.
Discard the really small pieces as they will burn easily while frying.
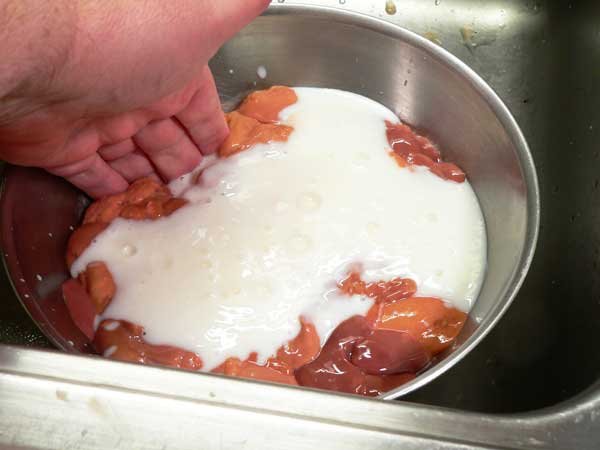
Place the trimmed livers in a bowl and add the buttermilk. I just added enough buttermilk to cover the livers. No need to actually measure it. Gently toss them around with your hand to fully coat the livers in the milk.

Place the livers back in the colander and drain them again, removing most of the buttermilk. You’ll probably need to stir them around a bit in order to drain them.

While they are still in the colander, add a bit of salt. About half a teaspoon should be fine.
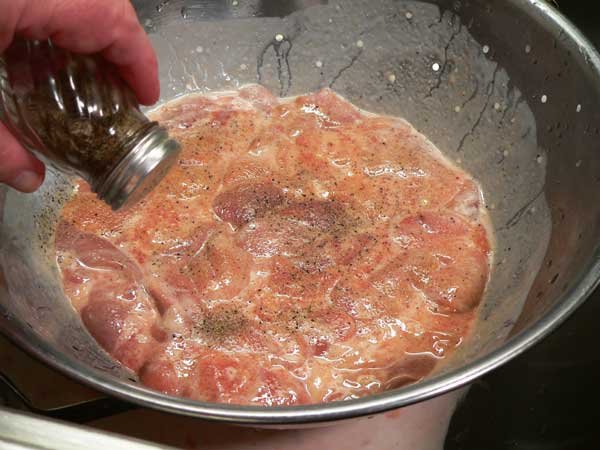
Sprinkle on the black pepper. About one fourth of a teaspoon will do.
Give them a gentle toss to mix the salt and pepper in.
Grab a small container or bowl, and add some flour.
Remove one of the livers from the colander and place it in the flour, tossing it gently to fully coat the liver.
Place about a cup of buttermilk in a small bowl and then dip the lightly floured liver into the buttermilk.
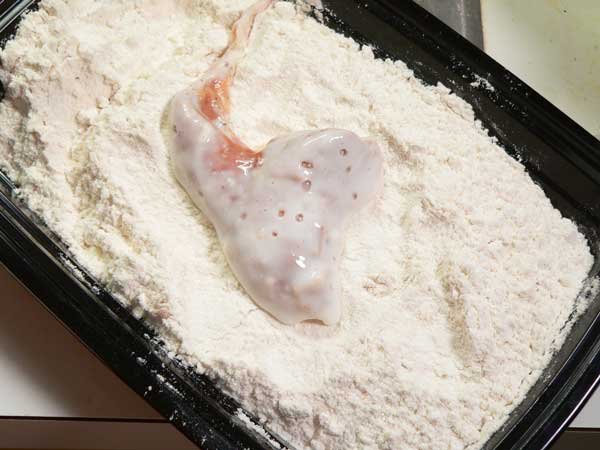
Place the liver back in the flour and dredge it again, fully coating the pieces of liver with flour.
I show this so you can see that we “double dip” the livers in flour. This will help them hold more of the flour for frying and make for crispy fried chicken livers.
You can speed up this process a bit by placing some flour in a paper bag or zip lock type bag. Once you dip them in flour, then the buttermilk, place the livers in the bag. Don’t add all of them at one time, but maybe about half. Shake them in the bag so they get coated with flour. It really is quicker and a bit less messy to do it this way.
Take them out of this second dipping of flour and spread them out on a foil lined sheet pan.
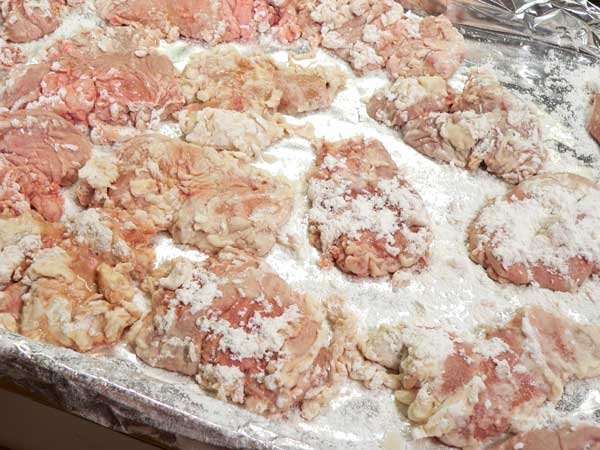
Let the flour coated livers rest on the sheet pan for about 10 to 15 minutes. I took the photo above after mine had been sitting while I heated up the oil.
This step helps the flour to adhere better so it doesn’t just all fall off when you place the livers in the hot oil.
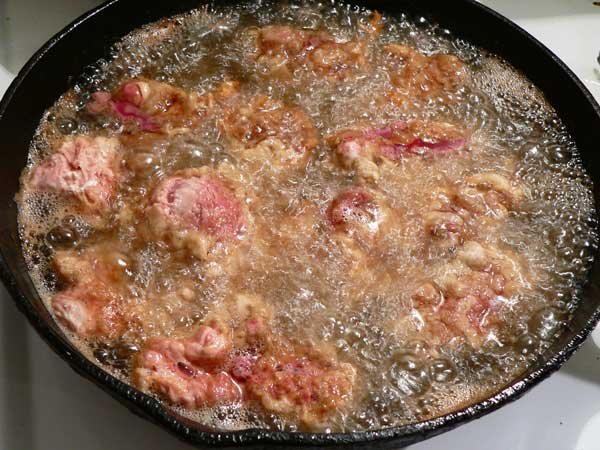
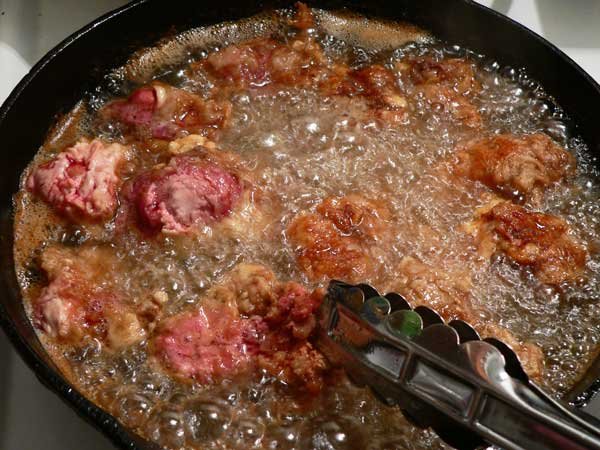
I like to fry mine in Mama’s old cast iron skillet of course. Here, I added enough oil to reach about one inch deep, then brought it up to 350F degrees. You can use a thermometer if you have one to be sure the oil is hot enough for frying.
Carefully place the livers, one at a time, into the hot oil. Don’t overcrowd the pan and leave a little room around the livers so they fry more evenly.
I also make sure that I have a lid large enough to cover my skillet close by just in case it should ever catch fire. That way, I could place the lid on the pan and hopefully kill the flames. You also don’t want to add more oil than will go over half the depth of your pan.
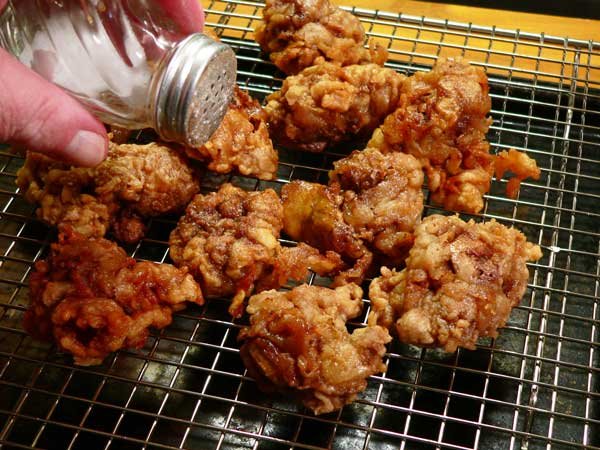
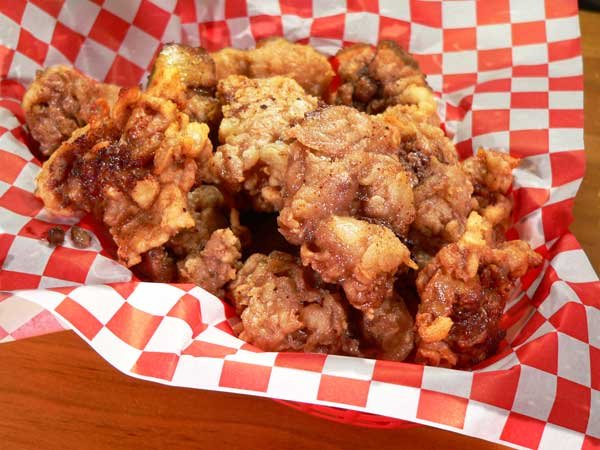
Use your tongs to remove them from the oil when they are done. Place the fried chicken livers on a wire rack if you have one, or on a brown paper bag. I don’t suggest you place them on paper towels as this will keep them from being crispy.
After you place them on the rack, lightly sprinkle them with a bit more salt and pepper.

Serve them while they’re warm.
You can use these as a main dish item or just as appetizers. Try dipping them in Ranch Dressing or some Hot Sauce. Lots of possibilities with fried chicken livers.
Enjoy!