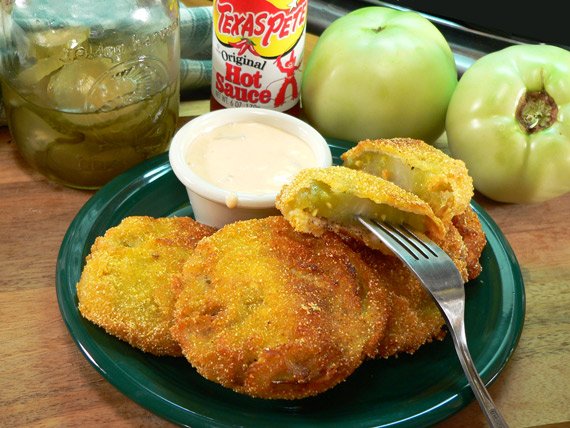
Long before the movie made them famous everywhere, Fried Green Tomatoes were already famous in the South. This quick and easy dish is great as an appetizer, snack, or as a side to your main meal. And, if the “secret is in the sauce,” we’ve got a quick and easy dipping sauce that makes them that much better.
I’ve tried Fried Green Tomatoes before, but I declare these turned out to be the very BEST I’ve ever had. The last time I cooked some, they were just a bit too tart for my personal liking. I really think it was because I rushed through them and didn’t give them time to fully cook. I also didn’t add one of mama’s favorite ingredients, a little sugar. Mama added sugar to just about all the vegetables she ever cooked.
I had tried for weeks to do this recipe. I’m ashamed to admit it, but I bought green tomatoes about 3 different times with the full intentions of doing this, but it never happened. My tomatoes would start to ripen before I could get around to it, or they would just turn ruby red all together. Perhaps I just had to be in the right mood to do them. I don’t know why it took so long, but it was certainly worth the wait. These turned out fabulous.
And, if you’re like me, they will get you thinking about the movie by the same name. Is the “secret REALLY in the sauce?” I’ve got my own version of a dipping sauce for these that you might want to try. So, if you’re ready…Let’s Get Cooking!
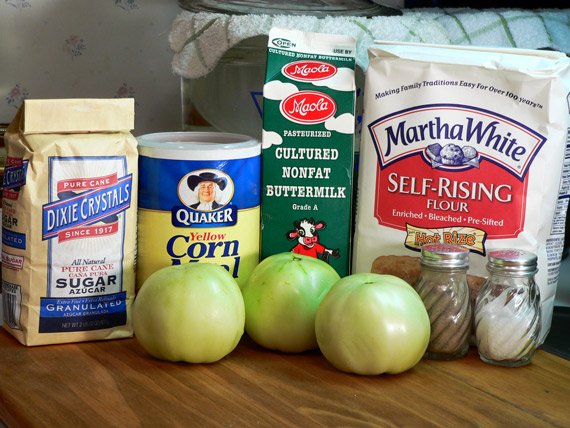
Fried Green Tomatoes Recipe: Ingredients you’ll need for this recipe.
You want to use tomatoes without any pink or red color to them. If they have started to change colors, they’re beginning to ripen. Look for really firm, green, tomatoes for the best results. They have a somewhat tart flavor but we’ll tame that down a little with this recipe.

Wash your tomatoes well before slicing. Place them on a cutting board, slice off both ends and discard. Slice the remaining tomato into thick slices. About 1/4 inch thick will work well.

Place the sliced green tomatoes on a wire rack over a layer of paper towels to let them drain.
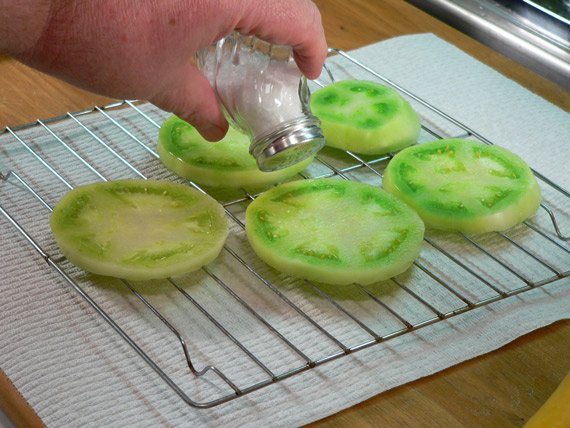
Sprinkle salt over all of the tomatoes. Don’t get carried away, but do sprinkle generously. The salt will help pull water out of the tomatoes which will aid in the frying process. Set aside for about 15 minutes.
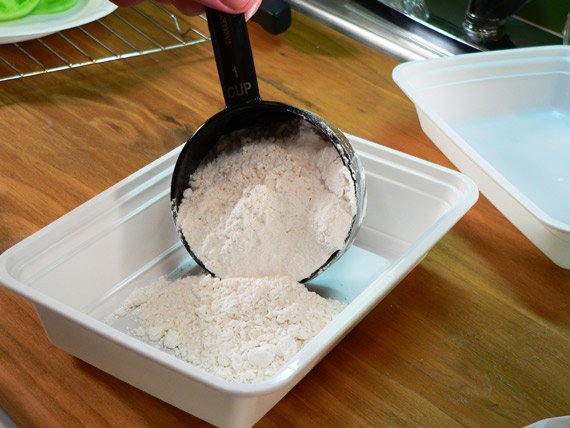
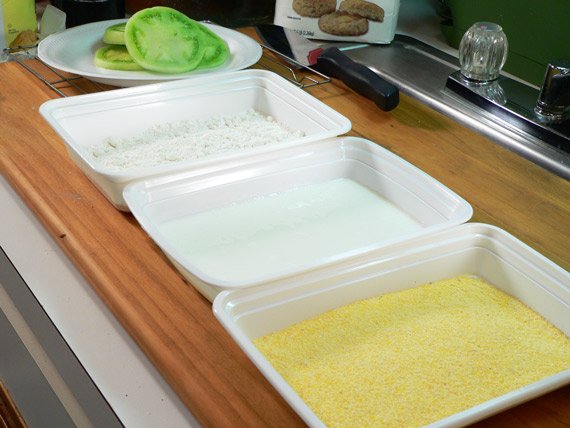
While you’re waiting on the tomatoes, go ahead and start setting up your station for the dredging process. You’ll need 3 containers for the following ingredients. I like to use these leftover trays from my Chinese Food takeouts. They’re plastic, have clear tops, and I just can’t seem to throw them away. Turns out, they work great for a quick and easy dredging station.
You’ll need about 1 cup of flour. I used self-rising but all-purpose will probably work just as well.

Pour 1 cup of buttermilk into another container.
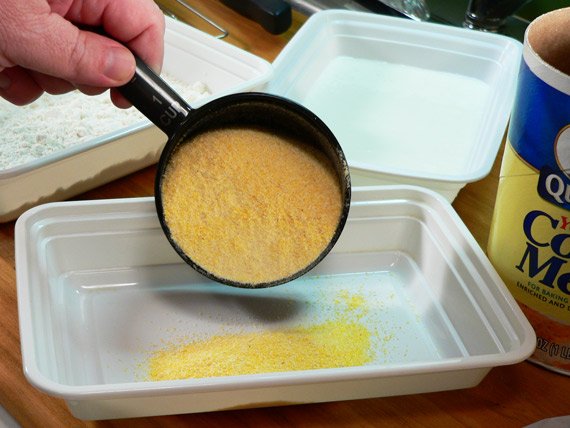
Then, pour 1 cup of Yellow Corn Meal into the third container. Spread it out evenly.

After 15 minutes, gently pat the tomatoes dry with a paper towel to remove excess water from the top.

The tomatoes will drip a lot of their moisture onto the paper towel. Adding the salt helped to pull moisture out of the tomatoes.
Line up your dredging station for an assembly line type production. We’re going to dip each slice into each portion of the dredge process, then place them back on the wire rack to rest a little more.

First though, let’s season them up for some added flavor. I prefer to season my tomatoes directly instead of adding it into the flour or cornmeal. I think it gives you better control on how much you’re using. Also, seasonings have a tendency to burn as the breading cooks, which could give it a somewhat off taste. I learned that from the Food Network so it must be true right? They certainly turned out great as far as I’m concerned.
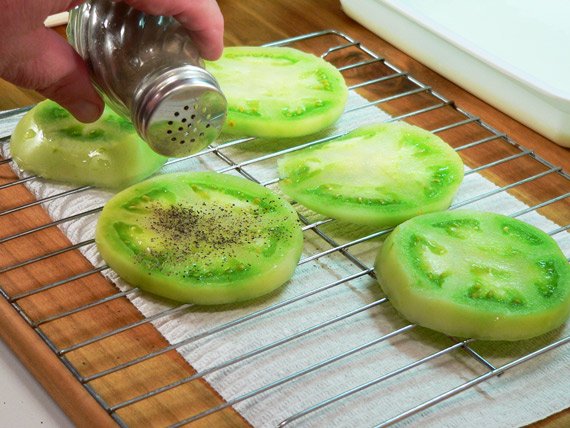
Lay the tomato slices out on the wire rack and sprinkle each slice with Black Pepper.

Next, sprinkle each slice with a little more salt. We wiped most of it off in the steps above so a little more now isn’t going to hurt unless you’re really watching your sodium intake. Remember, it’s all to the taste, based on what you and your family like. Adjust accordingly.
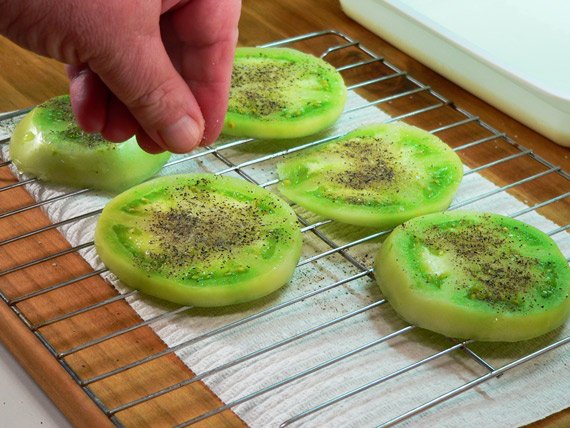
And for the best part….sprinkle each slice with a little sugar. Mama added a little sugar to just about everything she cooked so I come by it naturally I suppose.

We want to season them on both sides, so flip them over and repeat the whole process again. Salt, Sugar, Black Pepper. You can thank me later. (Smile)

Ready to start the dredge process? Place a slice in the flour. I’d suggest that you might want to sift the flour or perhaps do a better job than I’ve done here by using a fork to break up some of the lumps of flour. The lumps aren’t going to stick very well so err on the better side and break it up some.
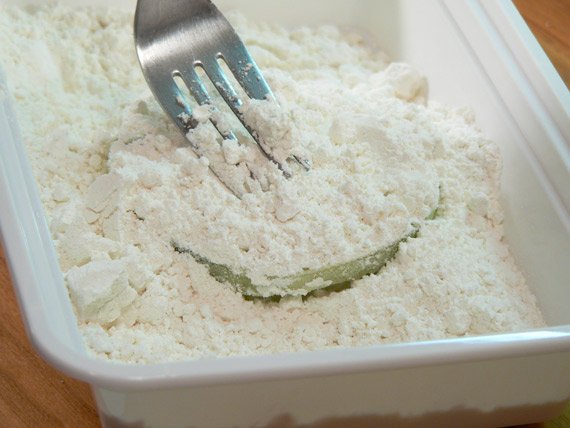
Using a fork, or your fingers, flip the tomato over and coat the backside. If using your fingers, remember to use one hand for dry ingredients and the other hand for wet ingredients. It will keep you from getting a paste buildup all over your hands. It works….if you don’t slip up and grab something with the opposite hand. Try it. The tomatoes are naturally moist so the water from them will help the flour to adhere to them.
Gently shake off any excess flour. Note that the flour will stick easily to the wet sides, but not so much to the outside skin of the tomato. That’s not a problem; we’ll get it in just a minute.
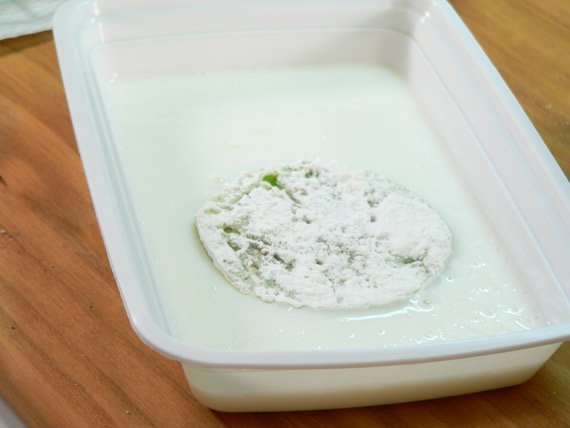
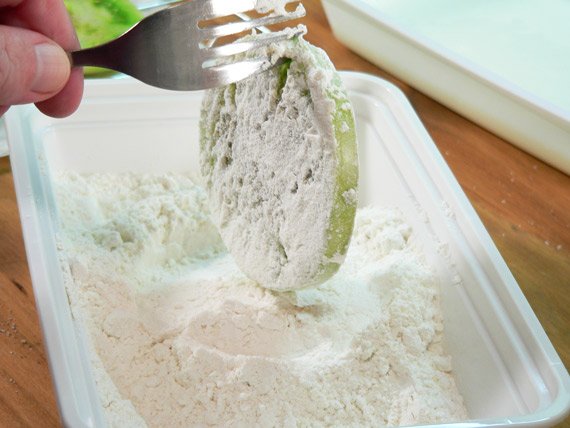
Lay the slice into the container of buttermilk.
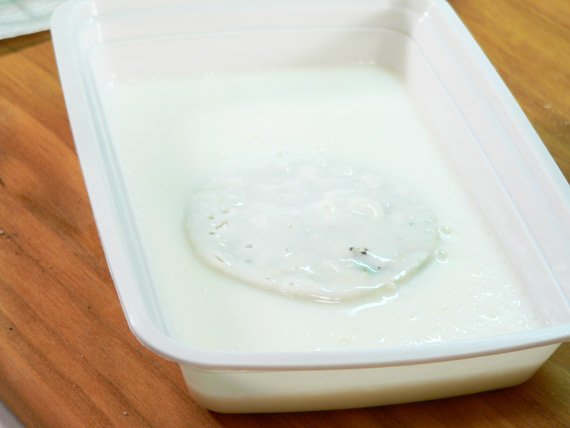
Using the properly designated hand…or your fork….flip the tomato slice over to coat the other side.

Gently shake off any excess buttermilk as you lift the slice up.
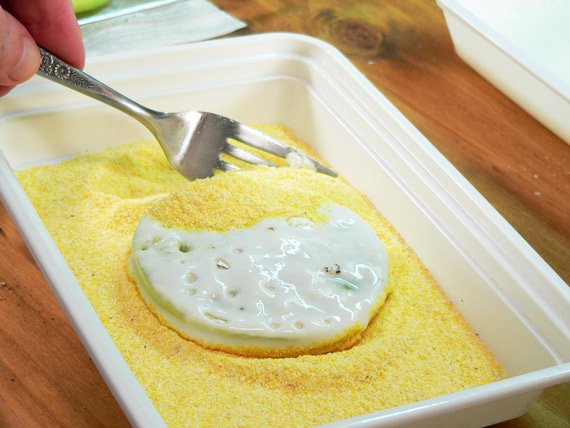
Lay the slice in the cornmeal. Use your fork to gently toss the cornmeal over the tomato. Coat it good all over.
Flip the slice over and do the same to the other side. Shake it gently as you lift it up and place it back on the wire rack.
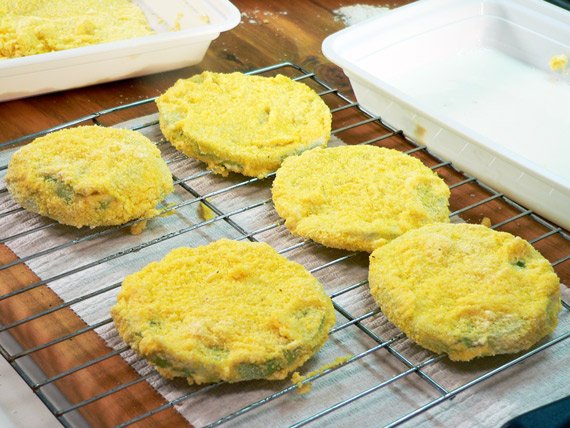
Dredge the other slices using the same steps until you have all the slices coated. You have to handle them gently so the coating doesn’t fall off but you can do that. Once you get them all on the wire rack, just let them sit for about 10 minutes longer. This will help keep the coating on even better.
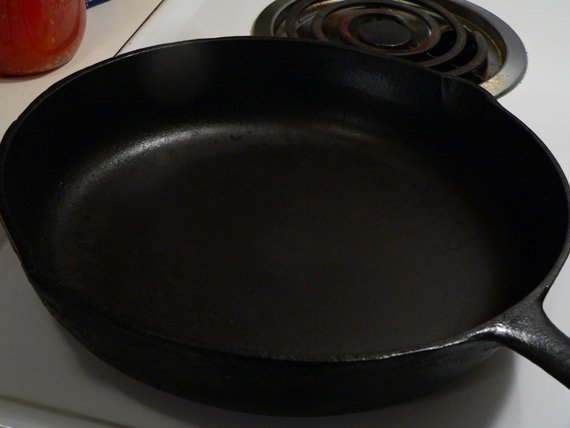
Now is the time to start warming up that cast iron skillet. I hope you have one, but if you don’t, a regular frying pan will work. This one belonged to my mama and I hadn’t used it until we started up this Taste of Southern website. It needs a little maintenance, but I can’t bring myself around to removing any of its history. If only it could talk.
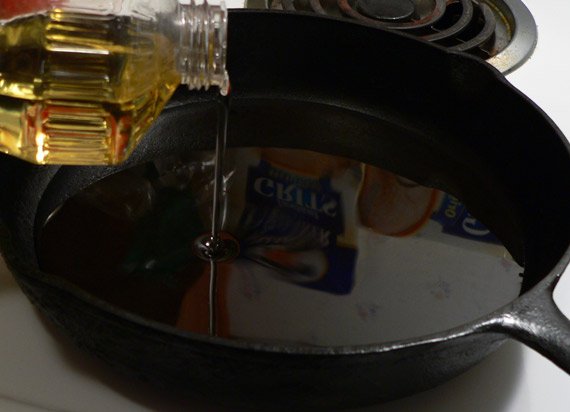
As the skillet begins to warm up, add in enough oil to fill the pan to a depth of about 1/2 inch or so. I’m using vegetable oil. I started out with a cold burner and turned it up to just about one notch above medium heat. As you begin to fry and cook, you learn what the best settings are for your particular stove. They will vary, one stove to the next, so learn what works best for you. Let the oil heat up with the pan.
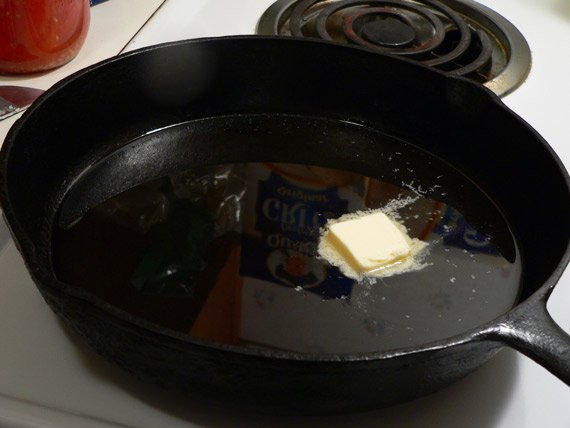
I also added about one tablespoon of Butter to the oil. This will not only give it some added flavor, it will also help add some color to the browning process.
From my experience in working at the seafood restaurant, new oil has to become a little used before it starts adding a pretty brown color to the food. Most seafood houses here in the south will “cut” their new shortenings with some of the old oil when changing out a fryer. If you’re a pretty busy restaurant, you have to change the oil frequently or it will start burning and giving a bad taste to your food. We would drain out all the old oil, clean out the bottom of the fryer, then refill it with a little of the old oil after running it through a filter. Then, we’d finish filling it up with new oil…or in our case at the restaurant…with genuine lard. Wait….I’m having flashbacks….let’s move on.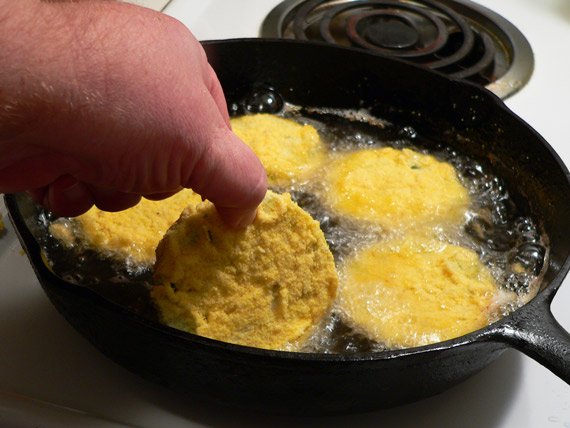
Once you’ve reached proper frying temperature, carefully place each slice into the hot oil. Don’t try to cook too many slices at one time. They need some breathing room and you’ll find it much easier to work with them if the pan isn’t overloaded. If the sides are touching, they will stick together, so give them some space.
TOS Tip: Here’s an old trick you might want to try to determine that you’ve reached proper temperature for frying. As the oil heats up, drop in just about 2 drops of water. When the oil starts to get hot enough, the water droplets will start “talking” to you by popping. When this happens, you’ve reached the point of frying ability. Some folks also sprinkle just a little of the cornmeal into the pan, if it sizzles and dances around a bit, you’re ready to start frying. Of course the best thing is a thermometer if you have one of those. Just don’t get it too hot or the breading will burn before the tomatoes start to cook enough.

Never leave your frying pan unattended. And, if you have little ones in the house, keep them away from the stove at this time. I know they are curious, but grease gets extremely hot and pops a lot. It hurts!!! Always use caution anytime you’re cooking and baking. This friendly public service announcement has been brought to you by Taste of Southern…home of great southern cooking.
Seriously though, watch the pan as close as possible at all times. Make sure the pan isn’t frying too fast and watch for the bottom edges of the tomatoes to begin turning brown. You want to turn them over before they burn, but not before they brown on the bottom side. I’ve got slight bubbles coming up around the slices as you can see, and the oil is up a little over half way of the thickness of each slice.
Once I notice the bottom edges beginning to brown, I use a fork to gently lift a slice up to keep an eye on the browning process. The pan will have its hot spots, usually around the center, so watch it carefully.

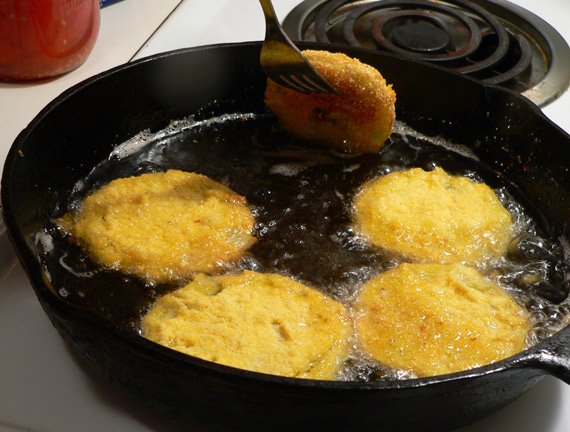
When you start to see a good brown color, gently flip each slice over. A fork seems to work great for this. A large spatula just doesn’t work for me and tongs could cause the breading to break and fall away. Just a gentle flip with the fork is all you need.
When your slices are golden brown on both sides, remove them from the pan and turn the heat off.
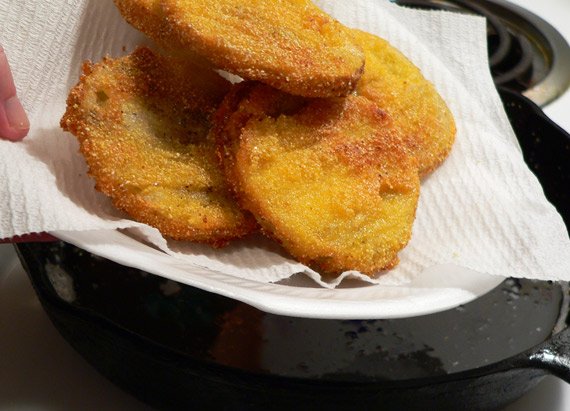
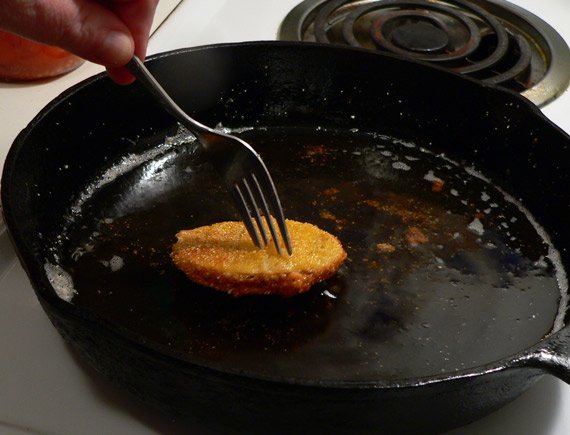
Place the slices on a couple of layers of paper towels and let them drain. Hey, don’t they look good?
Maybe I was hungry by the time I finished, I don’t know, but these were without a doubt the best Fried Green Tomatoes I’ve ever had. I couldn’t get this final picture fast enough before digging in to them.
If you’ve never had them, find yourself some green tomatoes and give this recipe a try. It’s really easy and doesn’t take long at all. One tomato will yield a good serving so figure accordingly based on whether it’s just an appetizer or a side dish for your meal. Then, rent the “Fried Green Tomatoes” movie and enjoy that again as well. Yep, I did just that myself a few days after I cooked these up.
Sauce: I didn’t do an EXACT recipe for the sauce in the picture. I just wanted a little something to dip them in and whipped up something real fast. It’s basically a couple of Tablespoons of Duke’s Mayonnaise®, along with a few drops of Texas Pete Hot Sauce® and you’ll need a little relish of some sort.
I used one of mama’s “secret ingredients” which I really wish you could find in your local store, but it’s not available….yet. I used “Granny Gordon’s Pickles.” If I could, I’d take mama’s pickle recipe to market. Who knows, we may be able to do so one day. Mama’s sweet pickles were the BEST and she used the juice from them in a lot of her dishes. I’ve made her pickles for the past couple of years and hope to add the recipe to our Taste of Southern site this year. It takes about 3 weeks to make them but I happen to love them. For this sauce, I just chopped up about one of the pickles and added about a teaspoon of the pickle juice to make my pink sauce.
If you have some sweet pickles, you can do the same or perhaps you have some pickle relish. Experiment with what you have and let us know how it turns out. Next time, I may try some sort of buttermilk ranch style dressing. Either way….it want be long before I fry up another batch of these. They were awesome, even if I must say so myself. And, I just said it!
Enjoy!!!