Follow these easy, step-by-step, photo illustrated instructions for making and canning your very own Bread and Butter Pickles. You’ll never buy pickles again, once you’ve made your own. See just how quick and easy it is to make these delicious pickles right in your own kitchen. This recipe can be completed in one day. Printable recipe included.

Award Winning Bread and Butter Pickles Recipe: 2013 First Place Winner at the North Carolina State Fair.
Growing up Gordon, we always had sweet pickles on hand. Mama would make a big batch of them each year, enough to last us through the cold Winter months, and back into Spring when fresh cucumbers would become available again. We just always had pickles on hand.
Mama was well known for her pickles. She used the juice from them in all kinds of dishes she would make. From Potato Salad to Chicken Salad, Deviled Eggs to Cole Slaw, a little pickle juice and some chopped up pickles, always found their way into each and every one.
Mama would always call on me to figure out the ratio of sugar she would need for the number of pounds of cucumbers she was planning to use. I always figured she could have done it herself, but I always felt like I was doing some major part in “deciphering out” just what was needed. I would check, then double-check, all my figures to be sure I was getting it right. Then, Mama would write it down until she was ready to start adding the sugar.
Having said that, these are NOT my mother’s pickles. Mama never made Bread and Butter Pickles at our house that I can recall. I don’t have any memories of her making these, dill, or any other kind, except her special sweet pickles.
Mama’s pickles took weeks to prepare, and several months before they reached their prime flavor. The work was certainly worth the finished product as far as I was concerned.
On the other hand, Bread and Butter Pickles can be made in just a day or so, and come to good flavor within a week or two.
Pickles are the reason I got into canning in the first place. I can almost remember the day that I knew I was removing the final couple of pickles from that last jar that Mama had made. After suffering from several strokes, she was now in a nursing home, and her canning days, and pickle making days were over. She just wasn’t able to take care of herself any longer, and certainly wasn’t able to do any more canning and preserving.
Mama spent four years in that nursing home. I could write an entire book on that segment of life.
For many years, I thought about trying to make some of her pickles, but I’d never get around to it. The notebook with her handwritten recipe for making her pickles, along with the directions for how much sugar to add to how many pounds of pickles, was now somewhere at my sisters house. Years passed, then my sister passed away. No one seems to know where that little notebook went, and I’ve not seen it since the last time Mama asked me to decipher out the amount of sugar she would need, as we sat around her kitchen table.
If there is one handwritten recipe I’d really like to have in my possession… it would be that one.
Finally, one year I pulled out the copy of how Mama made her pickles, and finally made some of my own. They turned out great, and I was really proud of myself for finally making them. I made them again the following year, and ended up having to throw a big batch away when something went wrong and the pickles messed up.
I’ve been playing, tinkering, and toying with that recipe for years. I have good results some times, and bad results another. I don’t recall that Mama ever had to throw any of hers away. I’m still trying to figure out what goes wrong some times.
Back in 2012, I made a batch of Mama’s Sweet Pickles, and then I made these Bread and Butter Pickles. I entered a jar of each in our North Carolina State Fair. Both, won First Place, but I was more excited about Mama’s recipe winning than I was the Bread and Butter.
Mama never entered anything into our local fair. I don’t know why, she loved to cook and you just didn’t visit our house without her insisting that you have a “bite to eat.”
I think she would be happy just to know that I was making her pickles, and that I was trying to keep some of the old traditions alive. Trying to preserve some of the things she taught me.
I’ve often wished that I could take her recipe for pickles to market. They just take so long to make, I doubt it would ever be something that could be made and made profitable. Perhaps one day, when I get comfortable enough with making them myself, I’ll post the recipe here on Taste of Southern.
In the meantime, I do hope you’ll give these Bread and Butter Pickles a try. They’re much easier to make, and you’ll be happy with the final results once you’ve made them.
The photo’s and steps below are the actual photos that I took while making the batch that I entered into the State Fair. I didn’t get the recipe posted online that year, but it did get posted on the Our State Magazine website. Now, I’m happy to be able to share it with you here on Taste of Southern.
I was told by the folks at the North Carolina State Fair, that they had 22 entries just in the Bread and Butter Pickle category alone. I’m not sure why they picked mine as the First Place Winner, but I’m glad they did.
So, if you’re ready to make some pickles of your own, get out the canning equipment, get in the kitchen, and… Let’s Get Cooking!
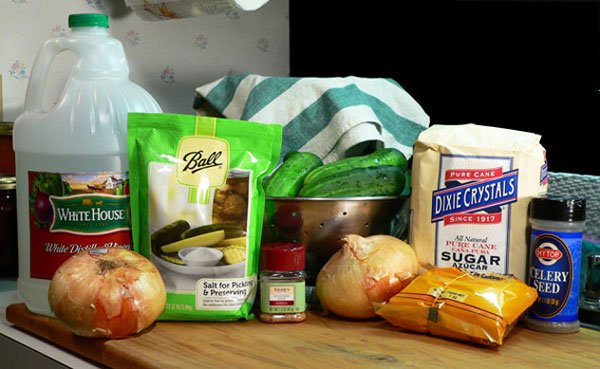
Bread and Butter Pickles Recipe: You’ll need these ingredients.
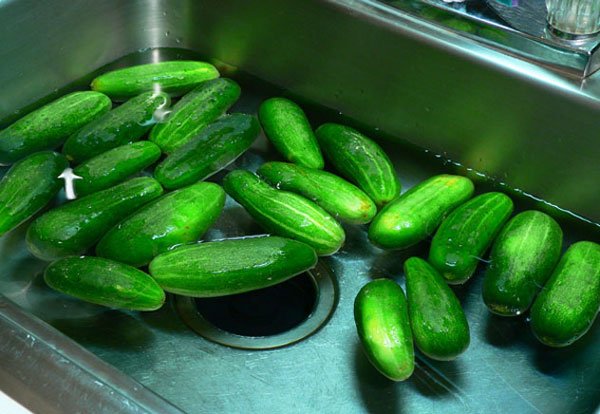
Place the cucumbers in a sink filled with cold water. Gently rub each cucumber by hand to remove any dirt or other particles that might be attached. DO NOT use a vegetable brush to scrub the cucumbers. Drain off the dirty water when finished.
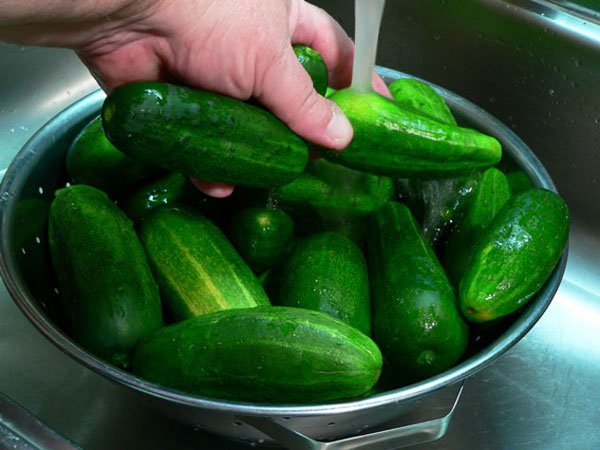
Gently rinse the cucumbers again, under cool running water. Place in a colander and let drain.
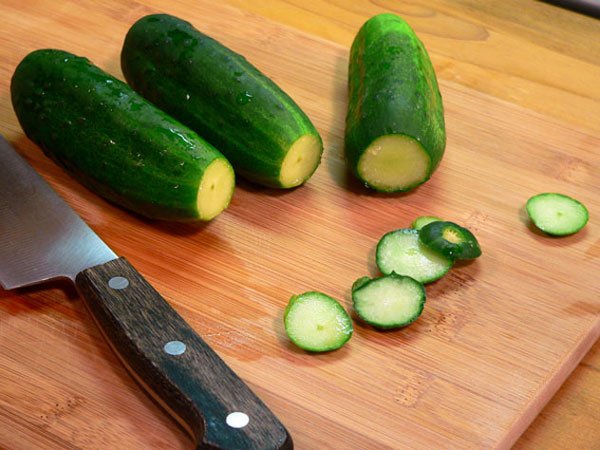
Cut about 1/4 inch off of each end of the cucumbers. Discard the end pieces.
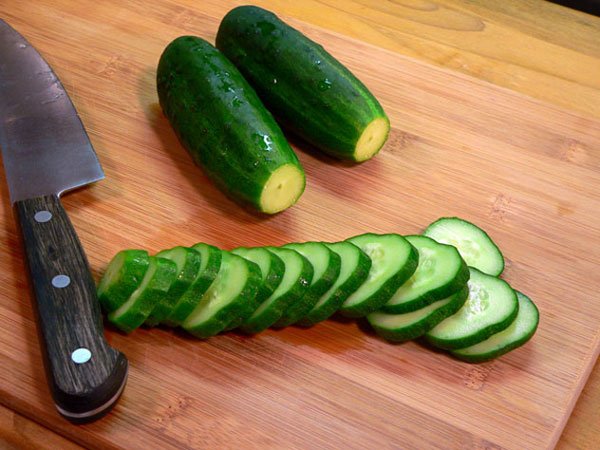
Slice each cucumber into 1/4 inch or thicker slices. If you slice them really thin, they will shrivel and be much softer when finished. Slice them a bit thicker and they’ll tend to be a little crispier.
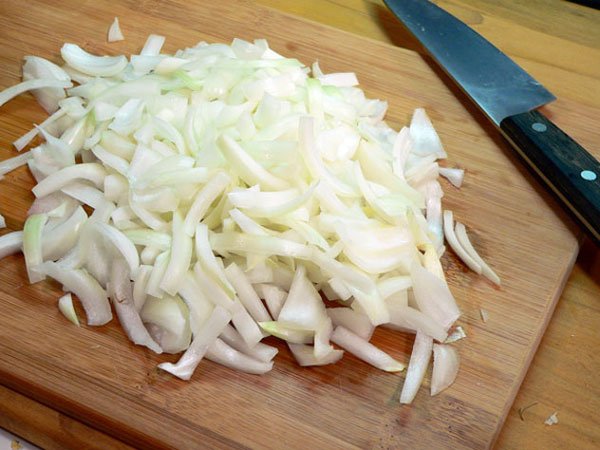
Next, slice up the onions. Just looking at this picture makes my eyes water… how about you?
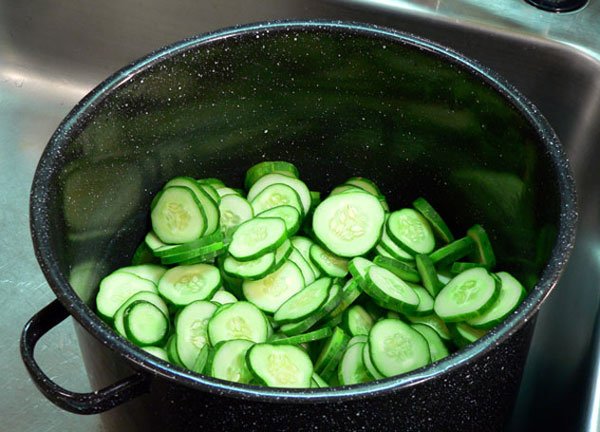
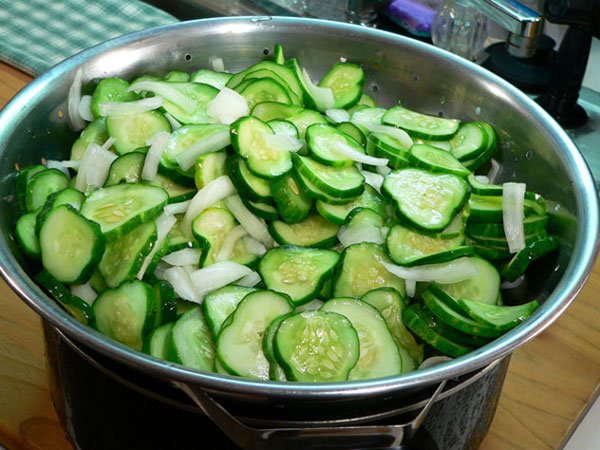
Place the sliced cucumbers in a large pot. I use my enameled canning pot for this part. Just don’t use Aluminum. Stainless Steel or Teflon coated will work well.
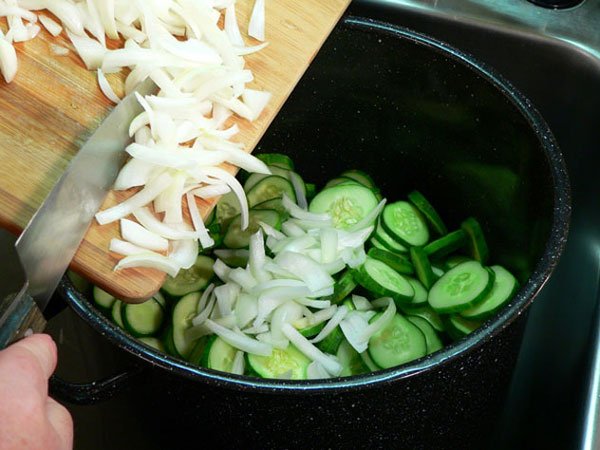
Add the sliced onions on top of the cucumbers.
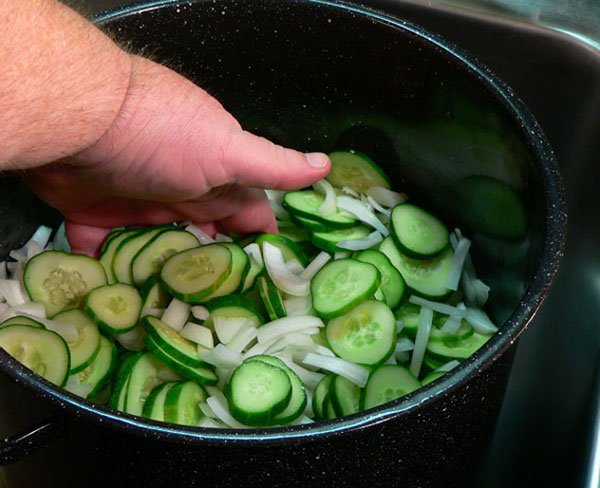
Gently stir the cucumber and onion slices together with your hand.
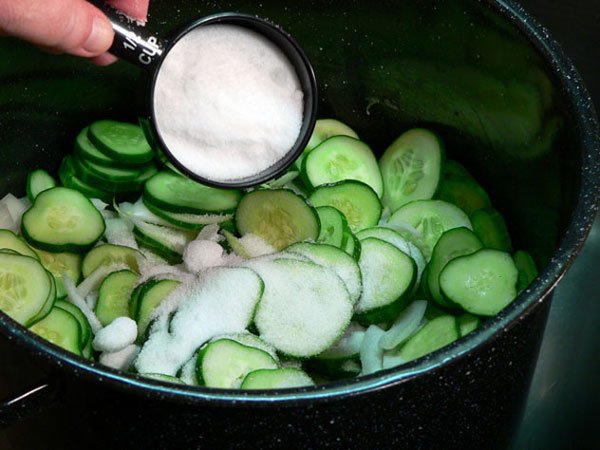
Sprinkle the top with the Canning and Pickling Salt. You can find it in most of the larger big box stores or in many grocery stores. You just don’t want to use regular table salt to make your pickles.
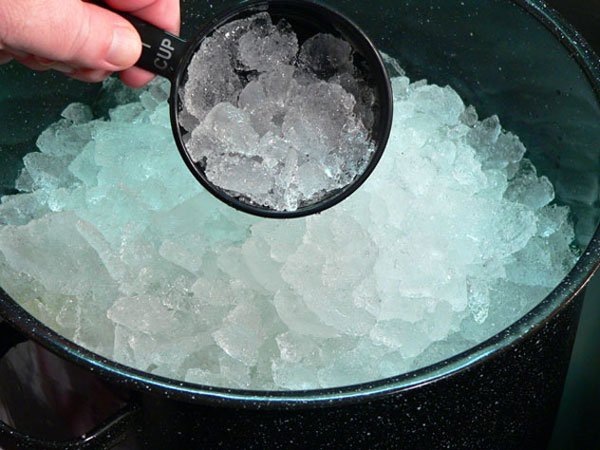
Cover the top with about two inches of crushed ice or cubed ice. If possible, place this pot in your refrigerator for 3-4 hours or even overnight. If you don’t have room in the refrigerator for it, just keep adding more ice as it melts. It’s very important to keep the cucumbers and onions cold.
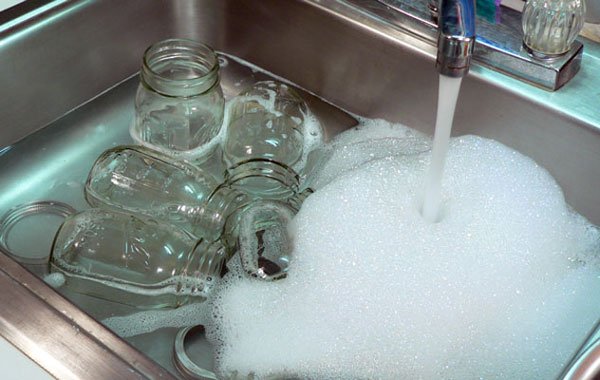
While the cucumbers and onions are doing there thing under the ice, go ahead and wash your jars and bands, and start setting everything up to do the actual canning process. You’ll need to wash the jars in hot soapy water and rinse them well. Be sure to check the jars for any nicks, especially around the top edge. Discard any that are chipped or broken. Chipped edges on the jars could affect the proper seal of the jar. You’ll want to wash and rinse the jars, and the bands, just before you’re ready to start the canning process. Jar lids MUST be NEW and do not need to be washed.
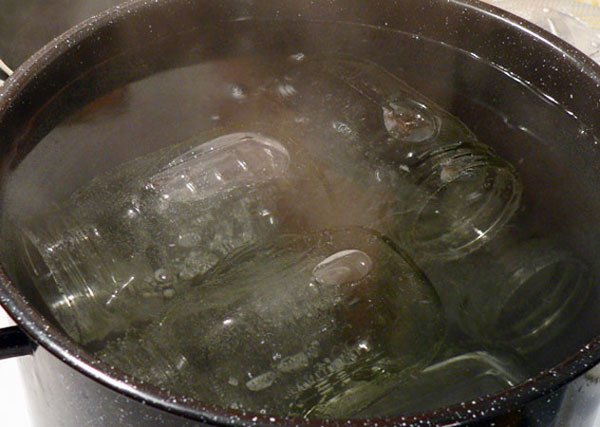
Once the jars have been washed and rinsed, you’ll need to sterilize them. Many of the newer dishwashers have a sanitize cycle that will work for this. I always place mine in my canning pot to do it. Fill the pot almost full and place the jars inside. Many directions recommend that you place a clean kitchen towel in the bottom so the jars aren’t resting on the very bottom of the pot during this process. Bring the pot with the jars up to a rolling boil and let the jars remain at this temperature for 10-15 minutes.
With the jars starting to boil, take the cucumbers and onions mixture out of the refrigerator and drain off the salt water.
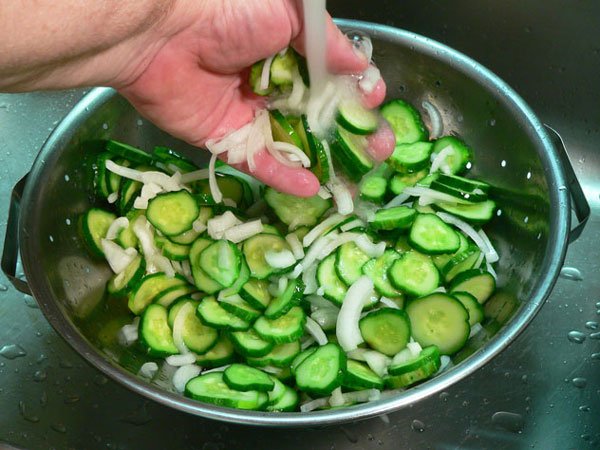
I place mine in a colander and then gently rinse them under cool running water. The cucumbers will have absorbed a good amount of the salt and will taste salty when finished if you don’t rinse them well. Salty tasting Bread and Butter Pickles aren’t good. Trust me on this one. Rinse them gently and then just let them sit and drain while we prepare the spice mixture next.
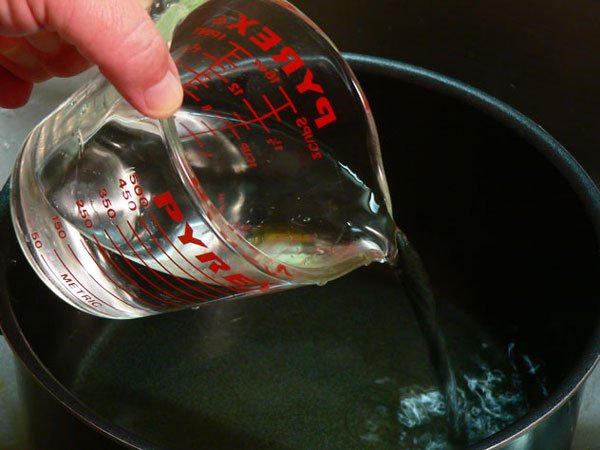
In a large sauce pot, add the Vinegar.
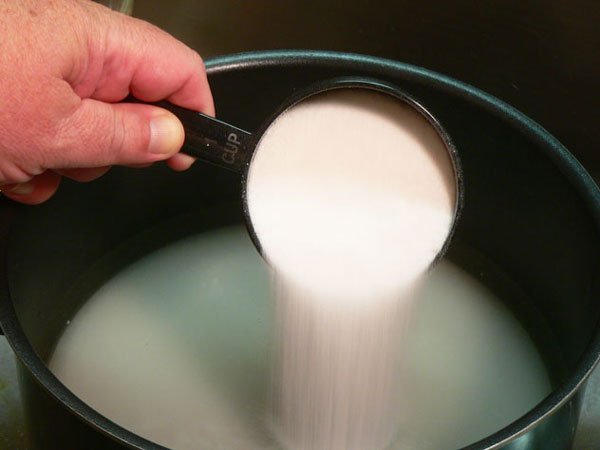
Add the Sugar.
Add the Sugar.
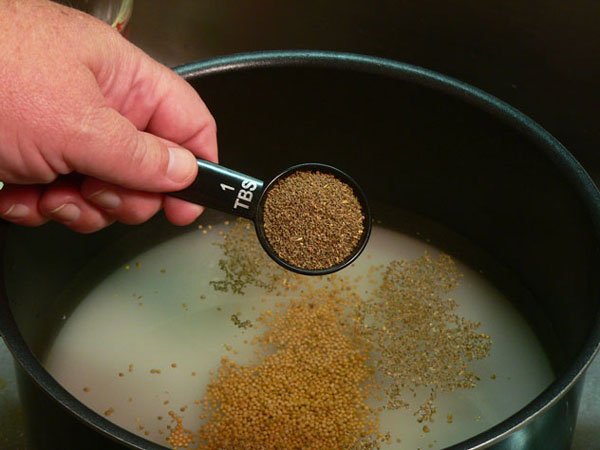
Add the Celery Seed.
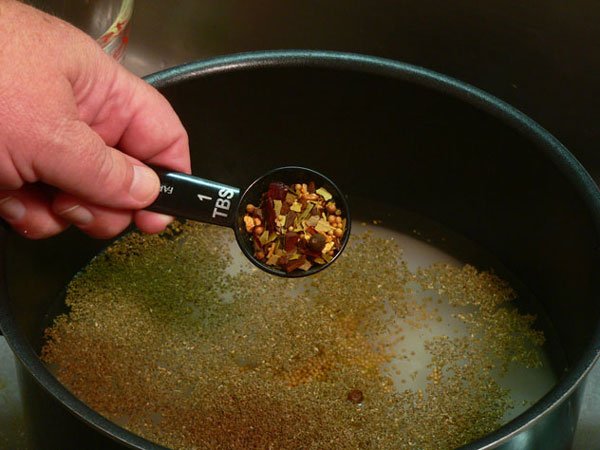
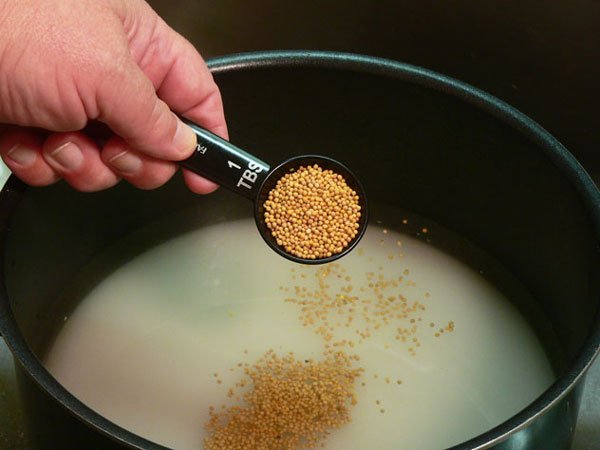
Add the Pickling Spice. Many recipes don’t call for adding Pickling Spice but I personally like the flavor and think it really adds a little something extra to the finished pickles. You’ll find lots of different recipes for making these pickles if you really start looking for them.
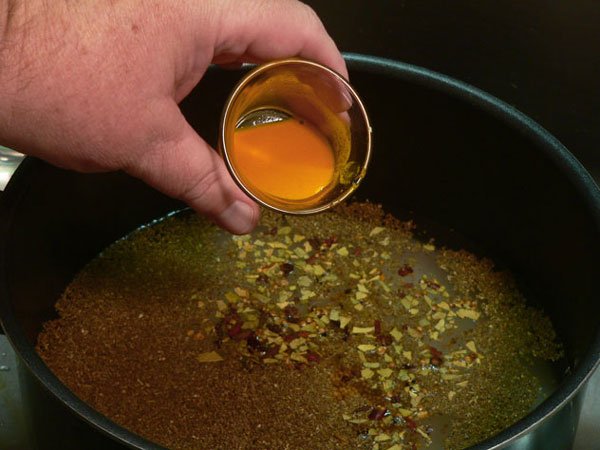
Add the Turmeric.
You’ll also find recipes that call for various amounts of Turmeric. It is a great spice with lots of health benefits for you. It also has a very strong color that can stain anything it comes in contact with so be careful with it. I find that using a smaller amount is best for me. It doesn’t change the color of the completed pickle as much as adding a lot more of it will do. Here, I’ve added just a bit of water to my Turmeric to be sure it will dissolve OK and then add into the mixture.
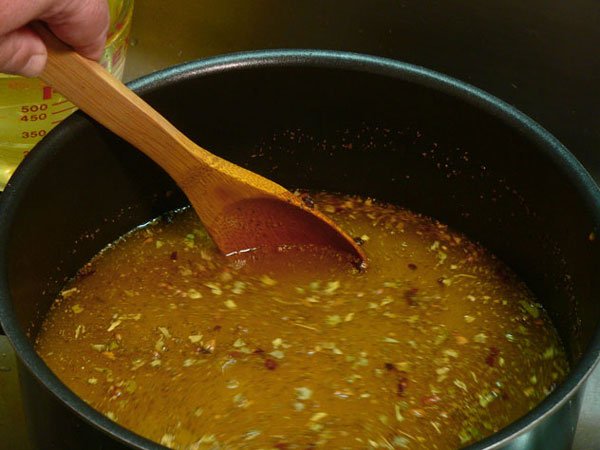
Stir the sugar and spices well. Place over Medium-High heat on your stove top and bring this mixture to a light rolling boil. You’ll need to stir it as it starts warming up to make certain the sugar has fully dissolved. Don’t let the sugar just sit in the bottom of the pot during this process, keep it moving so it doesn’t scorch or burn.
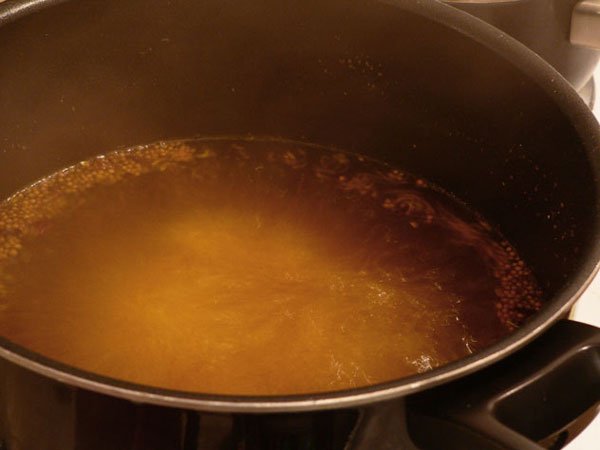
Once it begins to boil, let it boil for 10 minutes.

After 10 minutes, carefully add the cucumber and onions.
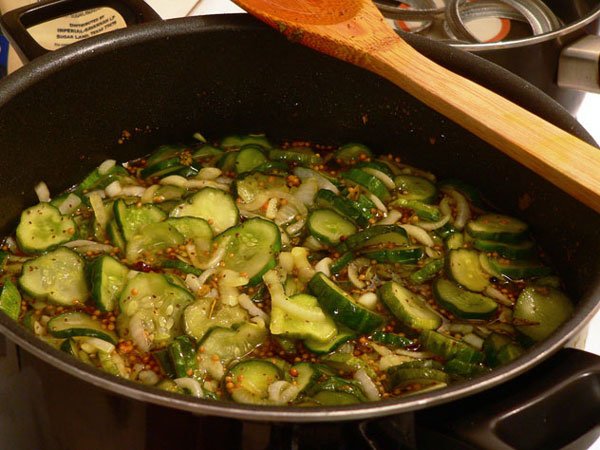
Stir the pot often and let the mixture come back up to just the point of reaching a slight rolling boil. Once it begins to boil, time it, and let it boil for ONE minute. When the minute is up, remove the sauce pot from the heat and get ready to jar it up.
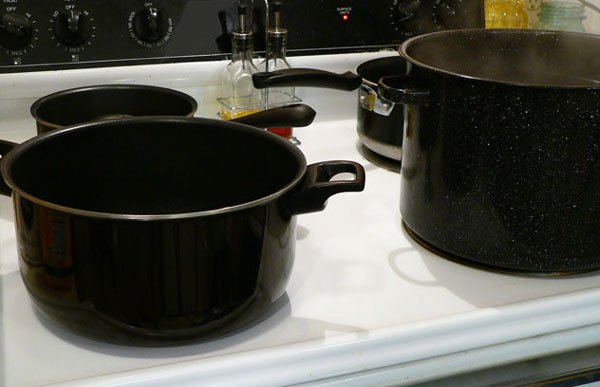
This is my stove top setup for canning. I think one of the biggest things that discourages folks from doing more canning and preserving, is not being organized when you need to be. Everything starts happening all at one time, and you need to be ready for each step of the process. A little advance planning, along with a little added experience, will make the process a whole lot easier.
I use four pots. The pot on the front left is usually the food item I’m working with. The big pot on the front right is my canning pot. I keep a small pot on the back left burner that holds my lids and bands. The larger pot on the back right burner is just more water that I keep heated during the process.
The jars are in the big canning pot at this point, getting sterilized. I’ll take them out once I remove the pot of heated cucumbers from the stove.

Jar lids and bands are placed on the back left burner. This pot is kept on the lowest heat setting on my stove top. The lids need to just warm up enough to soften the red rubber part of the lid so it will seal better. You do NOT want this pot to boil at any point. When I start bringing the empty jars up to boil, I place the lids and bands on the stove on this lowest heat setting. They’re usually just right by the time I need them.
After the jars have boiled for 10-15 minutes, a lot of water has evaporated from the pot. By keeping the pot of water on the burner behind it, I have hot water ready to add back into the pot once the filled jars are ready to go back into the canning pot. That way, I don’t have to wait another 20 minutes for the canning pot to get back up to boiling.
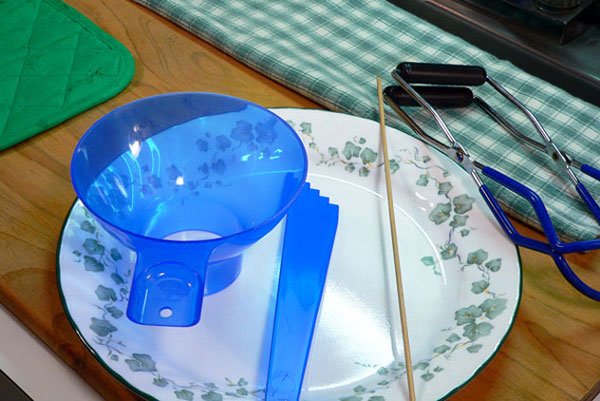
On my counter, I place the utensils I’ll need to actually fill the jars. I lay out a cloth at the back to place the sterilized jars on once I pull them from the boiling water. I have a hot pad for the pot when it comes off the stove. I also use a plate to place my jars in while I fill them. It just makes cleanup easier for me.
All the blue items come in a “kit” you can purchase. The kit has the funnel for adding food items to the jars. The long blue tool is notched on the end to measure for proper “head space” in each jar, and the other end can be used to remove air bubbles. The tool on the right is a jar lifter, used for placing hot jars back in the canning pot and removing them once they have gone through the water bath process. I prefer to use a wooden skewer to remove air bubbles from my jars so that’s why it’s there. The kit also contained a long plastic wand with a magnet on the end. This is not pictured but it’s used to lift the lids and bands from the pot of warm water when needed.
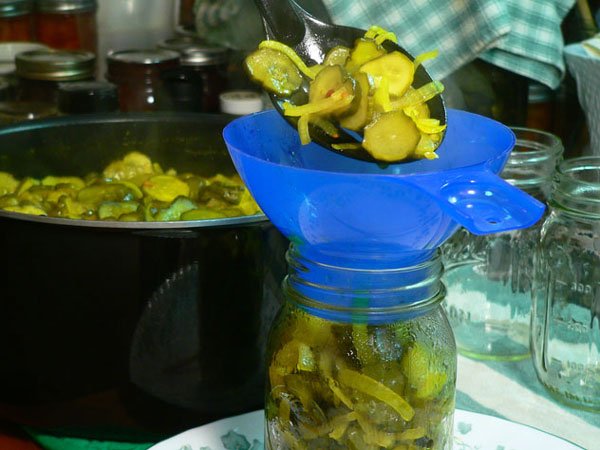
OK, everything is starting to happen at one time now. I pulled the cucumbers from the stove top and set the pot on the pad. I used the jar lifter and pulled the sterilized jars out of the canning pot. One jar is placed on the plate right next to the pot of cucumbers and I’ve inserted the funnel into the jar opening. I use a slotted spoon to fill the jars first, filling it all the way to the top of the jar with the heated cucumbers and onions. Then, I use a ladle to fill the jar with liquid from the pot. Everything is good and hot so be careful. Kids should be allowed to watch from a safe distance.
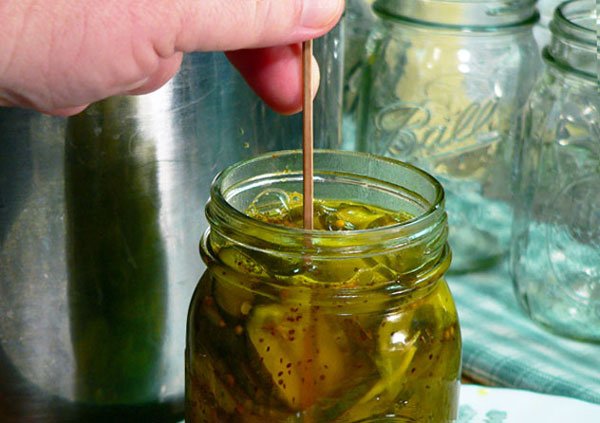
Once the jars are filled, take the wooden skewer, or a butter knife, and run it around the inside edges of the jar. This will allow any air bubbles in the bottom of the jar to slide up the skewer to the top where they will burst and be released. You’ll probably not get them all, but you need to get out as many as possible.
This jar is NOT filled to the proper head space for making pickles. I was busy taking pictures, but did realize before adding the lid, that I needed to add some more liquid to the jar. Head space is the amount of space from the top of the food product or liquid, up to the top of the jar itself. Various recipes will call for varying amounts of head space depending on what you’re making. Always check the recipe and fill the jars accordingly. Bread and Butter pickles need 1/4 inch of head space for a proper filled jar.
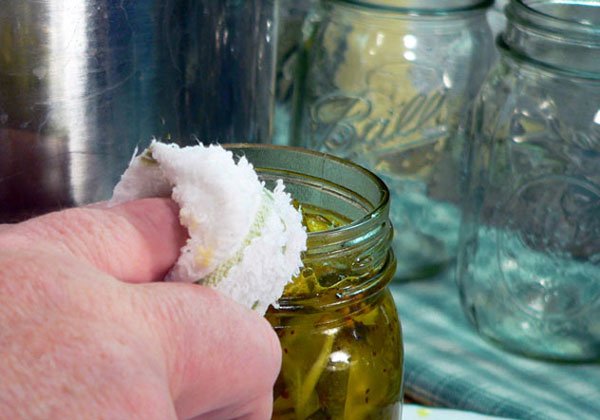
When the jar is filled correctly, gently wipe the very top and all around the thread portions of the jar with a clean, damp cloth. You don’t want any liquid or food particles on the top surface as it may prevent the seal on the lid from sealing properly. Any food particles, or syrup, around the outside threads could cause the band to stick and be difficult to remove later. Just wipe it carefully and clean it well.
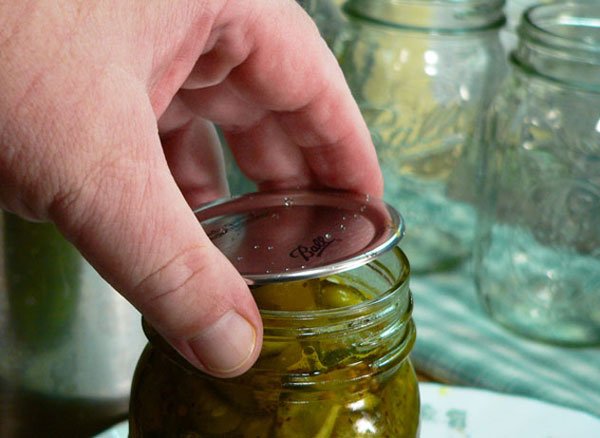
Remove one lid from the warm water and center it over the top of the filled jar. It was at about this point that I realized I hadn’t checked the proper head space. I carefully added a little more liquid and filled it to the proper point before finally placing the lid on the jar. If you ever plan to enter any of your canning projects into competition, head space is one of the first things checked when the judges open the jars.
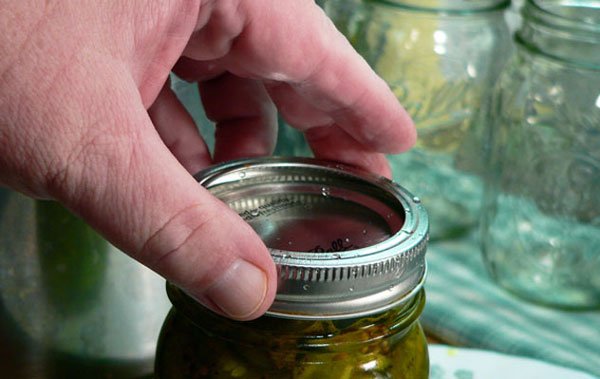
Next, place one of the jar bands over the lid. Make sure the band is seated properly before you begin to snug it down and tighten it. All canning recipes will call for the jar band to be tightened “finger tight.” That means you just snug it down without trying to force a bunch of pressure into tightening up the band. If it’s too tight, it will keep the air inside from escaping and could cause an improper seal.
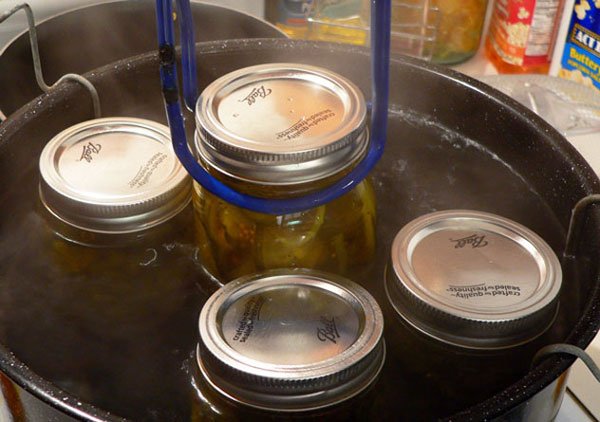
When the jars are filled, and closed with the lids and bands, it’s time to place them in the canning pot. I use the regular enameled canning pot that has been used for years. Other large pots will work though, and you should seek out more information before attempting to use something different. The enameled canning pots come with a wire metal rack for holding the jars, or for at least trying to. They can really be aggravating at all the wrong times, trust me on that one as well. Use the jar lifter to place the jars in their sections in the wire rack.
The handle of the wire rack has a bend in it. This bend is placed on the outer rim of the canning pot and keeps the jars up high in the water until all the jars have been loaded in the rack. This particular rack will hold up to seven pint size jars. If you don’t have enough jars to fill the rack, try to spread them out and balance out the load. When the rack is loaded, carefully lift up on the handles and lower the rack into the hot water below. The jars may try to slip and move around as you do this. Quickly straighten them back up before folding the handles down on top of the jars.
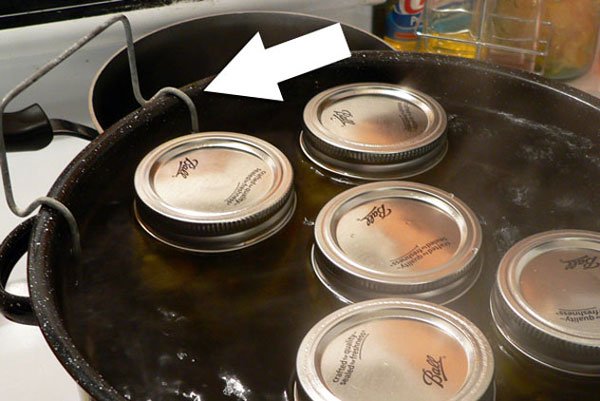
Once the jars are lowered into the canning pot, they should be covered with an inch or two of water. Again, consult the recipe you are using for the proper amount. I’ve just used the same water that was in the pot from sterilizing the jars. They’re filled and closed so it will not matter. I’ve also used that extra pot of water on the back burner to make sure I have enough water over the tops of the jars.
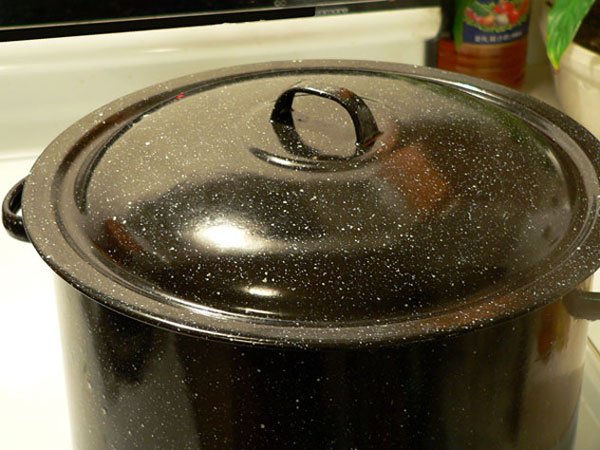
Let the jars come back up to a rolling boil and then start timing them. You will want to let the Bread and Butter Pickles stay in this rolling boil “water bath” for TEN MINUTES. Time doesn’t start until the water is boiling again over the submerged jars. When it starts to boil, cover the pot and start timing the process.
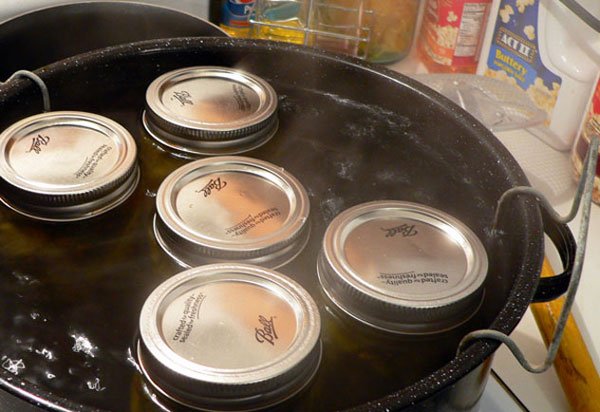
After 10 minutes, remove the lid from the canning pot. I use two tongs to grasp the handles and lift the rack back up to that first notch on the handles. Be sure to watch for steam when you go to remove the lid, it can burn you bad. Raise the jars back up and place the handle notch back on the rim of the canning pot. The jars need to just sit here and rest for about five minutes before you start removing them from the canning pot.
You may start to hear that lovely sounding “Ping” as the jars start to seal. I think that’s the most fun part of the whole process and get a kick out of counting how many I hear. Sometimes they will seal much faster than others. Sometimes, you will not even hear that familiar ping but that doesn’t mean the jar hasn’t sealed. You’ll have to wait 24 hours to be sure it did though.
After five minutes, use the jar lifter again, and carefully remove the jars from the canning pot. The hot jars should be placed on a folded towel in a draft free location for 24 hours. You MUST resist the urge to press on the top center of the jar to see if it sealed for this amount of time. You may be able to look closely at the jars and see if the center portion is up or down but DO NOT press on it.

After the jars have sat for 24 hours, check the tops to make sure each one has sealed. Any jar that hasn’t sealed is still good and should just be placed in the refrigerator and consumed first. If by chance you had a large number of jars that didn’t seal, you can reprocess the jars again but you’ll need NEW lids. Bands can be used over and over but new lids are needed each time you can anything.
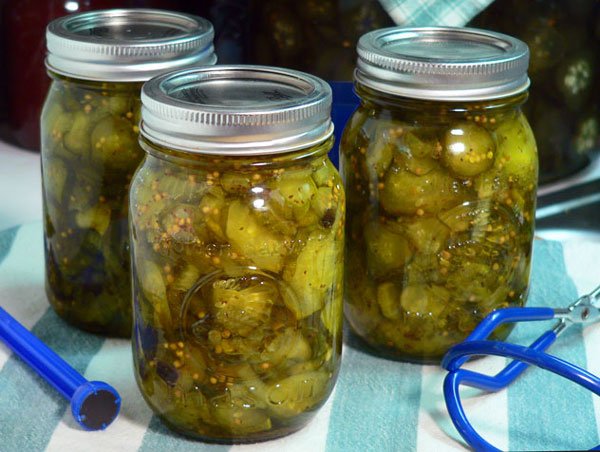
The completed pickles really need about 4-5 weeks to develop their best flavor. I know it’s hard to resist them for such a long time, but you’ll be rewarded with the best taste if you can hang on for that long.
It’s best to remove the bands from the jars before storing them. That way, if a jar loses it’s seal after a period of time, you’ll notice it more quickly. Properly sealed jars will continue to hold the seal without the band.
Bread and Butter Pickles should be stored in a cool, dark, dry location in a single layer. Do not stack jars or anything else on top of them. Properly processed and sealed pickles will easily keep stored for a year or longer.
Enjoy!


