Follow our easy, step-by-step, recipe to learn how to make a delicious Homemade Apple Pie just like Mama made.
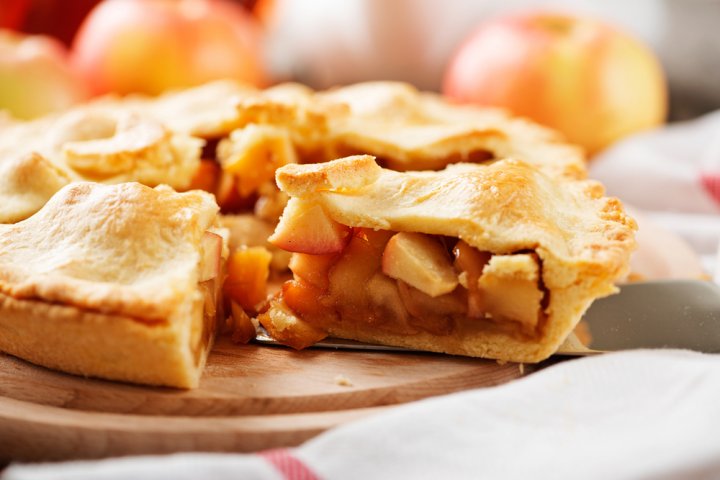
Mama may not have ever set her Apple Pies on a window sill to cool, but she did make a great pie. Homemade pie crust and all.
Mama’s Apple Pie. That’s about as Southern and as American as one can get. Smile. We do love our Apple Pies.
We’ve just had our first nights of temperatures dropping into the mid-fifties here in the heart of North Carolina this past week. Our Regional Fair is over, and the North Carolina State Fair is just a few weeks away. Fall itself is right around the corner. That means it’s time for some good old homemade Apple Pie.
Mama probably made Apple Pie mostly around Thanksgiving and Christmas. Most of the family loved Chocolate Pie or her Coconut Pies the best, so she cooked those more often. Still, she made a mean Apple Pie when she did bake them.
I have vivid memories of her rolling out pie dough on top of our kitchen table. She didn’t seem to fuss with everything having to be really cold, but her pies turned out awesome if you ask me.
Daddy had a produce stand out in the front of the house, next to the road, and he sold a lot of apples and other produce items from it. Once those North Carolina mountain apples started being picked, some fellow would show up with a truck loaded down with bushels of freshly picked apples. Daddy would buy several bushels and several different varieties of apples to resell in his produce stand.
Of course, that meant we almost always enjoyed a fresh homemade Apple Pie with some of them.
I would like to encourage you to make your own pie dough for the bottom and top crusts. It’s much easier than you might think and it makes the best pies you’ll ever sink your teeth into.
We don’t use a lot of sugar or spices in this recipe. That way, you get to enjoy the taste of the apples when you bite into it. Besides, you’re probably going to add a scoop of ice cream on top and that will make it even sweeter. Smile.
Ready to bake up an All American favorite? Alright then, let’s head on out to the kitchen, and… Let’s Get Cooking.
Homemade Apple Pie Recipe – You’ll need these ingredients.
I’ve made two pie crusts using my Basic Pie Crust recipe posted here on Taste of Southern. These need to be made at least a day in advance, so it’s just one thing less to do when you go to assemble your pie. Smile.
Remove the dough from the refrigerator when you start working on the recipe so the dough will be easier to work with. Or, if you prefer, you can always use the ready-made pie crust dough sheets that are now available at most grocery stores.
Begin by adding the Flour, Brown Sugar, and Granulated Sugar to a large mixing bowl.
Add the Cinnamon.
Add the Nutmeg.
Some folks don’t like the taste of nutmeg. You could leave it out if you prefer.
Add a dash of Salt.
Grab a whisk or fork, and mix all the dry ingredients together. Set this aside for now.
Rinse the apples under cold running water.
Granny Smith Apples hold up the best for baking pies. I’m using those plus one Golden Delicious Apple. The yellow apple will offset some of the tartness from the Granny Smiths.
Peel the apples.
I use to enjoy watching my Daddy peel an apple. He used his pocket knife, and could almost always get all the peeling off in one long length. I’m not that good, but I still like to try. Once peeled, I placed my apples in a bowl filled with cold water to help keep them from browning.
Slice the apples into small wedges and remove the center core. I did this all by hand and tried to slice them into even slices so they would bake better. No need to obsess over it though.
I placed the slices back in the water as I went along until I got them all sliced up.
Once I had them sliced, I poured all the slices into a colander to drain off the excess water. I’ll let these drain while I roll out my pie dough.
Butter the inside bottom and edges of your pie plate.
Next, I rolled out the pie dough to make the bottom crust for my pie.
I don’t know who came up with the idea of rolling dough out between layers of waxed paper, but it sure does work well. Makes it pretty easy to roll out the dough and to move it without tearing it – if you remember to still use a little flour on your surface.
Place the dough in your pie plate and adjust it as needed. Center the dough as best you can, then lift up the edges to help press the dough down the inside edge of the pie plate so you don’t have air bubbles under the corner edge.
I also like to sprinkle the crust with a little bit of flour and sugar to help hold in the juice from the apples.
Place the drained apples in the bowl with the sugar mixture. Give it a good stir to fully coat all the apple pieces.
Don’t be afraid to taste one of the slices. You might prefer a bit more sugar in your pies. Adjust it accordingly to make the recipe your own. Smile.
Place the apples in the pie plate. Make sure you get apples out to the edges and pile it up fairly high in the center. The apples will cook down as the pie bakes in the oven. I’ve set the pie plate on a baking sheet to catch any spills that might occur while the pie is baking.
Place the top crust over the apples. Center it as best you can. Use any extra dough hanging over the sides to patch any places that cracked or you might not have fully covered.
Trim off the excess dough from around the edges.
Fold the edges of the top sheet of dough under the bottom sheet. Press the edges together to seal them all the way around the pie. Decorate the edges as desired.
Once the edges are sealed, use a pastry brush to lightly coat the dome of the pie with a Tablespoon or two of regular milk. Do NOT brush the milk on the outer edge of the pie. The milk will help the top brown nicely.
Sprinkle some granulated sugar or sugar Sprinkles over the top dome of the pie. Again, do not sprinkle sugar on the edges. The edge will brown way too much if you do. Just saying.
Finally, take a good sharp knife and cut about 8 vents in the top of the pie. Twist the knife slightly to open the vents up. The pie will produce a good amount of steam as it’s baking, and these vents are used to release that steam.
READ CAREFULLY.
Place the pie on the bottom, or next to bottom rack in an oven that has been preheated to 450F degrees.
Once you close the oven door, REDUCE the heat to 350F degrees.
Let the pie bake at 350F degrees for 25 minutes, then lightly place a sheet of aluminum foil over the entire top of the pie. The edges of the pie will probably have already started to brown some, and the piece of foil will keep the edges from burning while the pie continues to bake.
The pie needs to bake for another 25-35 minutes, or until the pie is bubbling hot and the top is lightly browned. That’s a total of 50-60 minutes to fully bake the pie.
If needed, remove the foil and let the top of the pie brown for a few minutes longer before removing it from the oven.
When the pie is done, carefully remove it from the oven and place it on a wire rack to cool completely. This will take several hours.
Enjoy!
The pie will cut much easier when it is completely cooled. Individual slices can be heated in the microwave for a few seconds if you prefer warm apple pie.