Follow our step-by-step, photo illustrated instructions as we recreate the Adams Original Red Velvet Cake Recipe. Adams Extract, a Texas based company, is credited with bringing this cake to American kitchens during the time of The Great Depression. Just why is it so red though? We’ll explore it’s origins and follow the recipe of Betty Adams to see just why this Red Velvet Cake is so good and, why it’s become so popular.

Red Velvet Cake Recipe:
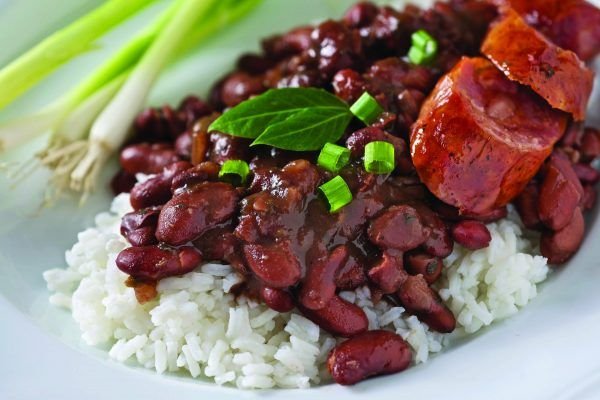
Red Velvet Cake is considered by most to be one of those long standing Southern Traditions. It’s deep red color and texture makes one think of the smooth soft feeling of luxurious velvet fabric. The taste of it is… well… just RICH. Red Velvet Cake is normally prepared as a layer cake, filled with a bright, white, cream cheese frosting between each layer and all over the top and sides. Its deep red color comes from added red food coloring… LOTS of red food coloring. But, why? Why must it have so much red food coloring I wondered. Call me crazy but, I wanted answers.
I wanted to prepare this cake as our recipe for Valentines Day this week and, I got to wondering about why it has to have so much of the red food coloring. Most recipes I found called for about an ounce of the red liquid. Thats a lot of food coloring if you ask me. So, I went in search of some of the origins of this cake and thus began a bit of a history lesson, for me at least, on how such a delicious dessert came into being.
Of course, these days, when you want to know something, you just Google it on the Internet. Long gone are the days of reaching for a World Book Encyclopedia or, heading to the local library to do some research. I just love the Internet. And of course, the main source of information for just about anything takes you to the foremost authority these days… Wikipedia. Sure enough, they had some information that just started me on a journey that has taken over a month now to complete. All for some… Red Velvet Cake.
I’ve searched many of my trusted old cookbooks and none of them even list a Red Velvet Cake. I have a few trusted cookbooks that I keep by my side and often use as reference material. Many go back to the 20’s, 30’s and 40’s. But, none of them list a Red Velvet Cake. I even searched my own families recipe book that contains many recipes from my mom and her sisters but, there isn’t a recipe for Red Velvet Cake in it. It seems the cake was popular at one time but kind of died off. However, its seen a great resurgence in recent years and now its popular again all over the South from grocery stores to restaurants. Its also become a favorite of the cupcake making crowd of late. So, where does it all begin?
According to Wikipedia, the Waldorf Astoria Hotel in New York City is pretty much credited with the original recipe. And, for our Canadian readers, we must also include the Eaton’s Department Store chain from the 1940’s and 1950’s as many also believe this chain of stores created the original version of the cake. You can read more about it if you visit this link at Wikipedia.
The one that really caught my attention though was the story and recipe of Betty Adams. Her husband John, was the founder of Adams Extracts, a Texas based company that was one of the first to sell red food color and other flavorings through the use of point-of-sale posters and tear off recipe cards available in local grocery stores in years past. You still see similar items in stores today but, they’re most often just a coupon you can pick up right in front of the product and use at the register to save a dime or two off the purchase price of an item.
As a child though, I remember tearing these little pieces of paper off from store shelves as I helped mama during her trips to the neighborhood grocery store just down the corner from our home. The food pictures just caught my attention… and, they were free so, why not. As the story goes though, Betty Adams gets credit for adding so much of the red food coloring to what we now know as the traditional Red Velvet Cake. Why not, her husband SOLD the stuff. It was great marketing for sure.
You can follow our step-by-step instructions below as we make both the cake layers and the frosting… from scratch. We also have a printable copy of the recipe at the bottom of this page.

This is the front of the tear off recipe card that was available in countless grocery stores back in the day. It would have been “padded” together, about a 100 to a pad and, placed right in front of the food coloring and extracts as you walked through the store. The tempting picture on the front leads you to tear off one of the cards, purchase the needed red food coloring and vanilla extracts so you can try a new dessert for Sunday dinner. The idea was brilliant and obviously worked well. Adams Extracts is still in business today and they have been producing fine extract flavorings and food colors since 1888. That’s quite a history.

Images are the copyright of their respected owners.
The back of this slip of paper contained the Betty Adams Original Recipe for Red Velvet Cake. When I read it, I knew this was the recipe I wanted to use. Then, I realized that in order to be as Authentic as possible, I also needed to use the original Adams Extract Red Food Coloring, Butter Flavor and Adams Best Vanilla. If you’re going to do it… do it right. Right?
Adams Extract and Spice Company is celebrating its 125th Anniversary during this year of 2013. They have a great website that includes many recipes and Do It Yourself Videos for some of them. You’ll find the recipe on their site and you can also order all of their products online. I couldn’t resist this chance to make this special cake for Valentines Day by not using some Adams Red Food Color and Adams Best Vanilla Flavor. I placed my order. Thus, the recipe below is my recreation of this Adams Original Red Velvet Cake Recipe, complete with Betty Adams No-Cook Icing.
This is not the Cream Cheese version you’ll find almost everywhere else. They didn’t use Cream Cheese back in those days to make icings I don’t think. Turns out the icing is quick and easy to make and you can whip up a batch in just a few minutes. It’s also delicious, as is the cake itself. So, if you’re anywhere as near intrigued with it all as I was, order your red food color and flavors and… Let’s Get Cooking!

Adams Original Red Velvet Cake Recipe: You’ll need these ingredients to make your layers.

You can certainly use other brands of red food color and flavors to make your Red Velvet Cake. I just wanted to be as true to the original recipe as possible so, I ordered these three items from the Adams Extract Company. Their prices are very reasonable, it just cost a few dollars extra for shipping since I didn’t find that these were available anywhere in my area.

Start your made from scratch layers by adding some All-Purpose Flour into your sifter.

Sift the flour into a large bowl and set it aside. Sifting the flour will pump up its volume and is best to do before measuring out the amount needed for the layers.

In a separate bowl, add the sugar.

Add the shortening.

Using a mixer, on low speed, cream the sugar and shortening together.

Add one egg. We’ll add the eggs one at a time. I always crack open the eggs into a separate container, that way I’m not trying to find any egg shell pieces in my flour, sugar or, other ingredients. Keep it simple.

Again, on low speed, mix the egg into the sugar and shortening.

Add the second egg and mix it again.

Be sure to scrape down the sides of the bowl and mix that in too.

Add the Vanilla Flavoring. (Dab a drop behind each ear if you’re feeling adventuresome, it’ll make you smell real good.) Smile.

Add the Butter Flavoring.

Mix it all together. This only takes about 30 seconds. You just need to make sure it’s all incorporated together.

In a small bowl or cup, add the Cocoa powder.

Carefully add the Red Food Color. Try not to spill any of the coloring as it can quickly get to be a bit messy. If you spill any at all, grab a paper towel and wipe it up as quick as possible. Trust me on this one, you can thank me later. I mean, it’s not like I actually spilled any myself you know, I’m just trying to keep you from making the same mistake that I… OK, move on… there’s nothing to see here folks.

If you try to just stir this, I think you could be stirring all day long and, into the night. It’s amazing how well the Cocoa Powder can just float on top of Red Food Color. If you make the paste separate, be sure to kind of scoop from the bottom of the bowl up to the top as you stir. This helps make the paste much quicker than just stirring alone. The recipe called for making a paste of these two ingredients. I wanted to stay true to the recipe but, lots of other recipes mix it into the batter differently. You could add the Cocoa into the flour and the Red Food Color into the wet ingredients. Its also a bit hard to get it all out of the bowl this way. Just saying.

Add the paste into the batter mixture.

Mix it together very well. If you have kids or Grand kids around, you now have their undivided attention. Relish the moment.
Historical Marker: Now is a great time to tell them how way back during World War II, when foods were rationed, bakers used boiled beets to enhance the color of their cakes. And, tell them that some times, boiled grated beets or, beet baby food, is also used to make this cake. If they’re older kids, tell them how combining the vinegar and buttermilk in this recipe, along with the cocoa, causes the anthocyanin in the cocoa to react and reveals a hint of red in the otherwise chocolate color of cocoa. OK, even I didn’t understand that. But, its what it says on Wikipedia so, you know it must be true… right? If they start asking questions you don’t understand, quickly change the subject and move on.

Its time to add the flour. Don’t just scoop it out with your measuring cup as this kind of defeats the purpose of sifting it to begin with. Instead, grab a large spoon and spoon it into your measuring cup. Fill it full, we’ll level it off in the next step below.

Take the back of a knife and gently draw it across the top of the measuring cup to level off the flour. This gives you a more exact measurement in your baking recipes.

Grab another bowl and then place the measured out amounts of flour back in the sifter. Yep, we’re going to sift it one more time.

Add the salt.

Add the baking soda.

Sift them together into the bowl.

Add about half of the sifted flour into the bowl with the batter at this time. We’re only adding part of the flour and, will add the other half in 2 separate parts in the steps below. So, just to recap, it’s half now, 1/4 the next time and, the final 1/4th in the last step. Make sense? We’ll be alternating between the flour and the buttermilk as we go and ending with the last amount of flour as our last addition. Whew!

Mix the flour into the batter.

Add about half a cup of the Buttermilk into the batter. It was at this point that I wanted to make one of those designs like they make in your coffee at those expensive coffee shops.

Mix it again, just until you’ve worked the Buttermilk into the batter.

Add a little more of the flour and mix it all up real good. Don’t forget to scrape down the sides of the bowl if needed.

Add the rest of the Buttermilk. Then, add the Vinegar.

Give the final amount of Buttermilk and the Vinegar a good mix down. Then, add the last amount of the flour and mix that in really good. Scrape down the sides of the bowl and mix it all together until it’s good and creamy looking.

Get your baking pans ready. This is an old pan that I’ve had for many years. It’s neat in that it has that slider that helps remove the baked layer from the pan. They were really popular “back in the day.” They work pretty good for their intended purpose but, I find them to be a bit messy. It’s difficult to clean out from under the slider once you remove the baked layer. I figure if I’m recreating an old recipe, might as well use the old baking pan. The recipe says to use 3 – 9inch pans for the layers. By the way, if you’re interested, you can still find these pans in various places on the Internet.

Use some shortening and grease up the pan really good. Make sure you get under the slider and all around the inside rim of the pan. Hey, that little finger back there sure does look RED for some unknown reason.

You should still have some leftover flour from the first time you sifted it. Dump a good handful of that into your baking pan and shake it all around to coat the bottom really good.

Tilt the pan and give the inside edges a good coating as well. Don’t leave any bald spots, coat it really good all over.

Be sure the pan is coated with flour all over the bottom and around the edges. Look carefully at the above photo. See that clump of flour in the edge around the 11 o’clock position? That will not bake out. It will cause an uneven edge on the bottom of your layer. Gently tap that out or even use a knife point to knock it out. Just make sure that same spot remains covered with shortening and flour. Turn the pan over your flour bowl and gently tap it to remove all of the loose flour. I admit it, I’m guilty… I know this and still leave some clumps in the bottom about every time.

Add the batter to the pan. I measured this out for you. I was able to place 1-1/2 cups of batter in each pan. Don’t be afraid to measure the amount you’re placing in each pan. It’s better to do that than have layers that are all a different thickness. Once you’ve baked a few cakes, you’ll be able to eyeball the amounts and not have that problem.

Take the back of a spoon and, starting in the center, work the batter gently out to the edges to level it out in the pan. Be gentle up around the edges because the batter will start to pull away the flour once it touches the edge.

You should also lift the pan up from the counter a couple of inches and, just let it drop. I do this a couple of times to help remove any air bubbles in the batter and to settle the batter more evenly inside the pan.

Bake at 350º for 20-25 minutes. Wait… I just said that didn’t I? One day, I want a wood stove to call my own. As a second unit of course.

Test the layers after about 18-20 minutes by inserting a wooden toothpick into the thickest part of the layer. If the toothpick pulls out clean, the layer is done. If it has some particles on it, let the layer bake for a couple more minutes. When they’re done, remove the layer from the oven and set it on a wire rack or folded towel to let it start cooling down. It needs to rest for about 10 minutes before you try to remove it from the baking pan.

After about 10-15 minutes, it’s time to remove the layer from the pan. In my case, I needed to run this slider all around the pan. It loosens the layer from the bottom so the layer comes out without sticking. It does pretty good most of the time. Of course, most layers will come out easily if you have the pan properly prepared before you add the batter.

Place another wire rack on top of the layer if you have it. Or, just place a plate on top. Either will work fine.

Grab the whole setup and flip it over… gently of course. Then, pretend you’re a magician and tap the bottom of the pan a couple of times. Say a few magician type words and slowly lift the pan.

And there you have it. One fully baked layer, one down, two to go. Place the other wire rack on top of the layer and flip it all back upright so the bottom of the cake layer is resting on the wire rack. The layer needs to cool completely before you try to add the frosting.
After the layers have cooled, you can frost them. The layers could also be wrapped firmly in plastic wrap and frozen for later if need be. Don’t have time to frost them today? Wrap them in the clear wrap and just let them sit out on your counter overnight. Then, you can unwrap them and frost them the next day. Most sources say it’s best to leave them out of the refrigerator if you intend on frosting them within 24 hours. The refrigerator has a tendency to dry out the layers. The same rule applies for a cake once it’s frosted. Just use a cake plate and top to cover the cake and let it set out on the counter. It’s not likely to dry out before it’s all gone anyway.

Let’s make the frosting for our Red Velvet Cake.

Betty Adams No-Cook Frosting Recipe: You’ll need these ingredients.

Place the Confectioners Sugar into your sifter.

Sift the Confectioners Sugar into the bowl.

In another mixing bowl, place the room temperature butter if you’re using it. The recipe gives you the option of using shortening or butter. I decided the butter would probably taste better than shortening. It just needs to be at room temperature. If you use shortening, the recipe calls for some of the Butter Flavor we used earlier.

Add the salt.

Add the Vanilla Flavor.

Use the lowest setting on your mixer and, mix the ingredients together as best as possible.

Add about half of the Confectioners Sugar into the bowl.

Mix the ingredients on low speed with your mixer.

Add about 3 Tablespoons of the milk. I’m using Evaporated Milk from a can, you could use whole milk just as easily.

Mix again, using low speed on your mixer.

Add the remaining amount of Confectioners Sugar.

Mix the ingredients again. They will probably look pretty dry at this point.

Gradually add more of the milk, as needed, to bring the mixture to a creamy texture suitable for spreading.

Continue to add very small amounts of milk until the mixture becomes creamy. You’ll just need to work with it at this point, adding milk, a little at a time as needed. If it gets too soupy, sprinkle in a little more sugar.

Mix it until it gets to a very smooth consistency, thin enough for spreading, firm enough to hold a bit of shape. It’s very sweet. There may be a finger indentation in there somewhere if you look closely. Where might that have come from I wonder.

I’m not going to get into very much detail about how to frost the cake. I’m sure you’ve got a good idea about that and will do a much better job at it than I did. I greatly admire anyone with the skill and know how to decorate a cake like the professionals do. They do some amazing stuff. I just hope I get it good enough to show you a picture of the finished product. Here goes.
Level the cake layers if needed. You’ll need a cake knife or a good long knife with a serrated edge to trim off the bubble that usually appears when baking layers. Save the pieces though, we’ll use them to finish off our cake. In other words, don’t eat it all just yet.

One thing I have learned about frosting is to always measure out the amount you’re putting on top of each layer. That way, you’ll come out with an even layer of frosting between all the layers and have a more professional look to your cake. If you’re like me, you love those cake pictures that have just about as thick of a frosting layer as they do a cake layer.
That will not be the case with this one though. I measured out 1/2 cup of frosting at first to see how well it covered the layer. I quickly realized I might not have enough as I think it would turn out better if you add a full cup of frosting between each layer. More on that later though. Just add the frosting and carefully spread it around to cover the first layer.

All three layers are stacked with frosting between each layer. That used a good portion of the frosting for me. Then, I spread a thin layer of frosting on the top and all aound the side of the layers. They call this a “crumb coat.” It seals in the crumbs so they don’t show up everywhere in the final layer of frosting. It’s one of those professional terms and tips for decorating a cake.
This cake will certainly produce a fair share of crumbs… bright RED crumbs at that. Spread the thin layer of frosting all around the cake and smooth it up as much as possible. You can get as precise as you want to from here on out. It’s best to not lift the spatula up and down in the frosting as this just pulls cake crumbs with the spatula. Place a scoop of frosting on the cake and gently work it around, lifting away only when needed. Once the crumb coat has been applied, place the cake in the refrigerator for about 20 minutes. This will firm up the crumb coat layer and make applying the final frosting layer much easier.

Once you remove it from the refrigerator, the crumb coat should feel firm to the touch. If you press your finger to the frosting you should not lift any of it away from the cake when you remove your finger. After that, you can get creative. Swirl, circle, dab, do whatever makes you happy with the final coat of frosting. Swirl a little design into it or smooth it out, it’s all up to you.

You could also take some of the pieces of the layer that you trimmed away from the top earlier and run them through your food processor. Or, just crumble them with your fingers. Spread them around the outer rim of the top of the cake. I may have got a little carried away with mine. A lighter layer of these red crumbs would have been better. I make no claims whatsoever to any prowess regarding decorating cakes. I was just happy I got this far with it and could muster up the nerve to show you the finished product.

You can do the same around the bottom of your cake. This helps cover any imperfections around the base of the cake but, don’t tell anyone I said that. I’m not saying that I actually had any of those… I’m just saying that in case I DID, the crumbs would cover that up.
I used some parchment paper under the bottom layer as I was frosting the cake. I put that down before I placed the first layer on the cake stand. After all the frosting had been applied, I gently pulled out the parchment paper. It’s a pretty neat trick that you shoud try as well.

I must admit that I’ve long considered taking a couple of those Wilton Cake Decorating Classes that are offered through our local college. I’ve just never done it. I would hate to do it alone, I don’t want just strangers laughing at me you know. I wish I had now though so I could show you something “Spectacular.” Still, I was kind of proud of the outcome of this one. It’s far from perfect thats for sure. So, just have fun and fancy it up anyway you like.
For reference, the crumbs around the top and the bottom DO dry out a bit after a day or two. Its to be expected so keep that in mind if you use them.
I had a lot of fun working with this recipe. It was an interesting adventure that spread over about 4 weeks of time for me. After finding the recipe and learning about the Adams Extract Company, I ordered the Vanilla Flavor, Butter Flavor and a large bottle of Red Food Color to use in making the recipe. The first package got lost in the mail so I had to contact the company. They were totally AWESOME in their Customer Service and quickly sent out a second package. Thankfully, I got it just in time to have this cake ready for Valentines Day of 2013.
How did it taste? I thought it was very good. I don’t know that I’ve ever had anything but the Cream Cheese Frosting on the one’s I’ve tried previously and this No-Cook Frosting gives it a different taste all together. I made my layers one day, wrapped them and left them out overnight then, made the frosting and assembled the cake the next evening. The entire cake was covered and allowed to set out overnight again until I could take photos of the finished product the next day. So, it was actually the third day later before I ever got to try a slice. It was still moist and delicious though.
If I did it again: If I were to do this again, I think I’d make a Simple Syrup of sugar, water and a little Vanilla Flavor to pour over the top of each layer before adding the frosting. The Simple Syrup would add more moisture to the cake overall and would, in my opinion, add a bit more flavor to the layers.
About the Frosting: The frosting is very good and very simple to make. I like that. I just didn’t find that one batch of frosting sufficiently covered the layers and outside the way I wanted it to. I would have liked to have added more between the layers, then made a thicker outer layer on top. So, I did end up making about half of another batch of the frosting to complete the cake. I’d suggest that you make one batch and use that to fill the layers and complete the crumb coat. While the cake is in the refrigerator for about 20 minutes, whip up another full batch and use that to frost the outside. Any leftover frosting will go really good with the slices you removed to level out the tops.

I want to say Thank You to Vickie, at Adams Extract Company, for her excellent Customer Service. I would highly recommend their products based on the few that I’ve tried. I’m glad I found them, found the recipe and, thank you to John and Betty Adams for a great recipe. I do hope you’ll give this Adams Original Red Velvet Cake Recipe a try. It’s not just for Valentines Day, you can enjoy this any time of the year.
Enjoy!