Follow our easy, step-by-step, photo illustrated, instructions for making these cute little Mini-Biscuits. Call them Party Biscuits, call them Mini Biscuits….just call them quick, easy and very good. We’ll take you step-by-step through the process of making these cute little mini biscuits that will be the hit of your next party. Perfect for Christmas or any time of the year. Printable recipe included.

Mini Biscuits, Party Biscuits Recipe
OK, how cute are these little buttons of a biscuit? Christmas is upon us and you’re looking for finger foods, appetizers, something simple. You can have these hot out of the oven in little time at all and with just 3 simple ingredients that you probably already have on hand. We know you’re going to be very busy this time of the year and, with family and friends coming over, these little nibbles will be just one more thing on your party table.
We’re taking mama’s recipe for making buttermilk biscuits from scratch and turning them into party favorites with just a simple little biscuit cutter. You can fill these with all sorts of things, like ham, jams, jellies, preserves and more. The choice is all yours. In fact, you could add some ingredients like cheddar cheese, bacon, chopped ham and more, right into the dough as you mix it up and have biscuits that will stand all on their own. The choice is always yours.
Even if you’ve never made biscuits from scratch, we’ve got all the instructions you need on how to make them, quick and easy. And the good part is that once you make them, you can make them full size for serving at any meal. Biscuits are great for breakfast, lunch and dinner. Plus, they’re made even better when you set a large plate on the table and everyone see’s that you’ve made them home made. So, ready to give it a try? Let’s Get Cooking!

Mini Biscuits – Party Biscuits Recipe: You’ll need these ingredients. And you thought it was going to be complicated right? Don’t have lard? Your favorite solid shortening will work just as well.

Begin by adding flour to your sifter. I just love using mama’s old sifter, it brings back lots of memories of watching her do her thing in the kitchen. If you don’t have one, I strongly urge you to pick one up soon. But, even without one, you can place your flour into your mixing bowl and use a fork or whisk to loosen it up and whip a little air into the flour.

Sift the flour into your mixing bowl. This is my bread bowl but any decent sized mixing bowl will work. This one has a crack in it but, I’ve had it so long and used it back in my restaurant days to make the first biscuits I ever made so, I can’t seem to part with it.

Shake the bowl around to spread the flour out evenly.

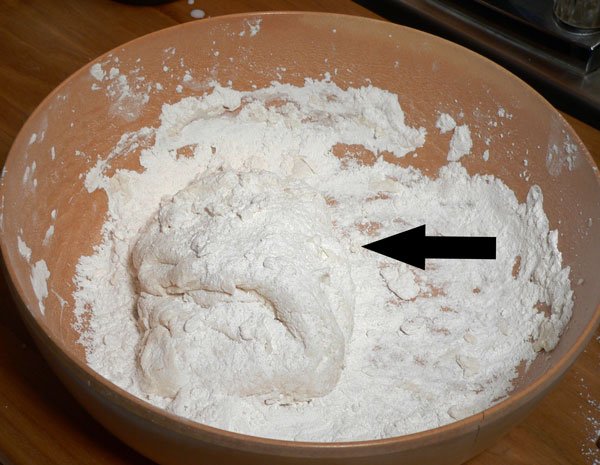
Take your fingers and spread the flour out around the edges, creating a small well in the middle.

Add the lard if you have it. Lard is available at many grocery stores around the south and I really like to use it for making biscuits. Of course, it’s what mama always used and what she used to teach me how to make biscuits. You can use your favorite solid shortening if you prefer and you’ll use it in the same amounts as you would the lard. I keep my lard in the refrigerator so it’s cold as I’m working with it.
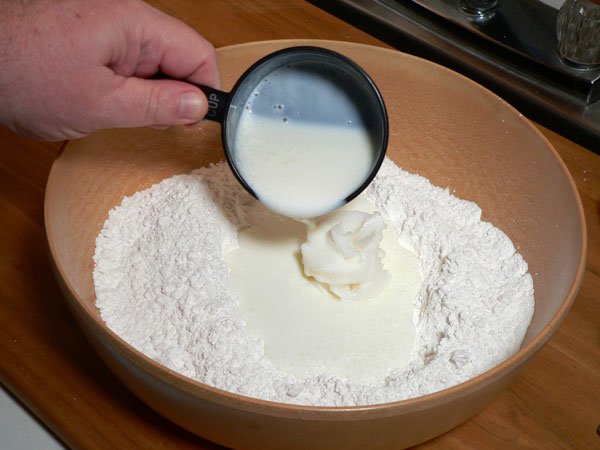
Add the Buttermilk. It’s also straight out of the refrigerator so it’s good and cold. I’ve worked with the lard and buttermilk warm as well and don’t really see a notable difference.

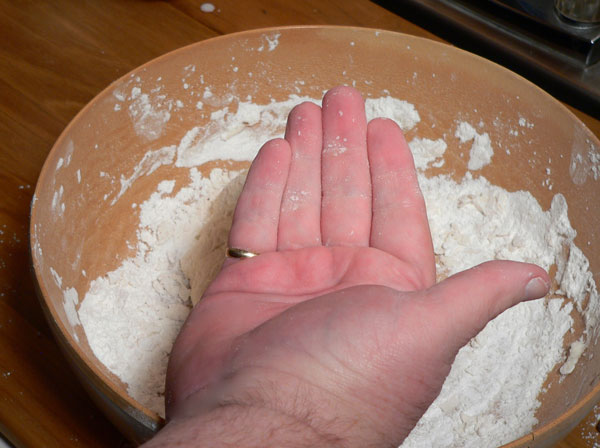
You’ve got to get your hands in it and get them dirty. Well, not dirty dirty…flour dirty. Oh, you know what I mean.

Work the lard with your fingers and then squish it in your hands so it’s coming out both sides. You just need to do this several times to break the lard up and not have just one big scoop of lard in your bowl. Work it into the buttermilk but not into the flour. Just keep your hand in the middle of that well you created as you mix the lard and buttermilk together. You’ll have lumps left in it but that’s OK, just work it around for about a minute and you’ll be good to go.

Here it is after about a minute of squishing. It’s kind of hard to see. I have the worse time trying to take pictures of flour…it’s all white. I always seem to over-expose the pictures. I really think I’m improving though.

OK, just like my recipe for making Sweet Potato Biscuits, it gets a little more difficult to show you what’s actually happening in pictures. First, my hands are covered in lard, buttermilk and flour…and….I’m trying to take pictures. That can mess your camera up you know? Secondly, it requires motion and that works much better in a video than in a still photograph. But, follow the directions and you’ll be baking biscuits in no time.
Stick your fingers right down into the middle of the bowl. Try to keep your fingers touching the bottom as you work and start working the buttermilk and lard around in small circles. The object is to start swirling the wet ingredients around, much like a dough hook on a mixer, and let it slowly pull the flour from the edges into the wet ingredients. Do it a little at a time and don’t just start mixing it all together at one time.

You can probably see what I’m talking about better with this picture. Wait…it’s just another still photo, it’s not making a lot of difference is it? Just keep moving the wet ingredients around in circles, keep contact with the bottom as much as possible and before long, the flour will start to work itself into the mix. As you keep working it around and around, gradually move the dough ball that’s forming so it pulls more and more of the flour in. Eventually, you’ll reach a stopping point because the dough usually starts sticking to the bottom. That’s when we start folding the dough to incorporate the rest of the flour.

Here, you can see that I’ve worked a good portion of the flour into the wet ingredients. There’s still a good amount of flour around the edges of the bowl. Your wet ingredients will pretty much tell you how much flour they can handle. It seems that some days, I can work more flour into same amount of wet ingredients than I can on other days. This is not one of those recipes that uses an exact amount of flour. I’ve tried those and it never seems to work for me. The dough will be too wet or too dry. Just let the wet dough ball do it’s thing as you go. Any leftover flour is OK and we’ll even need a bit of that further down the page.

I’ve mixed it in circles as much as I can and, now, I’ve started to just work a little of the loose flour into the dough. I pick it up a little at the time and sprinkle it on the dough, flip it over, do the same again. As long as the dough is feeling really sticky and tacky to the touch, you’ll need to just keep working in more flour. If the dough is too wet, you can’t work with it because, it’s going to stick to everything. Yes, it’s a bit of an acquired knowledge but, trust me, you’ll pick up that knowledge in no time at all.

Just keep adding in flour and working it until you start to get a smooth ball of dough. You’ll see some larger clumps of flour around the edges and you can usually just stick those into the dough ball and they will hold. Don’t worry about them though if they don’t. We’re going to use as much of the measured flour as the wet ingredients need.

Now, take the top portion of the dough and fold it down over the rest. We’re going to do a little bit of light kneading of the dough at this point. We’re still working loose flour into it and as you go, it will form even more of a smoother dough ball. Its important that you work with it lightly. Don’t beat the top down into the part that you folded it down on. Just gently lift it and fold it over.
Fold it over to the left. Sprinkle it lightly with more flour.

Repeat the folding process a couple of times. Flip it over and do it again. Most recipes for kneading bread tell you to push the heel of you hand down into it. Biscuit dough requires a lighter touch. Just flip and fold it a couple of times, pressing it lightly as you go. Be gentle with it and it will treat you well. This whole kneading and flipping process will only take about 60 seconds….if that much.

By this point, you’ve got dough sticking to your fingers and it’s making it difficult to keep folding. Here’s the best way I know of to get that wet dough off of your fingers. Scoop up a bit of the remaining flour or, if you’ve used most of it, grab a bit out of the bag. Walk over to your trashcan and rub that dry flour all around in your hands. It will pull the wet flour and dough right off of your fingers in a flash.
See how well that worked…..and how quick! It’s like magic. (Disclaimer: Actual cleaning times may vary) Smile

Grab a little of the lard from the bucket and give your baking pan a very light coat. Just rub it all over the bottom. And before you even mention it, I know this pan looks a little rough. Every time I see it in a picture I think about just that very same thing. And, I say, I’m going to get a new one. Would you believe that I actually HAVE a new baking pan…I just don’t use it yet because I don’t want to mess it up. Admit it…you’re the same way aren’t you? Well….you’ve got friends like that you know.
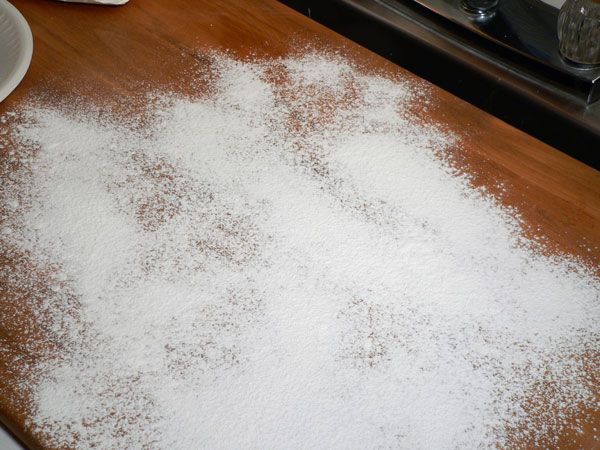
Lightly coat your work surface with flour. I go a little heavier because my wood work surface seems to need it.

I’m not one for rolling out dough to make biscuits. I pinch mine, “cat head” style, as they call it here in the South. But, I have these new biscuit cutters that I picked up at Charleston Cooks in Charleston, South Carolina ( I love that place ) and, I wanted to use them for the mini-biscuits. I’ve only been to Charleston Cooks one time but, one day I’m going to have a place very much like it. When I started dreaming about what to do next in my life, I came up with an idea. I started searching around the Internet and found Charleston Cooks. It was pretty close to what I was dreaming of. From that point on, I knew I had to visit the place. I got the chance several weeks back when I rode with my brother to deliver one of his pig cookers down that way. If only I’d had more money.
Oh Yeah….Place the dough ball onto the floured surface and lightly sprinkle the top with flour.
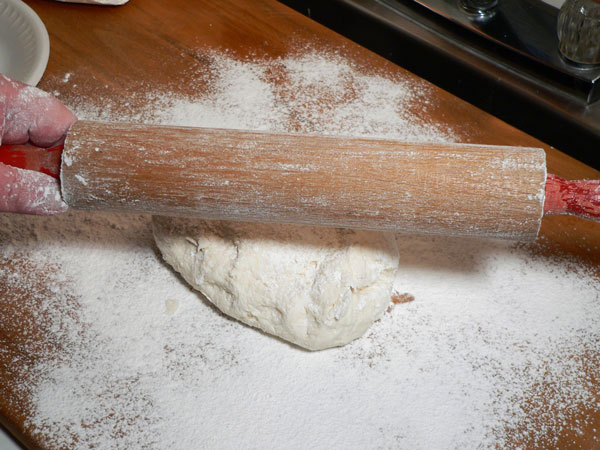
Rub a little more flour on your rolling pin.
Use a light touch here also. Gently roll out the dough. Don’t apply pressure as you’re rolling. Just lightly touch the dough and roll it out until it’s about 1/2 inch thick. You could also just pat out the dough if you don’t have a rolling pin. You really need a rolling pin though. They’re just really cool. This is one I got at an auction for about $2.00. It’s got red paint on the handles and every time I use it, I find a speck or two of paint that I have to pick out of my dough.

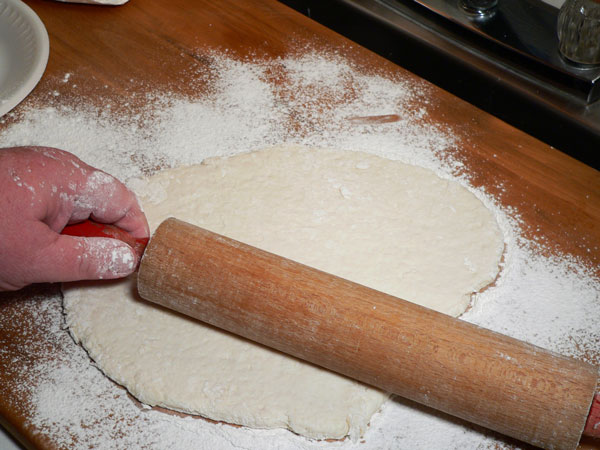
Here it is all rolled out.

Take your tiny little biscuit cutter in your big old clumsy fingers and dip it into a bit of flour.

Press the cutter into the dough, starting around the outside edge. You’ll want to dip it back in the flour after each impression.

Sometimes the dough will lift up with the cutter. Sometimes, the dough doesn’t lift up with the cutter. Just keep dipping the cutter into the flour each time and work it all around to cut out as many biscuits as possible. You’ll place them in the pan as you go.
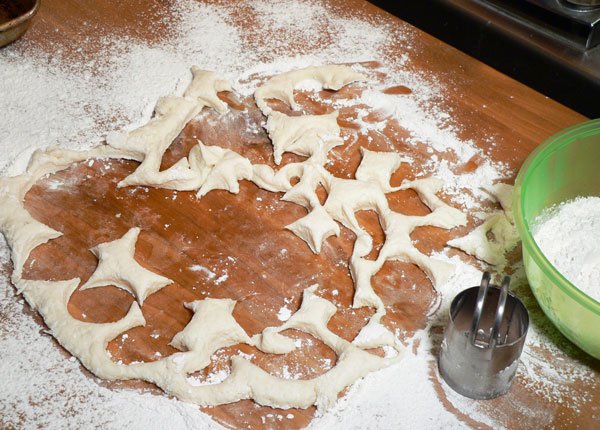
Eventually, you’ll end up with something like this. It looks a bit messy but you’ll have some scraps of dough left. We can use those.

Gather up the scrap pieces into one big pile.

Press the pieces together, flipping and folding it a time or two as needed. Then, just use your fingers and gently press it out by hand until it is once again about 1/2 inch thick.

Cut out as many biscuits as possible once again.

I could claim it was my expertise but, I just pretty much got lucky with this one. I had just enough dough to fill up this pan. I made 40 biscuits with this recipe.
Bake at 500º for 8-10 minutes or until the tops are golden brown.

Let the tops of the biscuits brown just slightly. They’re very small and could easily burn. In my oven, the bottoms come out much darker than the tops so you’ll need to learn your oven as well.
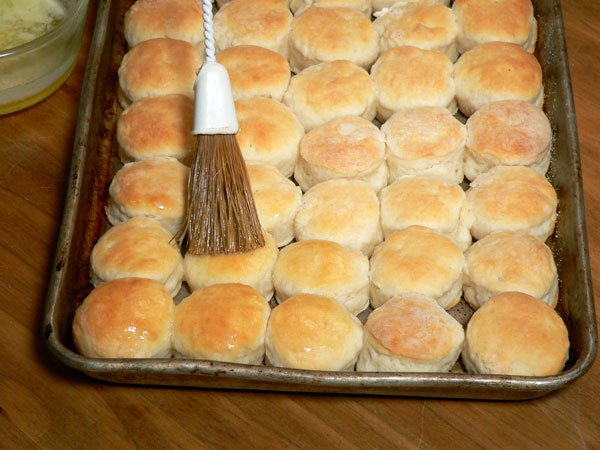
Brush the tops with melted butter.
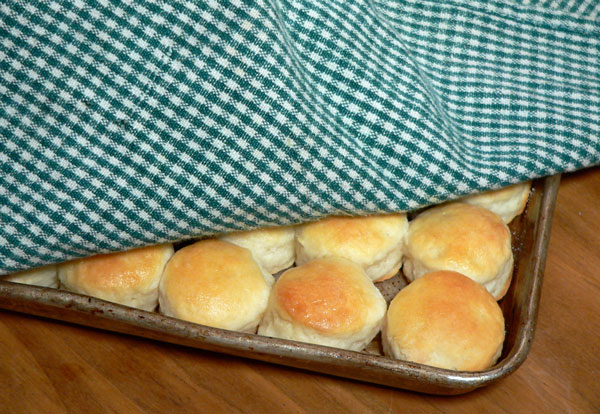
Cover the buttered biscuits with a tea towel to keep them warm.
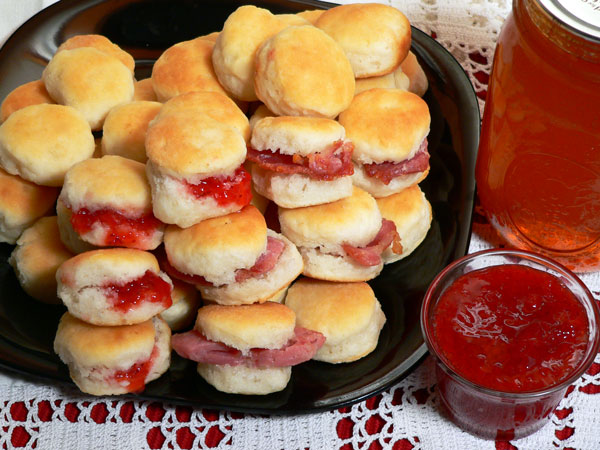
Fry up 40 little teeny tiny pieces of Country Ham and fill each biscuit. Aren’t these cute? Seriously, they turned out to be just about as big around as a quarter….that’s pretty small for a biscuit. You will probably want to make yours a little bigger but this would be great as finger food or bites at any party you’re having. They’re also very versatile. You could add some chopped ham, bacon, cheese or any sort of things right into the dough as you work it together. Or, you can split them with a fork and fill them with ham pieces, Strawberry jam, jelly, preserves….all kinds of things. Use your imagination and let me know what you come up with in the comments section below. I’d love to hear about it.
Just serve warm and ENJOY!