Follow step-by-step, photo illustrated instructions for making these mouth watering Southern Buttermilk Biscuits. We’re making them from scratch, just the way mama taught us years ago. Only three ingredients are needed and we do it all by hand without using a cutter. You can finally make biscuits you’ll be proud to serve. Printable recipe included.
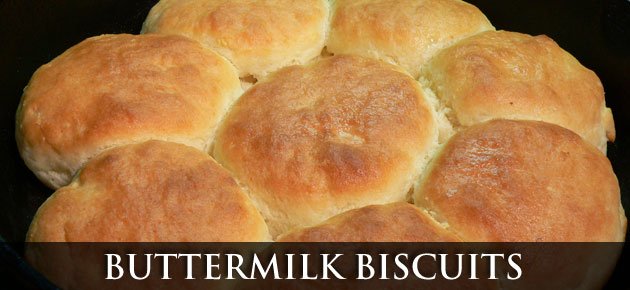
Southern Buttermilk Biscuits Recipe:
When I get to Heaven, I suspect mama will be waiting for me with a big old pan of her biscuits somewhere close by. What would I give to have another one of those? It’s a happy dream for me for sure.
My mother passed away at age 72 and I can’t begin to imagine how many biscuits she must have made in her time here on earth. Even though she said daddy taught her how to cook, I don’t remember him ever making biscuits, that was mama’s specialty. She didn’t roll her dough and cut them out with a cutter either, they were all done in what many folks refer to as “cathead” style biscuits. She pinched off a hunk of dough and rolled it out in the palm of her hand before placing it on a baking sheet and popping them into the oven.
Mama would make about two dozen biscuits for Sunday dinners. We always had about 12-15 people each Sunday which included all the family and usually our preacher and his family. Did I mention I ended up marrying one of those preachers daughters? Must have been the biscuits.
When my wife and I opened a small restaurant later in life, mama got up around 3:00am and made biscuits for us. Everyone always talked about how good they were, something we had known for a lifetime. When she had to have an operation for cancer, mama called us over to her house and we stood at her kitchen table as she showed me exactly how she made them. Sure, I’d watched her do it but this was serious, one-on-one instructions.
The next morning at the restaurant, I made my first pan of biscuits and sold each and every one of them… and more. From then on, I made biscuits at our little place and thankfully folks continued to talk about how good they were. I’ve always said mama prayed her talent for making biscuits over to me because I never felt like she made them quite the same after that. I just hope she would be proud that I’m passing this information along to you. It’s the way she taught me to do them and I do hope you’ll try them. I’ll look forward to your comments further on down the page and hope you’ll share some of your biscuit memories with me as well. Ready? Let’s Get Cooking!
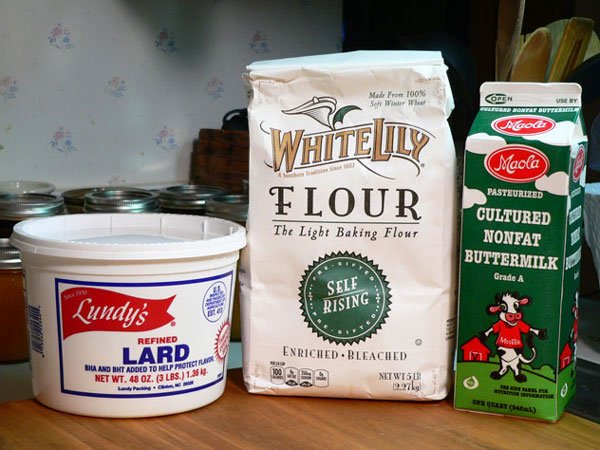
Mama’s Buttermilk Biscuit Recipe: Three ingredients are all you’ll need.
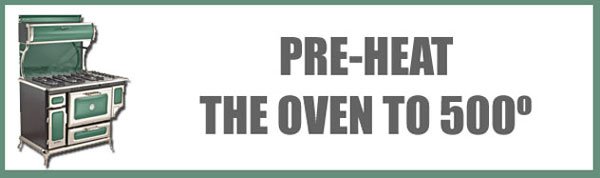
You’ll need a good HOT oven so go ahead and preheat your oven to 500 degrees. Yep, that’s right… FIVE HUNDRED DEGREES
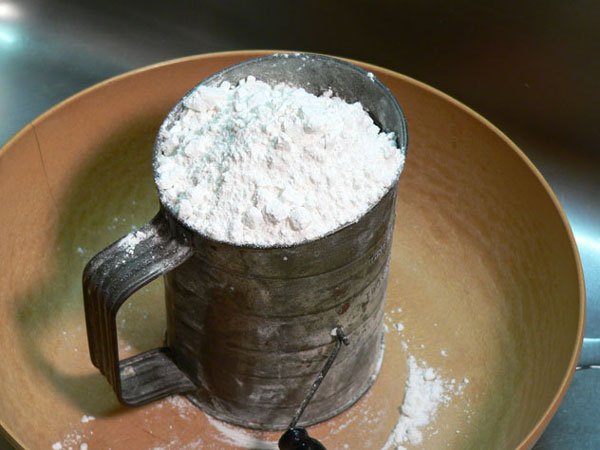
Begin by filling a sifter with Self-Rising Flour. This is right at 4 cups of Flour.
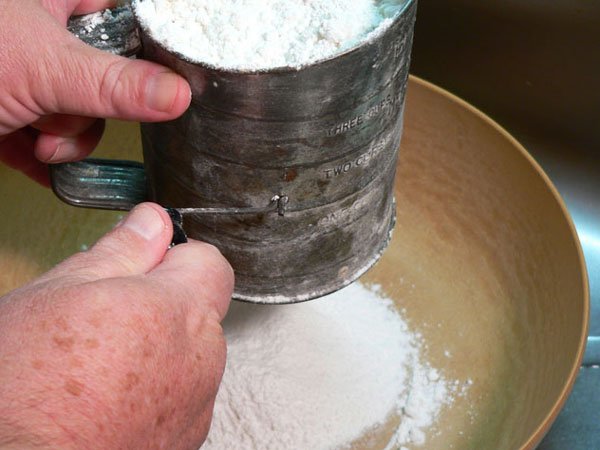
Sift all the flour into a large mixing bowl. This is one of mama’s bowls. Sadly, it cracked over the years but I still use it to make biscuits.

Take your hand and move the flour to the outside edges of the bowl, making a well in the center of the flour.
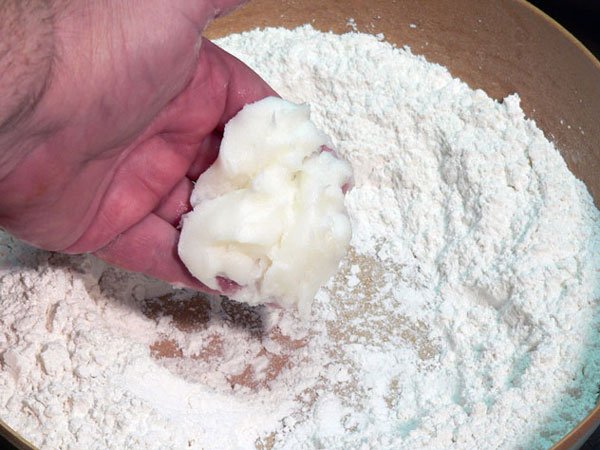
Grab some Lard. This is the way mama did it. She just knew how much she needed.
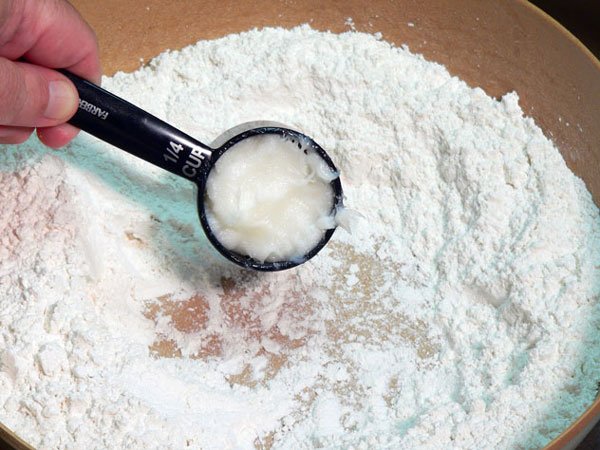
But, I figured you would want more exact measurements. It measured out to 1/4th cup. That’s all you’ll need.
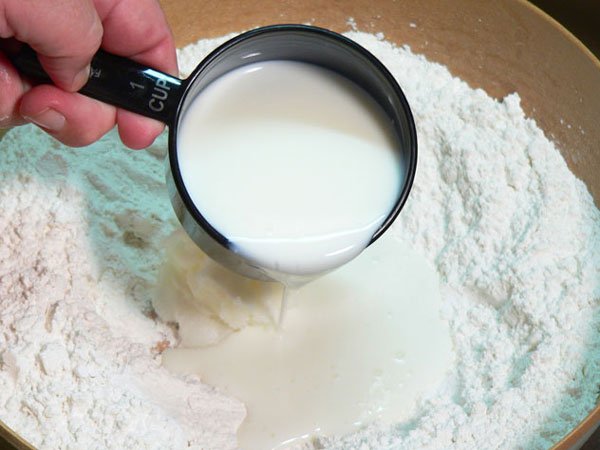
Add the Buttermilk right in the middle of the well.
Reach in and grab the Lard and squish it through your fingers. This is the fun part and just like playing in mud when you were a kid. Squish it good.
Continue to squish the Lard between your fingers until it breaks down into small lumps. Just keep working it with the Buttermilk and keep squishing. It will only take about a minute if even that. As a note, I keep my Lard and of course the Buttermilk in the refrigerator. It doesn’t matter if its room temperature or cold from what I can tell. It will warm up anyway once you start squishing it between your fingers.

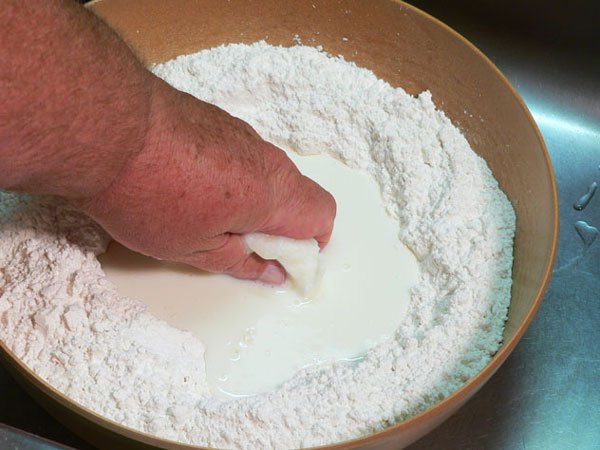
Place your fingers straight down in the middle of the bowl, all the way to the bottom. It’s time to stir it all up.
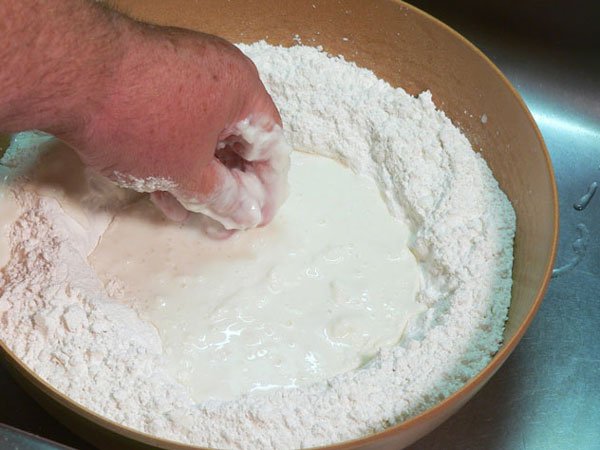
Keep the tips of your fingers in contact with the bottom of the bowl as much as possible. Start making small circular motions in the middle of the liquid and continue to do this, working in a little of the flour as you go.
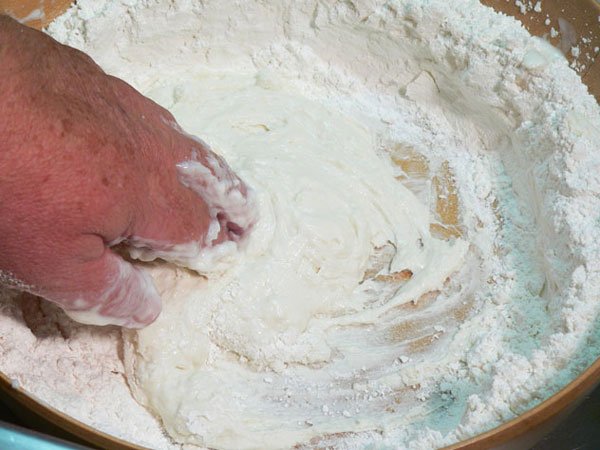
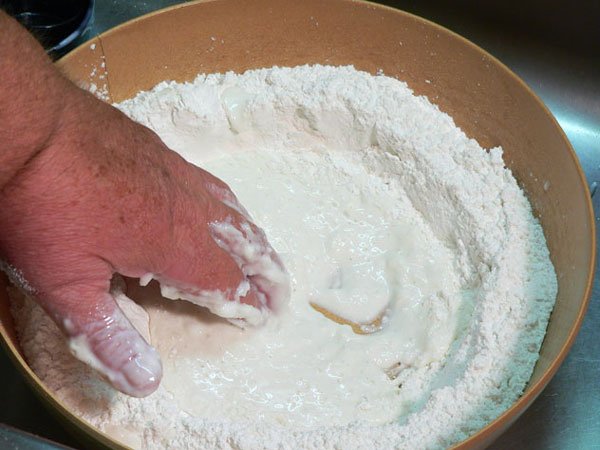
Think of this kind of like one of those rides at the state fair. Your fingers are making small circles but your hand is also making a larger circular motion as it moves around the bowl. You want to gather in just a little of the flour from the edges of the liquid as you continue to do this, working the dry flour into the wet mixture. This whole process should take about one to two minutes to complete before you build it into a large ball of dough.
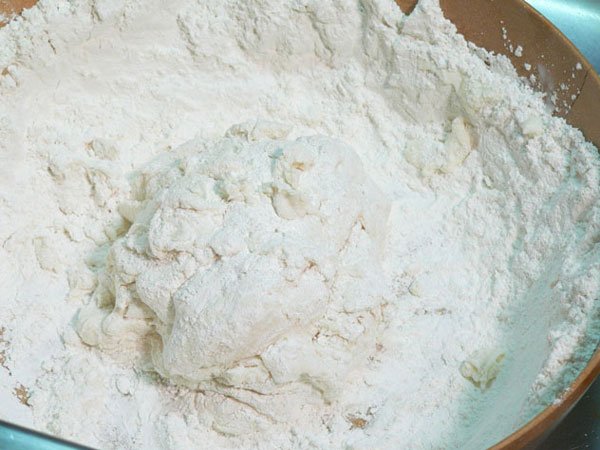
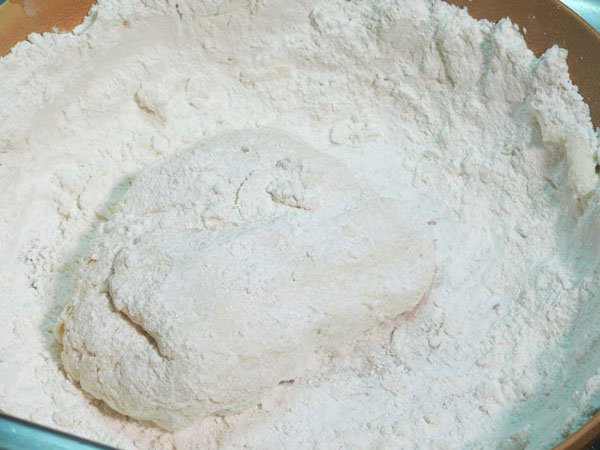
It’s not likely that you’ll use all of the flour but you will use a good portion of it. Once you’ve about stirred out, you will have a large ball of dough in the bowl like this.
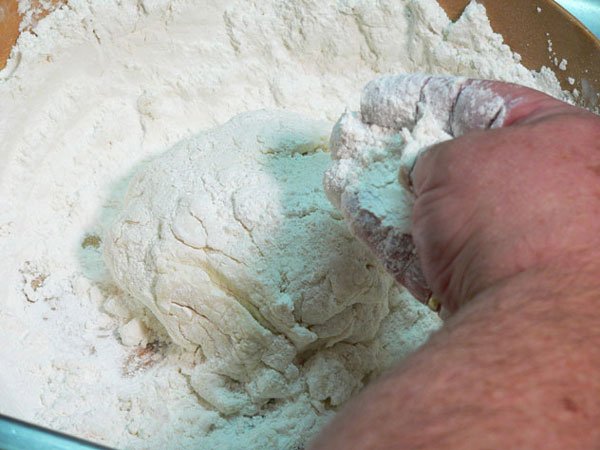
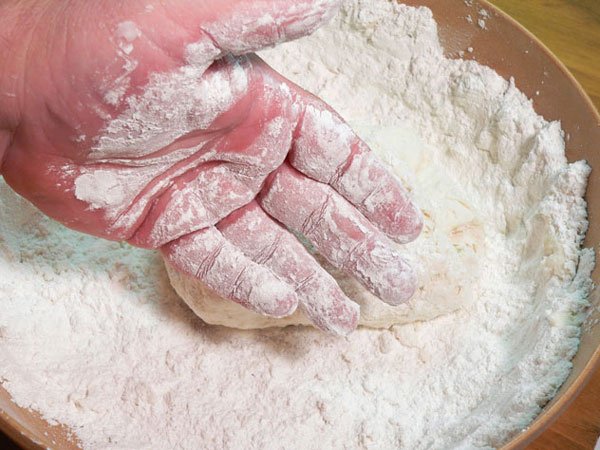
Take a little of the excess flour and sprinkle it over the top of the dough.
Fold the dough over on top of itself a time or two as you gently knead it into a smoother package. You’re still working a little more flour into it to take away some of the tackiness of the dough. You will want it slightly tacky but not wet. Turn the dough ball over, sprinkle a little more flour on top and knead it a time or two more. This will take about 30-35 seconds so don’t over work it.
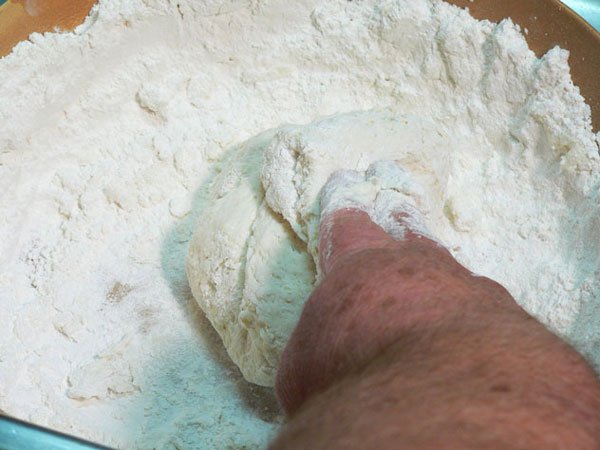
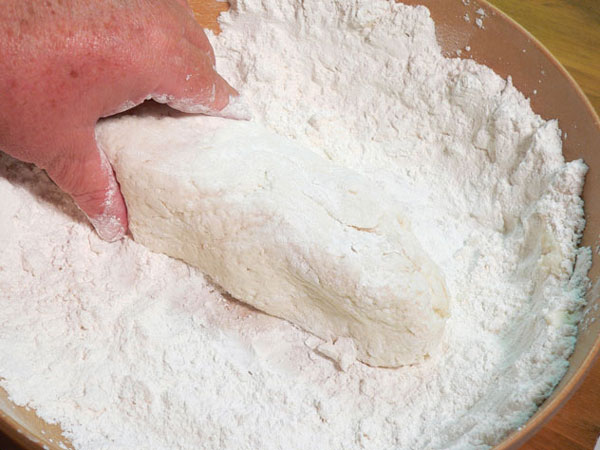
Work the dough just enough until it isn’t sticky and it’s fairly smooth on the outside.
CLEAN YOUR HANDS: Before you move to the next step, you need to clean off all that dough that is sticking to your fingers. Gather a handful of flour and step over to your trashcan. Rub the dry flour all around in your hands and between your fingers. The dough will start falling off and you’ll have clean fingers in no time.
With the sticky dough off your fingers, get some more clean flour and dust both hands a bit.
Gently shape the dough into a thick rectangular shape like this.
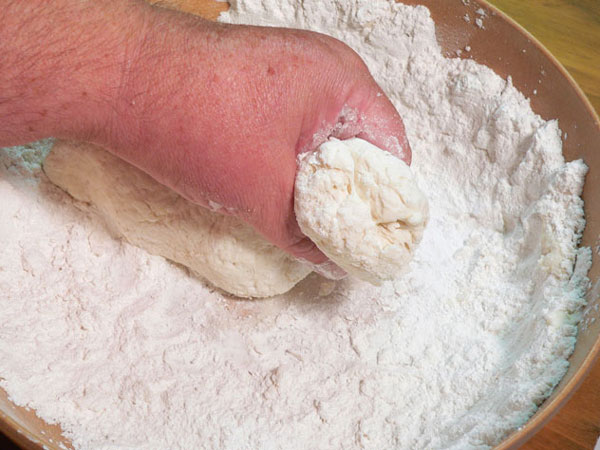
Scoop some dough between your fingers and pinch off a ball of dough a bit larger than a golf ball but smaller than a tennis ball.
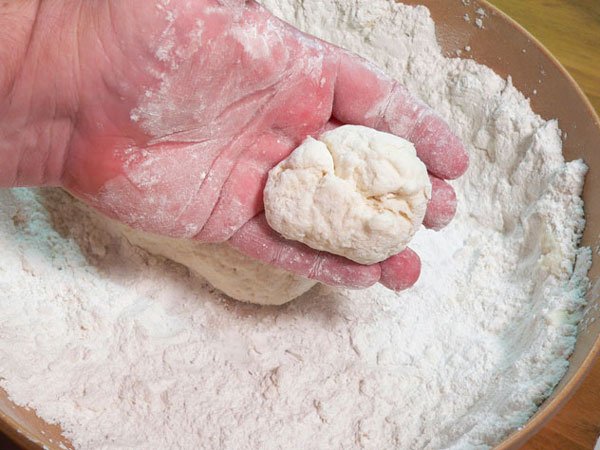
Of course, you can make your biscuits as large or as small as you want them to be.

Place the dough ball in the palm of your hands and roll it around just as you would in making a meatball or hamburger patty. Start out with a little firm pressure and as it starts feeling sticky, lighten up on the touch. This part may take a little practice but you can do it, hang in there.
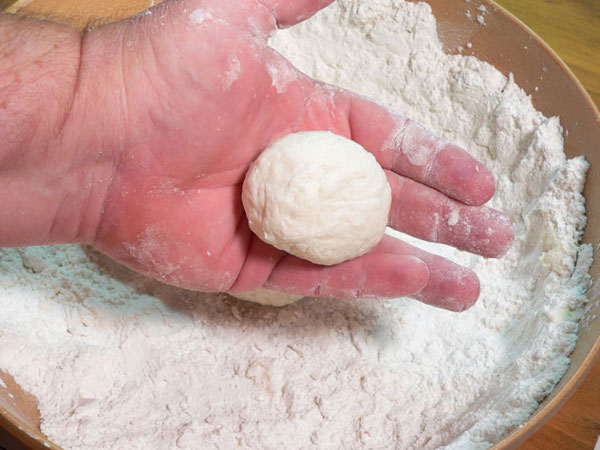
You should end up with a round ball of dough like this. Notice it’s pretty smooth on the outside at this point. Rolling it around in your hands should smooth out any splits or folds in the dough. If it has places like that, roll it around a little more. Use a light touch and don’t press the dough together very hard.
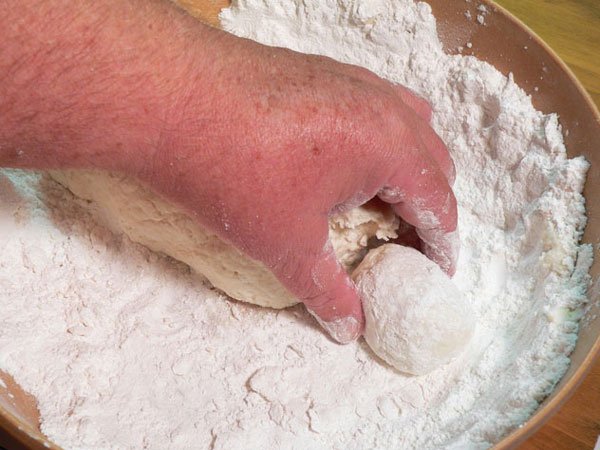
Drop the ball of dough back into the flour and roll it around just enough to lightly coat it again.
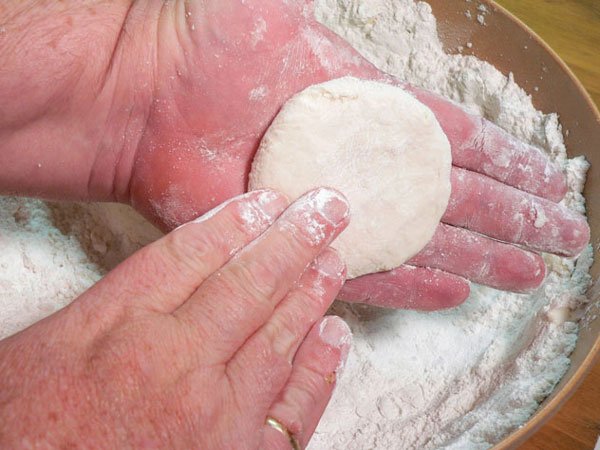
Give the dough ball another quick roll around between the palms of your hands. It will only take about one second to do this part then, flatten it out by pressing it just a little. Again, this is pretty much like shaping a hamburger patty.
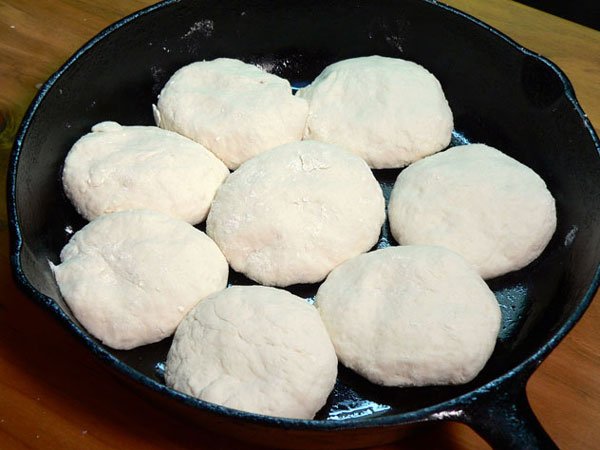
You will need to lightly grease your baking pan with a little lard or butter. You can use a flat baking sheet or a cast iron skillet. Just keep repeating the process of shaping the biscuits until you’ve filled the pan or run out of dough. I prefer to have the sides touching as it makes the edges softer. If you space the biscuits an inch or so apart on a baking sheet, they will have more of a crust around the edges as they bake up. It’s a personal choice and up to you as to which you prefer. Try it both ways and see which you like best.
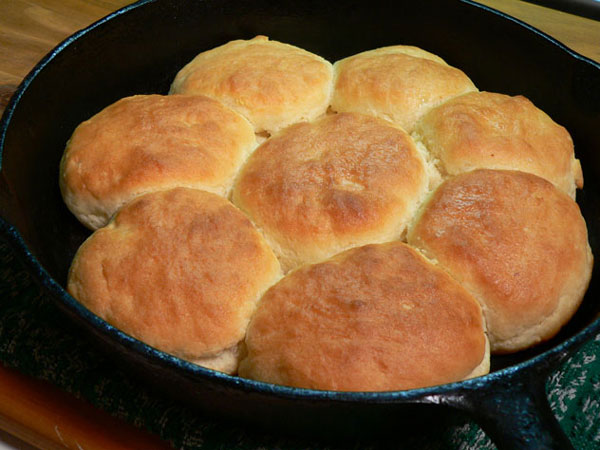
I opted to bake these in one of mama’s old cast iron skillets. It is of course my favorite and most treasured kitchen item. When mama baked biscuits for Sunday dinner, she made about two dozen or more biscuits at a time. She would bake those on large baking sheets instead of the skillet. I thought you’d like to see them in the skillet though.

Use the back of your fingers and gently press down on the tops of the biscuits. This will pack them in a little tighter and helps keep the centers from baking up uneven. These biscuits are probably about half an inch thick at this point.
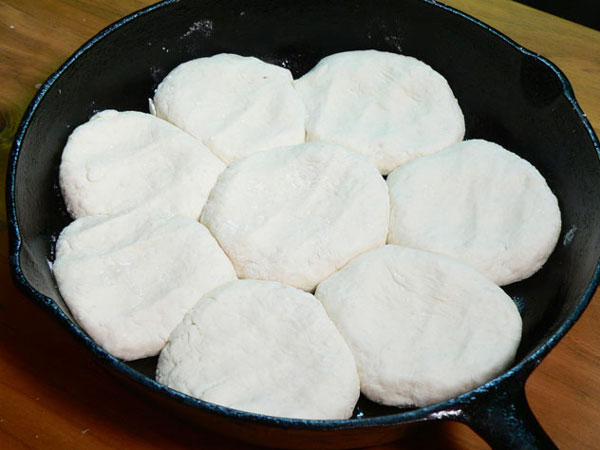
Here they are… ready to bake. Place them in the oven but don’t go too far away.
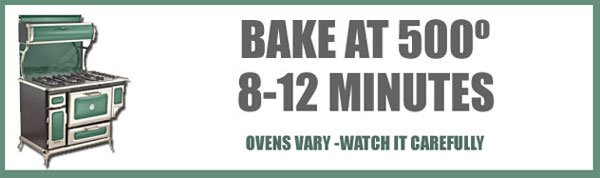
Yep, that’s 500 degrees. Oven’s vary so you’ll want to keep a close eye on them. After about 8 minutes, start sneaking a peak at the tops of the biscuits. Don’t open the oven door all the way but just enough to see them. They should have risen up nicely and will start to brown around this time. Since the oven is so hot, they can burn really easy. Once the tops turn a light golden brown all over… they’re ready.
CAUTION: No matter what you’re baking biscuits in, the pan gets really HOT. Especially a cast iron skillet. You’ll need much more than a towel or a pot holder to remove a cast iron skillet from a 500º oven. Trust me on this one. You’ll also need a good spot to sit the pan once it comes out of the oven.
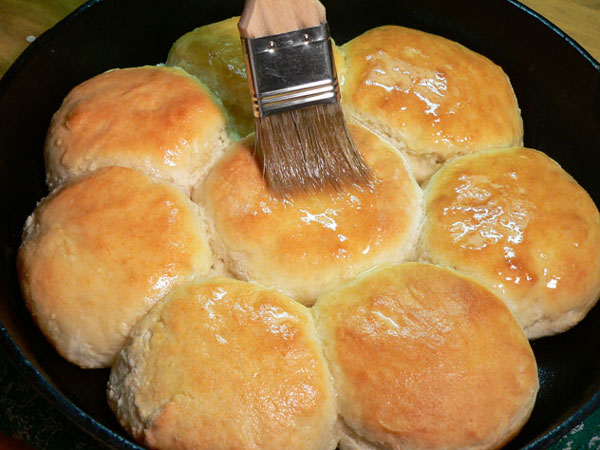
Right after you take them out of the oven, brush the tops with some melted Butter. Let it run down around the edges and in between the biscuits.
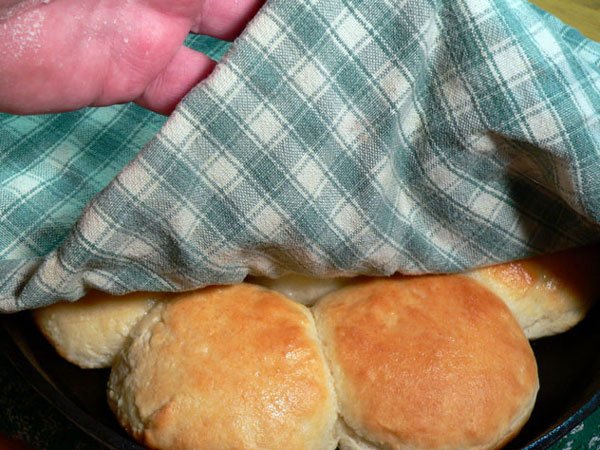
Cover the hot buttered biscuits with a clean towel and just let them rest for a few minutes or until you’re ready to serve them.
Look good? Serve them up warm and Enjoy!
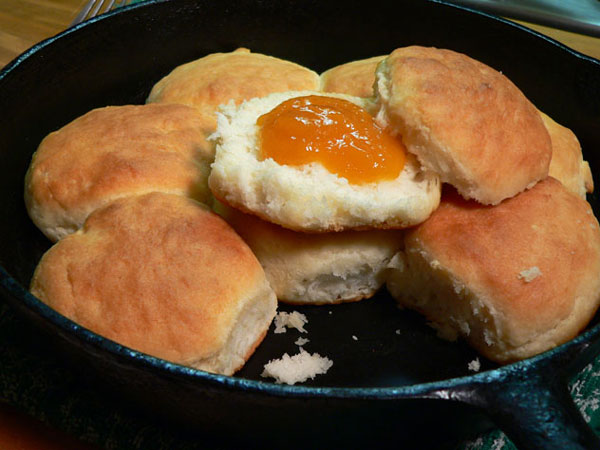
Biscuits are good about any way you would like to serve them. I do hope you’ll try making biscuits the way mama taught me to do them. I think you’ll find it to be one of the easiest ways to make delicious biscuits that you and the family will enjoy many times over. Don’t let it intimidate you, you CAN do it, even if you’ve never tried, or even if you’ve failed numerous times before.
What are some of your fondest memories about biscuits? What’s your favorite thing to enjoy with them? I do hope you’l try these and I look forward to you sharing your memories and comments below. I’d also like to invite you to check out my step-by-step, photo illustrated recipe for making Sweet Potato Biscuits here on Taste of Southern. Those are pretty awesome as well.
Be Blessed!!!
Steve