Follow our step-by-step, photo illustrated recipe to make this super easy pizza dough. No kneading is required. It only takes a few minutes to mix up the dough and after a short rest, you can add your favorite toppings and enjoy your own delicious homemade pizza. Printable recipe included.

Quick and Easy Pizza Dough
I love pizza. It’s my favorite food, and I could eat it every day. Seriously, I really could.
My love of pizza began when I was a youngster in school. Pizza would be part of our school lunch menu about once a month, and I loved it from the first bite. I love the bread, I love the sauce, I love the cheese, I love the pepperoni.
Sometimes I like to have pizza with lots of toppings, but for the most part, just give me cheese and pepperoni and you’ll make me happy. Did I mention that I could eat it everyday?
My first attempt to make pizza at home came when we discovered the Chef Boyardee Pizza Kits. That was many years ago, but they still make them. When I get a bit nostalgic in the grocery store, I toss a box into my shopping cart.
Eventually I started experimenting with making pizza dough at home.
As is expected, I made some good dough and some not so good dough. That was back before this thing called the Internet, so our recipes usually came from the newspaper or a magazine. We didn’t have videos back then either to show you how things should be done. It was just trial and error. It was fun though.
I made pizza for my family and eventually thought that I should go into the pizza making business. That bug seems to hit many of us at least once in our lifetime. You know, everyone says your food is really good and that you should “open a restaurant.”
Eventually, I actually did. But, I never made one single pizza my entire time there. Go figure.
I haven’t made pizza at home in several years. I don’t even buy whole pizzas out any longer. If I order one or purchase one, I have a tendency to eat most of it. What’s left becomes breakfast the next day. These days, I try to just buy it by the slice, and I have several places locally that I visit about once a week.
When OXO offered to provide me with a Pizza Pan, Pizza Wheel, and Grate & Slice Set to make a pizza with, I jumped on it. OXO makes great kitchen tools, and I’ve been honored to have worked with them several times in the past here on Taste of Southern. You’ll find many of their tools in my kitchen.
I’m not going into lots of pizza dough or sauce detail here. I went for one of the easiest pizza dough recipes that I know of, so as to encourage you to try making your own at home if you’ve never been inclined to do so before.
The dough recipe is one I found years back over at www.thefreshloaf.com. It’s very easy, and doesn’t require that you knead the dough, which can sometimes work on your hands. They have the recipe, and one for a simple sauce posted under “The Pizza Primer.” I invite you to visit with them if you have an interest in making your own breads.
I do hope you’ll give our Easy Pizza Dough Recipe a try. Once you’ve got the basics down, you can move on to making the recipe your own, something we always encourage you to do.
Now that I’ve got this new non-stick pizza pan, I’m sure I’ll get back to my more serious attempts so watch for those in the future.
Ready to make pizza at home? Alright then, let’s get in the kitchen and… Let’s Get Cooking!

Easy Pizza Dough recipe: You’ll need these ingredients.

Sponsored in part by our friends at OXO Tools.
OXO has provided me with the above items to use in making this recipe. Links to more information about these tools, and where you can purchase a set of your own are listed below.
- Non-Stick Pro Pizza Pan features a micro-textured pattern to improve airflow for even baking and rigidity for strength and durability.
- Complete Grate & Slice Set includes coarse and medium grating and straight and julienne slicing surfaces. Each can be used over bowls or plates or placed on top of the lid, which doubles as a container for collecting and measuring.
- 4″ Pizza Wheel‘s clear plastic wheel won’t damage non-stick pans, and the slick surface prevents cheese from sticking.
While OXO provided me with this set of tools to try and review, all the comments regarding these tools are my own. I was not monetarily compensated for this post. Just saying.
First thing I do when making pizza, is prepare the yeast I’ll be using.
You need to follow the instructions on the particular package and brand of yeast that you will use as it may be different than mine.
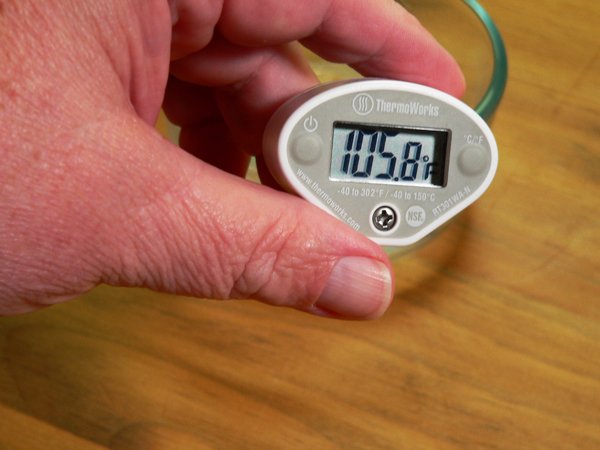
My packet said I needed to use warm water, somewhere between 100F and 110F degrees.
I’ve said it many times, but having a digital thermometer in your kitchen is one of the best gadgets you’ll ever purchase. Here, I’m using tap water that has cooled down to 105F degrees, about the halfway mark of what the packet suggested.
If your yeast needs to be added to water, using the right temperature is crucial in achieving a proper rise from the dough. Too cool and it will not become active while too hot could possibly kill it.
Again, follow the directions for the yeast you will be using.

I added the yeast granules to the warm water, then stirred until the yeast was fully dissolved. After that, I just set it aside for the moment.

Get a large mixing bowl, and add the flour. Be sure to use level cups of flour.
We could get into a lot of discussion about which flour makes the best breads, but for now, let’s just keep making this easy.
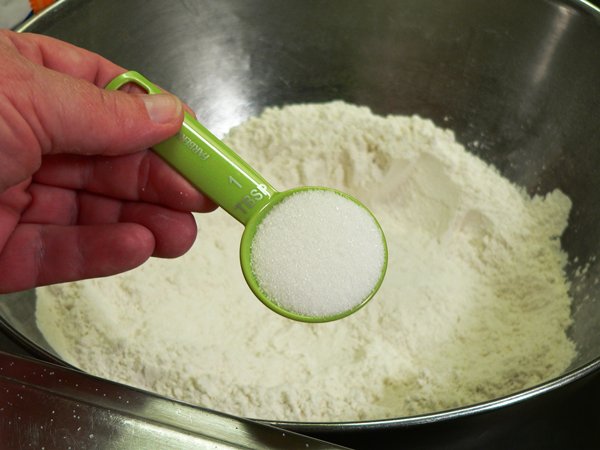
Add the sugar.

Add the salt.

Add the olive oil.

Add the yeast.
Notice how it has thickened and has some bubbles in it. This particular packet of yeast turned out to be a bit out of date from sitting too long in my cabinet, but it’s still working fairly well.

Add ALMOST all of the water. Save a little, you can add it later if needed.
I’m using warm tap water here as well. It was holding at about 105F degrees at this point. I didn’t want to add cold or hot water as it could cause problems with the yeast.

Use a large wooden spoon and begin to stir the dough.
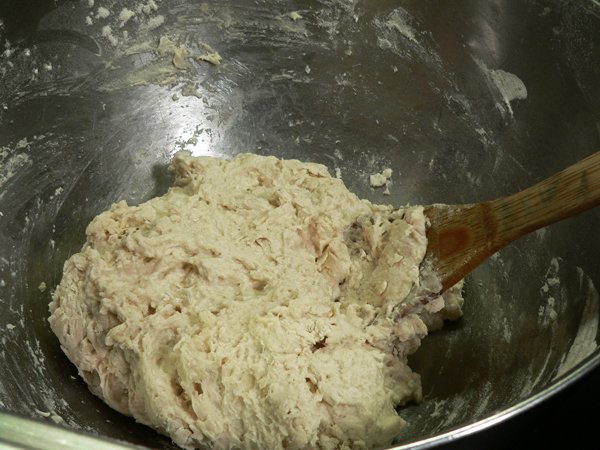
After a brief stirring, your dough should look something like this. It needs to be dry enough so it pulls away from the sides of the bowl, but still a bit more sticky than your average bread dough.
You could add more flour if it was too wet, or more of the reserved water if it’s too dry. Just add either gradually, it will not take much to change the consistency of your dough at this point.
It only took about a minute of stirring before it formed this ball.
After you get it mixed… LET THE DOUGH REST FOR FIVE MINUTES.
Then, stir it again for about 3 more minutes.

Divide the dough.
This recipe will make enough dough for 4 10-inch pizzas. Or, about 3 12-inch pizzas.
My new OXO Pizza Pan is 15 inches in diameter, so I’m dividing the dough into two parts.
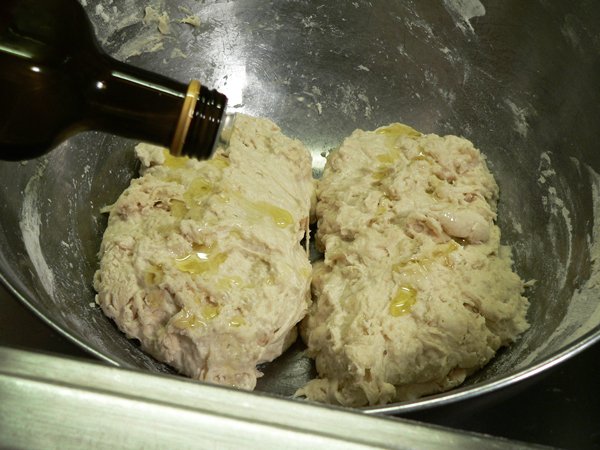
Drizzle just a little olive oil on top of each piece.

Use your hands and rub the olive oil all over each section of dough.
Place each piece in a freezer bag.
At this point, you can freeze any dough you don’t plan to use today by placing it in your freezer. It should easily keep for a month once frozen.
If you want to use the dough today, it does need to rest for about six hours before use.
I make dough the day before I want to make pizzas. Then, I place the dough bags in the refrigerator and let them stay overnight.
Just be sure to remove the dough about two hours before you plan to add the toppings so it can warm back up to room temperature.
If you freeze the dough balls, you’ll want to move them from the freezer to your refrigerator the day before so they can thaw, then remove them from the refrigerator a couple of hours before needed so they can come back up to room temperature.

I placed both packages on a sheet pan and placed them in the refrigerator.
Again, it’s best if you refrigerate it overnight before using.
You want the dough to make a long slow rise, so it will have a chance to develop better flavor.
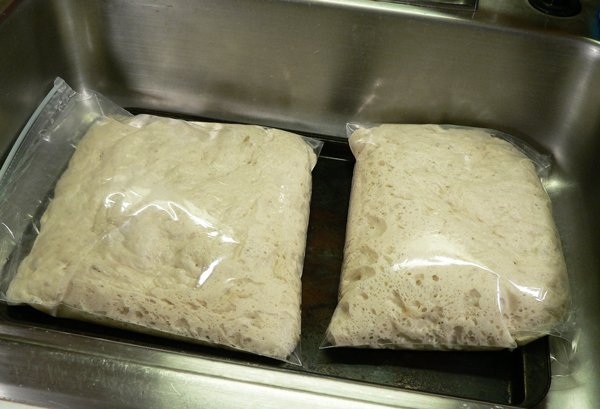
Can you see the difference a night in the refrigerator makes?
The dough has had a chance to slowly rise, and is now ready for shaping.
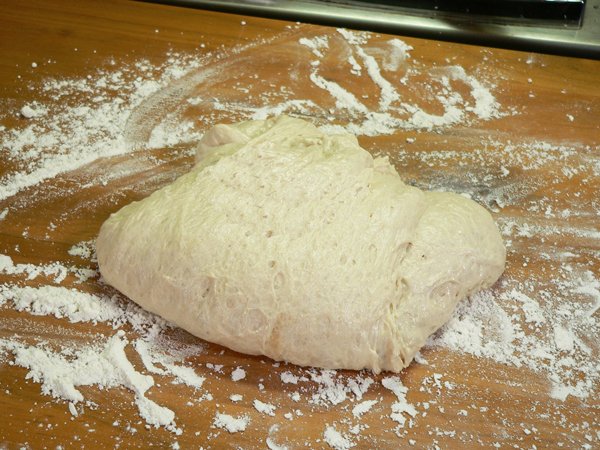
Sprinkle a little flour on your counter top, and remove the dough from the freezer bag.
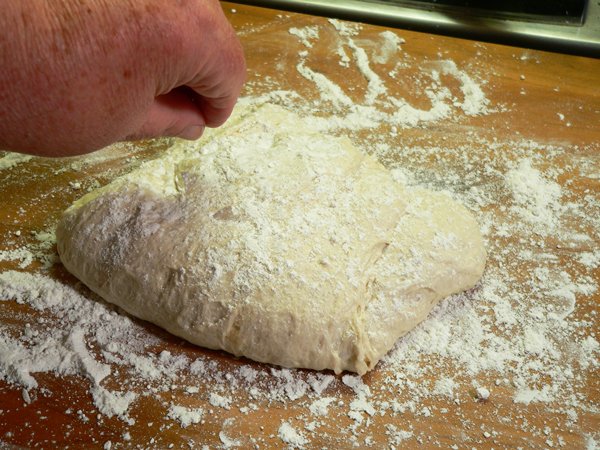
Sprinkle just a little flour on the top of the dough.
This will help keep the dough from sticking while you spread it out.

I always like to sprinkle a little corn meal on my pizza pan.
This is the first non-stick pizza pan I’ve owned. Adding the cornmeal probably isn’t necessary with this pan, but I’m showing it here in case you just have a regular type pizza pan. Don’t have a round pan? You can also use a cookie sheet or bread pan to spread your dough.
I imagine most of the cornmeal is going to end up in the indentations in the micro-textured pattern of this pan. Can you see that in the photo above?
The pattern of the pan will help the pizza to bake more evenly. Cool huh?

After spreading the dough out a bit on the counter top, place the dough in your pizza pan.
Use your fingers to gently press the dough and work it out to the edges of the pan.
If you develop a tear in the dough, you can just pinch it back together and move on. Depending on how much dough you have to work with, you can have a thin crust, or a thick crust. I like mine a little more on the thicker side personally.

So, how hard was that? You’ve made a quick and easy pizza dough, spread it out in your pan, and now you’re ready to create your own style of pizza.
Let’s take a look at the other OXO tools I’m using, and work on getting this pizza ready for the oven.

You can make your own sauce, or use a ready made sauce, whichever you prefer.
While I did make a simple sauce for this pizza, I’m not including a recipe for it today. Perhaps we can get into that in another post later on.
Either way, use a ladle and place some sauce in the middle of your dough… just like the pros do it.

Spread the sauce out over the pizza dough, leaving just a bit of the crust exposed around the outer edge.
Yes, I know my dough isn’t shaped perfectly round, and yes I see the sauce running over the edge of the dough and onto the pan. You don’t have to be perfect, just have fun while doing it. Smile.

As it would happen, I was recently in Cuba, New York, home of the Cuba Cheese Company and their Cuba Cheese Shoppe. I purchased this piece of Mozzarella Cheese just for use in making this pizza.

This is the OXO Grate & Slice Set that I received. It includes coarse and medium grating, and straight and julienne slicing surfaces. These blades can be used over bowls or plates, or you can place them on top of the lid which works as a container for collecting and measuring what you’re grating.
All of the blades easily store inside the container with lid when not in use. Fits right into your cabinet.

I’m using the coarse grating blade to grate the Mozzarella Cheese.
As with any tool like this, be sure to watch your fingers.
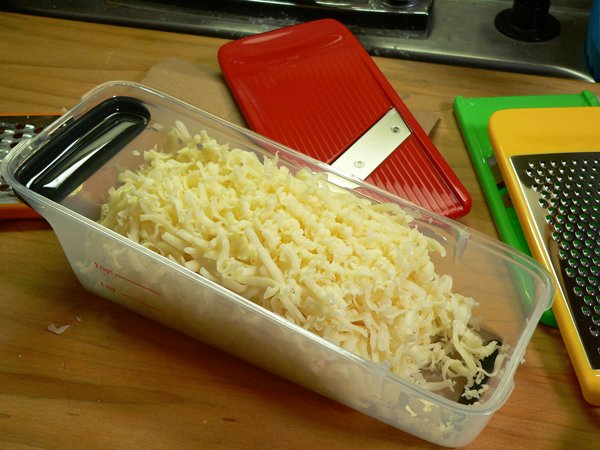
In just a few seconds, I had grated up more cheese than I needed for just one pizza. Wait, can you actually have more cheese than you need? Is that really possible? Smile.
It really was quick and easy, and I like that I had a container to catch the cheese in.

This is the slicing blade. I’m going to slice up a Roma Tomato with this one.

Again, it only took a couple of seconds to make these perfect slices. They even provide a guard for you to use when slicing vegetables so you don’t have to worry about slicing fingers instead of veggies.

I added the cheese on top of the sauce, then placed slices of Pepperoni across the top of that. I’m using pre-sliced Pepperoni because it was all I could find at the grocery store. I really wanted to see if my new slicer could handle slicing Pepperoni, but sadly didn’t get to find that out this time around.

Can you see how thin those slices are? And, did I mention it was really quick to slice them?

You want to pre-heat your oven way ahead of time to be sure it’s up to temperature. My oven goes up to 500F degrees, and you’ll want to get your oven as hot as it will go in order to bake your pizza.
Keep a close eye on the pizza as it bakes. You will probably smell it once it starts getting done, but you certainly don’t want to let it burn.
Your pizza will be ready when the cheese fully melts and the crust is lightly browned.

And here’s my pizza hot out of the oven.
I quickly noticed that the pizza was sliding around in the pan. Guess that non-stick part is working pretty good huh?

To double check that, I decided to slide the pizza out onto my cutting board. It slid right off without a problem. Didn’t stick to the pan anywhere.

This large 4 inch Pizza Wheel made quick work of cutting right through my thick crust. I like the easy to hold grips you’ll find on all of the OXO brand of kitchen tools. Of course, the plastic wheel of this cutter is made to not scratch up your non-stick pan, and the slick surface keeps the cheese from sticking to it. It just feels strong and sturdy in my hand, and worked great.

Would you care for a slice? I’ve got plenty.

I already love my new set of tools from OXO. I’ve got a feeling I might be making pizza at home more often now.
And, in case you’re wondering, the lettering you see on the pizza wheel that says “Safe for Non-Stick Pans,” is actually a sticker. It pulls right off. I just wanted you to see it. Smile.

Eat it while it’s hot and… Enjoy!
Did I mention that the pizza wheel/cutter is Safe For Non-Stick Pans? It is.
Thank you once again to our friends at OXO for providing these great tools for making our pizza recipe. Taste of Southern is always proud to work with you.