Follow our complete, step-by-step, photo illustrated recipe for making this old Southern favorite. Chow Chow relish is a great topping for hot dogs, burgers, turkey sandwiches, all kinds of great things. We’ll show you how to make the relish, then water bath can it to preserve it. Printable recipe included.

Southern Chow Chow Relish Recipe
Note: This was our most viewed recipe for the year 2020. Apparently, the pandemic caused a lot of folks to plant gardens and start home canning and food preservation adventures. Originally published on September 17, 2017.
Whether you call it Chow Chow, Chow-Chow, or ChowChow, this dish is made in lots of variations, just like the spelling of it’s name comes in lots of variations.
Around my “neck of the woods,” Chow Chow is one of those end of the season recipes that utilizes things that are quickly fading from the backyard garden.
It’s a way to use those tomatoes that are still on the vine, but will never turn ripe before the first frost gets them. Same for some of the other vegetables that are included in it. You pick them, then you figure out what you’re going to do with them.
Some folks use cucumbers, some use cauliflower, some use pretty much just cabbage. If you start looking for them, you’ll find lots of variations. It just depends on what you like and don’t like I guess.
I guess Daddy would have made Chow Chow more than my mom did. He took care of the gardening stuff throughout the summer, so it fell pretty much on him to clean it all up before the frost got it during the later part of Fall.
Mama on the other hand, in her later years, made a Squash Relish that I became fond of. I hope to do that recipe for you here on Taste of Southern one day. But for now, let’s make some Chow Chow.
I made this in 2016 and placed a jar in our North Carolina State Fair. It won Second Place that year, and this year (2017) I’m planning to enter a new batch with hopes of getting that prized Blue Ribbon. We’ll see.
Home Food Preservation seems to be fading away around my part of the country. At least among my friends and the folks that I know. It does take a little work, but it’s always fun afterwards to share a jar with friends and be able to say “I made this myself.” Plus, you always know what went in the jar.
Chow Chow is available at most of the grocery stores around the Eastern part of the United States. Not sure about anywhere else. I’ve never been much of a fan of the store bought kind, and I’m not sure what it is about the taste of the store purchased stuff that I just don’t seem to care for.
Chow Chow is sometimes called “Sweet” with a “Hot” version also available.
This recipe is fairly mild, but the Cayenne Pepper and Pepper Flakes give it a slight bit of heat. You could certainly eliminate that or add more, depending on your personal tastes.
We’ll take you through the steps of making the relish, then show you how to preserve it in jars that should keep you enjoying our Southern Chow Chow all year long. If it lasts that long that is.
I like it on Hot Dogs, and use to add it to Hamburgers before I stopped eating those. It’s a good condiment, and it makes a good side dish with a bowl of Black Eye Peas and cornbread.
So, if you’re ready to give it a try let’s get out the canning supplies. Get everything prepped and ready before you start chopping and dicing those vegetables, but most of all, let’s just get in the kitchen and… Let’s Get Cooking.

How To Make Chow Chow Relish: You’ll need these ingredients.

You’ll also need these ingredients.
It’s just a few spices with sugar and white vinegar.

Begin by washing your vegetables under cool running water.

I like to begin the cutting up part by dicing my bell peppers first.
Remove the inner core and seeds. Then, slice into small strips. Cut the strips into small dice pieces about 1/4 inch in size.
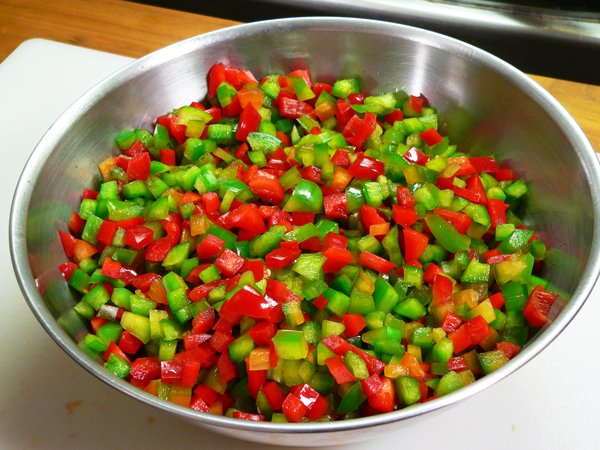
Set the peppers aside once you get them all diced up.
I do the peppers first since they seem to hold up better while I’m working on the other vegetables.

Dice the onions, then set them aside. Be sure to wash your hands before you rub your eyes. Just saying.

Remove the core from the tomatoes, then slice and dice the tomatoes. Set those aside.

Carefully slice the Cayenne Pepper into thin slices.
You really will need to wash your hands after you slice this pepper. You do not want to accidentally rub your eyes after you’ve been cutting up Cayenne Peppers. Take my word for it, okay?

You’ll need a large non-reactive container to mix all the vegetables in. This can be a large glass container, or perhaps stainless steel. Best that you don’t use aluminum.
Add all the diced vegetables into the bowl.

Next, remove the hard core from the center of your cabbage. Then, chop the cabbage up into small pieces.
I started out with my hand grater, but found that it was making the pieces too small. I ended up just chopping the cabbage with a knife. Again, you will want to keep this in small pieces.

Add the cabbage to the rest of the vegetables in the bowl.
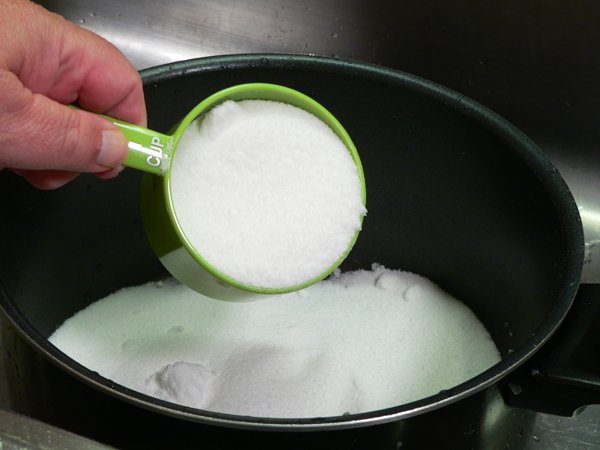
Sprinkle the top with the Pickling and Canning Salt.
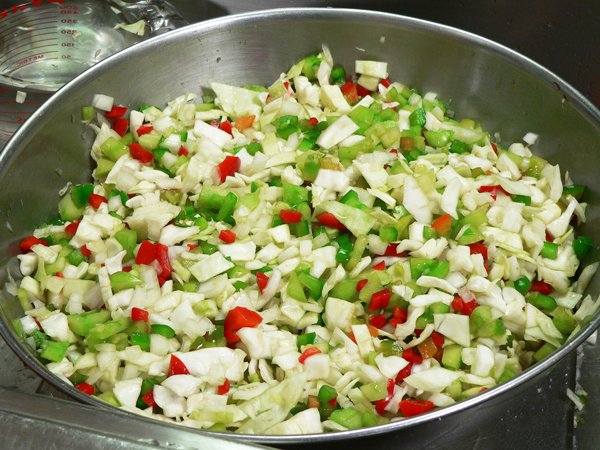
Use your hand and mix everything together well.
I like to scoop down to the bottom, then lift up a handful to the top. Rotating the bowl as you do this will help mix everything together pretty quickly.
As the salt starts pulling water from the vegetables, you’ll find some accumulation of this liquid in the bottom of your container. Just keep mixing it back in until you think all the vegetables have been coated with the liquid. That way, you’ve probably got the salt mixed in pretty good.

Cover the bowl with aluminum foil, or a lid if you have one.
The mixture will now need to sit for 4 to 6 hours, or overnight if possible.
I let mine sit on the counter for a couple of hours, and then set the bowl in the refrigerator overnight.
After cutting and dicing the vegetables, I was ready to take a break, so letting everything just chill in the refrigerator overnight sounded really good to me. I’m not getting any younger you know. Smile.

Next Day: Before I took the vegetables out of the refrigerator, I started getting everything setup so I could can the Chow Chow using the water bath method of canning.
First I washed my jars in hot soapy water. While you’re washing them, carefully run your finger around the top rim of the jar to check for any chips or cracks. You’ll also want to wash any old jar bands that you might be reusing.
You’ll always use NEW jar LIDS, so washing those isn’t necessary. Rinse the jars well.
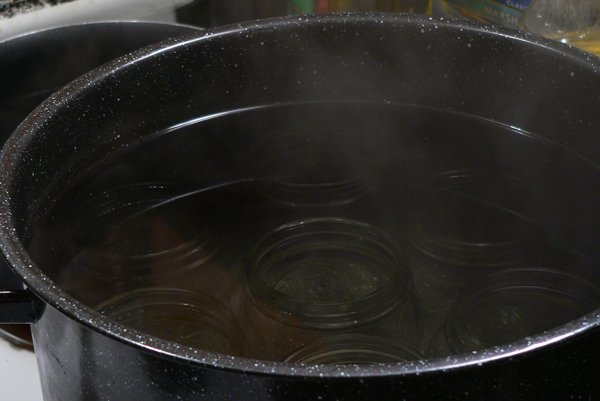
After I rinse my jars, I like to go ahead and place them in my water bath canning pot. I don’t use the rack at this time, and I just set the jars in the bottom of the canning pot. Then, I fill the pot with water, making sure the jars are fully submerged.
I will go ahead and place this on my stove top and begin warming the water up.
Timing everything out is one of the things you’ll learn through trial and error with your canning process.
I know it’s going to take this big pot of water some time to heat up to boiling, so I’ll start it while I work on the other steps in the recipe.
The jars will need to boil at a slow boil for at least 15 minutes in order to sterilize them.

With the jars starting to heat up, I have my sink clear now so that I can drain the vegetables.
I emptied about half of them in a colander and drained them for a couple of minutes.

Then, I rinsed the vegetables using cold running water. Stir down to the bottom and make sure that you rinse them well.
I had to do this in two batches since my colander wasn’t large enough to hold all the cut vegetables at once. Just let them continue to drain while you prepare the sugar and vinegar mixture.
You’ll need a large sauce pot for this step. A pot big enough to hold all the vegetables in.
First, add the sugar to the pot.

Measure out all of your spices next.
Don’t you like the way I labeled them all for you? I was just feeling a little creative at the moment I guess. Smile.

Add all of the spices to the sugar.

Add the white vinegar on top of the spices and sugar.

Give it all a good stir.

Place the pot with the vinegar, sugar and spices on your stove top.
This is pretty much the way my stove setup goes for all of my canning adventures. I place the item to be jarred up and canned on the front left burner. My jars are heating up in the water bath canning pot thats on the right front burner.
I keep a smaller pot of water in a pot on the back right burner. I heat that up so that it’s almost at the boiling point, and I can use this to add to my canning pot as needed.
Remember, you will need enough water in your canning pot to cover your jars with one inch of water while they are processing. Keeping hot water at the ready just always comes in handy.
And for the burner on the back left…

The small pot on the back left burner is where I put my lids and bands. I cover them in water and keep this on the lowest heat setting the burner can do.
In the past year or two, jar lids are being made so that they don’t require this warming up process. I can’t seem to get away from not doing it though. In my earlier years of canning, jar lids were always placed in warm water to soften up the red rubber ring on the lid. This was to help it seal better.
I still do it, but it doesn’t hurt anything. You just don’t want to heat them up to a boiling point as this could destroy the rubber ring all together. Just a little warm water will do the trick.

Simmer the sugar and vinegar mixture for TEN MINUTES.
I go ahead and crank the heat up to about HIGH, but I know I intend to stay with it during the whole time. Get it up to where you just start to see a few bubbles forming around the edge, then reduce the heat to let it begin to simmer.
If you let it boil hard for very long, it will boil away a lot of this liquid. Just stir it every minute or two and let the sugar dissolve.
At this point, I also raise the heat on my jars and start them boiling at a low boil.

After letting the sugar, vinegar and spices simmer for ten minutes, ADD the vegetable mixture.
I managed to get all of the vegetables in the pot.

I cranked the heat back up to High, but I didn’t leave the vegetables alone. I constantly stirred the pot until the vegetables heated up enough to start boiling. Then, I lowered the heat back down to about MEDIUM and let the vegetables continue to simmer for TEN MINUTES.
They’re boiling pretty hard in the photo above. This was just before I lowered the heat down to Medium.
Did you know that you can place a wooden spoon across the top of a pot and it will not boil over. It will get mighty close, but so far I’ve not had one to boil over. Not sure what the science is behind it, but it works.
COOK THE VEGETABLES UNTIL THEY ARE TENDER.
The vegetables need to simmer on Medium heat for TEN minutes. Then, continue to let them cook until the cabbage is tender. I let mine cook for about five more minutes, so that’s a total of 15 minutes cooking time once the vegetables start to simmer.
The vegetables will continue to cook once you remove the pot from the stove, PLUS they will cook even more once you start to process them in the jars. Thus, there’s no need to overcook them at this point. They’ll get there.

This is my counter setup.
My vegetables are tender and I’ve removed them from the stove. I have all my canning utensils already in place so that I can keep moving forward with the process.
I usually remove two jars from my canning pot at a time. I place one on a plate to catch any spills, and the other one I just set off to the back. I’ve got my slotted spoon and my ladle ready. And, I’ve got my skewer to remove air bubbles, my magnetic wand to lift the lids and bands, and my head space measuring tool all at the ready. My jar lifter is nearby as well, but it’s not in the photo.
It’s time to fill some jars.

I always use a funnel to fill my jars.
Place the funnel in the jar and then spoon your product into the jar. Since I’m working with more solids than liquids with this recipe, I like to use the slotted spoon to scoop up some vegetables and place them in the jar first.
With the jar about 3/4ths full of vegetables, I use the ladle to finish filling the jar, adding liquid as needed.
I only lightly tap the food down into the jar before removing the funnel.
Remove the funnel from the jar on the plate, then place the funnel in the jar towards the back. It just keeps your counter cleaner during the process as opposed to trying to find a spot to set the funnel. The next jar to be filled is the ideal place for it. You can just thank me later. Smile.

I like to use a wooden skewer to remove any air bubbles that might be in the jar.
The head space measuring tool can also be used to remove air bubbles, but old habits can be hard to break sometime. Right?
Use the skewer to run around the edges, then through the middle of the product in the jar. Air bubbles can ride up the skewer and be released at the top. At least that’s the thought behind it.
It’s not important that you get each and every air bubble in the jar, but this helps to remove most of them. Just work the skewer up and down as you go around the inside of the jar and you’ll be good to go.

The head space measuring tool has notches on one end. Each notch is a 1/4 inch segment so you can be sure you’re filling your jars to the proper level.
This recipe calls for the jars to leave a 1/4 inch amount of head space. That’s the first notch on the tool.
Head space is the amount of space between the top of the product or liquid inside the jar and the top of the jar rim itself. This amount of space will vary from one recipe to another, so always be sure to consult the recipe for the proper amount of head space that you need to leave for that particular recipe.
Add or remove product as needed to obtain the proper amount of space.
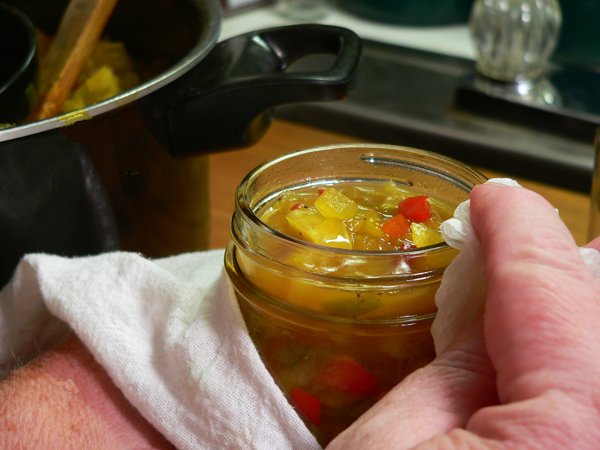
Next, use a damp cloth or paper towel to carefully wipe around the rim and top of the jar.
You don’t want any food particles or liquid to be on the top of the jar. It might compromise the seal once the lid is placed on top.
I will mention that with this particular recipe, the cooked onions can be hard to see on the outside of the jar. Check it carefully to be sure the entire top and the threaded part of the jar are clean and clear of any food or liquid.

Use the magnetic wand to lift one of the lids from the warm water.
Center the lid on top of the jar. Don’t worry about any water that’s on the lid, it will not be a problem. A gentle shake will remove the bigger drops, but water bubbles on the lid are nothing to be concerned.

You’ll also use the magnetic wand to lift one of the bands from the warm water.
Carefully position the band over the jar, then tighten it just “finger tight” over the top.
It’s hard to explain what “finger tight” really means. I snug my bands down firm, but never try to exert much force behind it. You just want them secure. Make sure they have gone on level as well.
Continue to repeat this filling process until all of your jars are filled and have lids and bands in place.
It’s now time to process the jars.

Use the jar lifter to place your closed jars in your jar rack.
Most of the enameled water bath canning pots come with a wire metal rack. They can prove to be aggravating with smaller jars, but they work pretty good with these pint sized jars.
The wire rack has curves on the handles that you hook over the top of the pot itself.
The racks let you add jars as you fill them, and they will stay warm as they are partially submerged in the water in the pot. Hook the rack on the pot, then load the rack with your jars.

Here’s a closer look at the handle of the rack as it’s hooked over the top of the pot.

Gently lift the handles up off the top of the canning pot and lower the jars down into the water.
Your jars need to be fully submerged with at least one inch of water over the top of the jars.
This is where that extra pot of water on the back burner comes in handy. It’s already good and hot, so I can just add more water to the canning pot at this time if needed.

Bring the water back up to a boil then place the lid on your canning pot.
With the canning pot closed an boiling, you can now start timing the process as called for in the recipe.
Processing time will vary from one recipe to another, depending on what you’re attempting to preserve.
We’re using the water bath method which is good for jams, jellies, preserves, and pickles. Most all types of vegetables need to be canned using a Pressure Canner. That’s a whole different story though.
Processing times for recipes will also vary depending on the size of jar you’re using. The larger the jar, the more time is needed. And, times will vary depending on the ALTITUDE of where you live.
Always consult a source such as Ball’s Blue Book of Preserving, or your states Extension Office for proper times for the recipe you’re making and for the altitude adjustments needed for your area.
This recipe calls for a processing time of 10 minutes for me.

When the processing time is completed, raise the jars back out of the water and hook the handles back over the top rim of the pot.
The jars should rest here for about five minutes before you try to remove them.
You may hear jars “ping” as soon as you pull them out of the water. That’s fine, it’s what they are suppose to do. Sometimes though, you might not hear a jar ping for 30 minutes or more after it comes out of the canning pot. That’s fine too.
You might not ever hear it ping at all. That will probably be fine as well. We’ll check on that later.
The jar lids have a “dimple” in the center of each lid. When new, this dimple is in the up position. After canning, the dimple should be in the down position. This tells you whether the jar is sealed or not. That ping or a “pop” sound is what you hear when the jar seals once it comes out of the water.
HOWEVER, do NOT press down on the center of the lid for 24 hours. Patience, my friend, you’ll need some patience. Smile.

Use your jar lifter to carefully remove each jar from the water bath canning pot.
Find yourself a smooth surface away from any air conditioner vents or any drafts. Place a folded towel on the counter top and place the jars on the towel, leaving about an inch of separation between the jars.
The jars will need to stay here, undisturbed, for at least 24 hours. Block any draft if needed to protect the jars.
After 24 hours, you can press down on the center of the jar lid. If it is down, your jar should be properly sealed. If it gives in and isn’t down, you’ll hear it make a popping sound. That jar didn’t seal. The product inside will still be good, so just place that jar in the refrigerator and use it first.
Should you have numerous jars that didn’t seal, sometimes the product can be reheated and processed again. If you find you must do this, you will ALWAYS have to use new lids. The bands can be reused, but not the lids.
You will also need to seek more information than we’re providing here about how to try and redo the product in your jars.
Thankfully, as of today, I’ve still never had a jar that didn’t seal. Just saying.
After the jars have set undisturbed for 24 hours, you will need to remove the bands and store your jars.
We remove the bands before storage in case a jar still didn’t properly seal. If you have a band screwed down tight on a jar, the lid can lose the seal but not come up. You might not know the product had spoiled and that could be trouble.
With the bands removed, any lid that comes lose will be pushed off the jar as gasses form inside the jar. This would be a clear sign that the jar wasn’t to be used. You would need to discard it if that happens.
Likewise, do not sit one jar on top of another, or sit anything else on top of the jars, pretty much for the same reason.
Store your Chow Chow Relish in a dry, cool area and it will last you for well over a year.

Enjoy!
Proper canning techniques are essential for any home canning project. It can be safely done if you follow the right information.
All of the canning recipes we’ve placed here on Taste of Southern come from the Ball Blue Book of Preserving, or from the USDA Complete Guide to Home Canning. I strive very hard to follow their guidelines with all of our canning recipes, but I also encourage you to read as much as you can about home food preservation before you start canning and preserving food at home for the first time.
We all had to start somewhere. Canning can be work, but it can also be a lot of fun.
I always think about how many hours and how much work my own Mother must have put in during her years to prepare the fruits and vegetables that our family raised in our backyard gardens.
It’s a tradition that seems to be a fading art, but I think if you will try it, you’ll enjoy the process. There’s just something about being able to say “I made this myself.” And, you always know what’s going into each and every jar.
I’ll look forward to hearing about your canning adventures in the Comment section below.