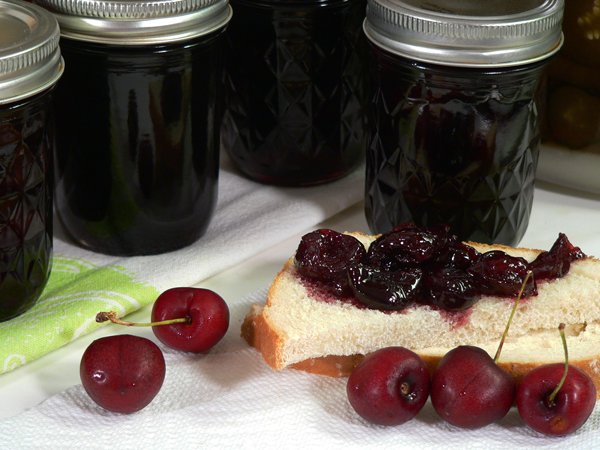
Follow our easy, step-by-step, photo illustrated recipe to make and water bath can these homemade Cherry Preserves. You only need two ingredients – cherries and sugar. It doesn’t get much simpler than that. We’ll show you the complete process. Printable recipe included.

How to make Cherry Preserves without pectin.
Recipe from the Ball Blue Book Guide to Preserving.
I was recently talking with a friend of mine and the subject of Cherry Preserves came up.
I told her that I didn’t recall that I had ever had any, but she insisted that they were super good. She just hadn’t been able to find any lately.
On my next visit to Wally World, I spotted a large display of Sweet Red Cherries and decided to buy a bag. It wasn’t until the next day that I thought about actually making some preserves with them, but as you can see, I did it.
When a recipe calls for just TWO items, you can’t hardly resist not giving it a try. Right?
I must say, they turned out pretty good from the little sample that I had left over. I only made a small batch, but that was what the recipe called for.
One thing that left me a bit puzzled was where the recipe called for draining the juice from the cherries. As you’ll see below, I ended up with hardly any juice at all. But, the recipe said you could add a small amount of water if needed, so that brought me through.
The recipe in the Ball Blue Book Guide to Preserving called for 2 pounds of cherries and 4 cups of sugar. That’s it, the whole recipe. No pectin, nothing else.
I think if I were to make them again, that I would purchase at least three pounds of cherries, and maybe squeeze the juice out of about one pound so I could add that to the recipe instead of the water. It’s just an after thought, but if you decide to try the recipe, keep it in mind.
And, I like a recipe that lets you start on it one day and finish it the next. I’m not getting any younger, and time in the kitchen is getting harder to handle. Smile.
You’ll need to cook the cherries a bit then let them set out for 12-18 hours before you jar them up and run them through the water bath canner. This worked in my favor.
So, if you’re ready to give this simple recipe a try, let’s head to the kitchen, and… Let’s Get Cooking.

Cherry Preserves Recipe: You’ll just need these two ingredients – cherries and sugar.
It doesn’t get much more simple than this.

Begin by rinsing your cherries under cool running water.

Next, remove the stems and throw them away.

Remove the pits.
Okay, this part gets a little more difficult, unless you have a cherry pit remover that is. I don’t, so I had to improvise.
I didn’t want to cut the cherries in half to remove the pits, so I used an empty Worcestershire Sauce bottle. You do save your empty Worcestershire bottles don’t you? I thought so.
Any bottle with a small opening will do. Just place the cherry on top of the bottle, then use a skewer to push down through the stem end of the cherry and pop the pit out the other end. Okay, it sounded easy enough.
I ended up using three skewers to give a bit more leverage against the pit. It worked though, and all the pits fell down into my bottle. Of course, I might have got carried away a time or two and pushed the whole cherry down into the bottle. Just saying. Smile.

My bottle of pits.
Be sure to do this inside of a bowl. You want to save every drop of cherry juice that you possibly can.
I saved this for later. I’ll tell you why shortly.

Where’s the juice?
The recipe calls for adding the juice from the cherries to about 4 cups of sugar. I saved every drop I possibly could, but only had about 2 Tablespoons of juice after all was said and done.
I ended up adding some water to the bottle that had the pits, so I could make a bit more juice. This is why you need to remove the pits over a bowl. There just wasn’t much juice to be had from this batch of cherries.

Place the 4 cups of sugar in a large sauce pot. Then, add the juice.
The recipe says it’s okay to add a little water. Between the actual juice, and the water from the bottle with the pits, I added 3/4’s cup of liquid into the sugar. Just enough to help the sugar dissolve.

Place the sauce pot over Medium-Heat on your stove top. Stir the liquid and the sugar constantly while the sugar begins to dissolve. You don’t want it to stick to the bottom of the pot and scorch or burn, so keep a close eye on it, and stir it constantly until the sugar has dissolved.

After the sugar has dissolved, add the cherries.

Quickly bring the cherries up to a rolling boil, and let boil for about 5 minutes.
The Ball Blue Book says you should boil the cherries until they are “glossy.” I’m not sure what that actually is suppose to mean as the cherries were glossy when they went into the pot.
You’ll really want to watch this closely. As you can see, the pot could easily boil over and you don’t want that to happen. Just keep stirring it down as it boils, and let it boil for about 5 minutes.
Remove them from the heat after the five minutes is up.
Cover the pot with a lid and let the cherries just sit in a cool place for 12 to 18 hours.
I did mine so they could sit overnight. I like a recipe that let’s you work on part of it one day, then finish it the next. Makes it easier on an old fellow. Smile.

Meanwhile, the next day.
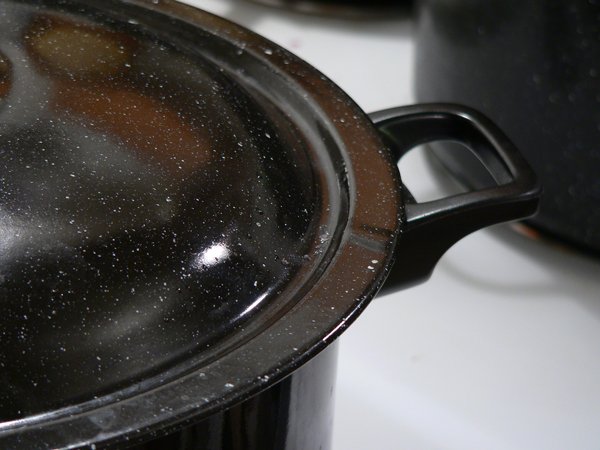
This is my stove setup in preparation for jarring up the cherries. I have the cherries in the pot on the front left burner. I have my water bath canning pot on the front right burner.
I’ve already washed my jars in hot soapy water and rinsed them. Then, I place them in the canning pot and fill it about 3/4ths full with water. I bring this to a low boil, and let the jars sterilize in this boiling water for 15 minutes while I get everything else setup and ready to fill the jars.
The pot on the back left burner has my lids and jar bands. I keep this on the lowest heat setting on my stove. You do not want these to boil in any manner at all. Just let them warm up.
The newer jar lids don’t call for this step any longer, but I still like to follow it. Warming up the lids helps to soften the red rubber sealing compound on the lids and I’ve yet to have a jar that hasn’t sealed in all my years of canning.
The pot on the back right is just a large sauce pot of hot water. I keep this hot so I can add it to my canning pot if needed. A lot of the water in the canning pot will boil away while I’m sanitizing the jars, and by the time I get the jars filled, so I want to make sure I have hot water ready in case I need to add more to cover the jars by one inch of water once they go back into the canner.

This is my counter top setup for canning.
While the jars are lightly boiling, I also setup everything on the counter so I’m ready to start filling jars once the cherries are ready. I’ve got my hot pad to sit my pot of cherries on, a plate to sit the jars in while I fill them so I don’t make a big mess everywhere. I’ve got my magnetic wand to lift the lids and bands from the warm water, my head space measuring tool, which can also be used to remove air bubbles from the jars, but I usually end up using a wooden skewer to remove air bubbles.
I also have my funnel, and my jar lifter. You also need a towel to help handle the hot jars, and a wet towel to wipe the rims of the jars.

Timing everything to come off at the right time is sometimes the hard part. You want to be sure the jars are ready about the same time your product is ready.
With the jars lightly boiling, you will need to quickly bring the cherries back up to a hard rolling boil. They usually refer to this as a boil that can’t be stirred away. Turn the heat up to about Medium-High, and keep stirring as the cherries heat back up.
Once the cherries have reached a hard boil, let them boil for ONE full minute. That’s it, just one minute.
Remove them from the heat and place them on the pot holder on your counter top. It’s time to fill some jars.
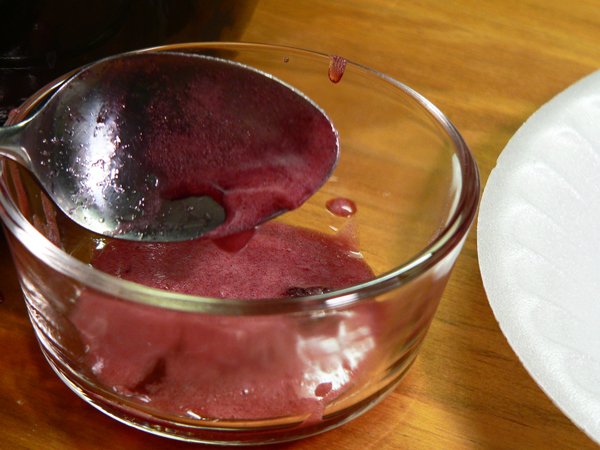
Skim off any foam that might be in your pot of cherries. Just get as much of it as you can. You don’t have to be overly obsessive with this, but get as much as possible. Discard the foam.
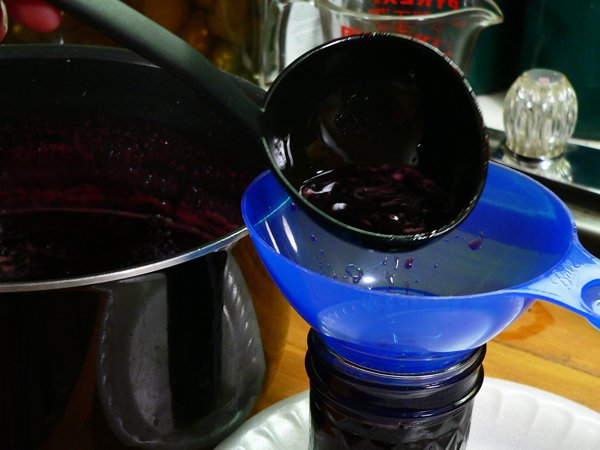
Ladle the preserves into a jar.
You’ll want to work at a steady pace from here on out. Don’t get in a panic and try to rush through it though. You’ve already got everything setup so it should go fairly smoothly. You just want to work at a steady pace so the product you’re working with, and the jars, don’t have a lot of time to cool down.
I always remove two jars from the water in the canning pot. I sit one on the plate, and the other behind it. Then, ladle the preserves into the first jar, using a funnel to make the process as easy as possible.
When that jar is full, remove the funnel and place it in the empty jar so you can fill it next. Just keeps from sitting that messy funnel on your work surface all the time.

Check each jar for proper head space. Use your measuring tool, and be sure each jar is filled so as to leave a 1/4 inch head space. That’s the amount of space left in the jar between the top of the preserves and the top outer rim of the jar. Proper head space is important for a good seal.

Jams and preserves aren’t so bad with air bubbles, but I still use a wooden skewer to remove any that might possibly be inside. Just insert the skewer down to the bottom of the jar, then run it around the inside edges of the jar, and through the middle, to let any air bubbles escape.
Again, this isn’t something to be overly obsessive with, but remove what you can see.
A few bubbles will not cause any problems, but a lot of bubbles left in the jar could compromise the seal and the quality of your products.
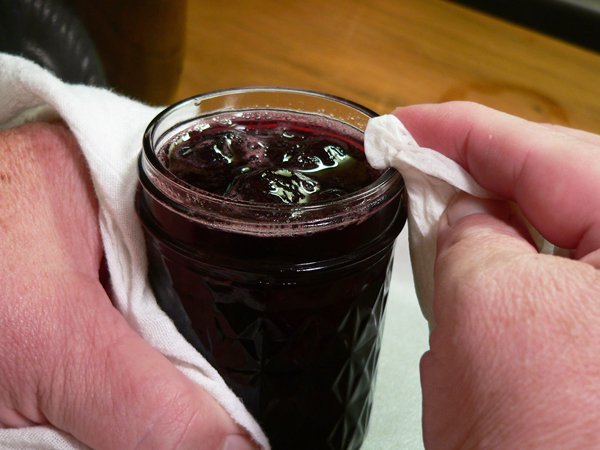
Use a tea towel to hold the hot jar with one hand, and use a wet towel, or wet paper towel, to wipe off any food that might be on the top of the jar. I also like to wipe around the edges of the jar where the band will go. Just be sure you get the top rim cleaned off really well.
Food product left on the top of the jar will keep the jar from sealing properly.

Use the magnetic wand to remove one jar lid and one jar band from the warm water. Gently shake the lid to remove water, and center the lid on the jar. As you can see, again it’s not a problem to have a little water on the jar lid. Don’t press on the jar lid to wipe it off either.

Screw the band down over the lid and snug it up “finger tight.”
Don’t use all your muscles trying to tighten the band onto the jar. Just snug it down a bit and move on.
Set this jar aside, and repeat the process until all your jars are filled and closed.

Now it’s time to place the closed jars in your water bath canning pot.
If you’re using a wire rack, like the one in the photo above, hang it by it’s handles so that the rack isn’t sitting on the bottom of the canning pot just yet. Some folks like to place their jars in the pot one at a time as they fill and close them. For me, it depends on what I’m working on.
Generally, I’m working in small batches and can get them back in the canning pot fairly quickly once they are all ready to go in. If I’m working with pickles, I don’t want them in hot water any longer than is necessary, so I leave them out until they are all filled. It doesn’t matter too much with jams and preserves though, so you can add them to the canning pot as you fill them if you prefer.
Once all the jars are in, carefully lift the handles and lower the rack on down into the canning pot.

Here they are down in the water. Sometimes the jars just don’t want to sit up right in this wire rack, so I had to change placement of a couple of them. Make sure they are sitting fully upright once you’ve lowered the rack.
The jars also need to have at least ONE INCH of water over the top of the lid. This is where that extra pot of water on the back burner comes in handy. It’s already good and hot, and if I need to add some, it gets right up to boiling speed in no time at all.
Once everything is settled in and secure….

Place the lid on your canning pot. When the water is boiling, start timing the process.
This recipe stated that I needed to boil these jars for 15 minutes. The amount of time needed for anything you can will vary depending on the size of jar you’re using, and on the altitude of where you live. ALWAYS consult a reliable source, such as the Ball Blue Book of Preserving, to find the proper times needed for whatever you’re processing in your area.

When the proper amount of processing time is up, carefully remove the lid. I suggest you use a mitt or a towel and open the lid away from you. Steam is hot and can burn you easily.
I use a pair of tongs to grasp the handles of my canning rack, and gently lift the rack back up from the bottom of the pot. Hook the handles back over the top rim of the canning pot, and just let the jars sit in the rack for a couple of minutes before you remove them.
You may hear some jars start to “ping” just as soon as you lift them out of the water. That’s okay, we love to hear that ping sound on all of our jars. Then again, you may not hear any, or maybe just one or two of your jars pop. That’s okay also. Just don’t press down on the tops of the jars for 24 hours.
Use your jar lifter and one by one, remove the jars from the canning pot. It’s best to sit them on a folded towel on your counter, in an area away from any drafts or air conditioning vents.
Set the jars on the towel, and let them go undisturbed for 24 hours. Don’t move them, and most certainly, don’t press on the tops of them to see if they are sealed.
After 24 hours, THEN you can press down on the button in the center of the lid. If it is down and stays down, you’ve probably got a properly sealed jar. If it springs back up, then that jar didn’t seal. If it’s just one jar, place it in the refrigerator and use that one first.
If most of your jars didn’t seal, sometimes you can reheat your product and try it again. You really need to consult a good source on how to do this. You will also need new LIDS to try again. Bands are always reusable, so only the lids will need to be replaced.
After 24 hours, you can store your preserves in a cool dark place. REMOVE the bands from the jars before storing them. That way, if a jar still pops a seal, the band isn’t holding the lid down and the lid can rise up letting you know it’s gone bad. You should probably throw that away.
Also, don’t stack your jars on top of each other, and don’t stack anything else on top of them.
Properly sealed and stored, your preserves should easily keep for up to one year or longer.

Enjoy!


