Easy to follow, step-by-step, photo illustrated instructions on how to make Blueberry Bread. We’re using fresh blueberries and making this quick and easy bread from scratch. It’s simple to make, not overly sweet, and you’ll love the cake like texture. Pecans are optional if you’d like to add those. Printable recipe included.

Blueberry Bread Recipe:
You just never know about your friends.
I have been visiting a local auction house each weekend for about two years now. During that time, I’ve made many new friends and since we all end up sitting in the same seats all the time, we’ve come to know each other pretty good. We talk about family, our week, our aches and pains, and somehow it seems, we always end up talking about… food.
They all know that I have this website and that I usually cook and post a new recipe each week. Since I see them on Friday or Saturday nights, they always ask what I’ve been working on and what my new recipe will be for Monday mornings. I’m always glad to share the info and that just keeps us talking about recipes and cooking throughout the night. I’m sure the auctioneer and some of those around us wish we weren’t having so much fun while the auction was going on.
Genelle and her husband Charles sit in the seats in front of me. Joyce and Rudy sit to my right while Sally, and her family and friends often sit behind me. We sometimes actually buy stuff and have even been known to bid against each other when it was something we all wanted. We still go out as friends though.
About once a week, Genelle will call me because we both sit up late at night. We’ll have a nice little chat and again, the conversation seems to turn to cooking. Genelle has pretty much claimed she no longer cooks very much and has tried to lead me to believe she hasn’t ever been much of a cook anyway. On the other hand, Joyce had a restaurant of her own some years back and did lots of cooking there as well as at home.
Imagine my surprise when it just came out one night that Genelle had created her own cookbook some years back. I was slightly stunned to say the least. She had never given a clue about it before. Seems she ran a small shop at one time, selling antiques and collectibles, and she typed up and had printed, a small collection of some of her favorite recipes. I was jealous. She even SOLD them at her shop. I was really jealous now.
When she mentioned that she still had a few copies left, I of course started begging. I at least wanted to SEE one and have the chance to peruse its pages. Thankfully she agreed to bring one as long as I kept it secret. (Don’t worry Genelle… I’m not going to tell anyone.)

Genelle’s Cookbook: That weekend, back at the auction, Genelle slipped me an envelope. Inside was this beautiful little cookbook that she created back in 1986. That was before folks had computers and printers in their home for all you young’uns that might be reading.
Genelle had typed up (think typewriter) 34 pages of her favorite recipes and a friend had added some illustrations for her. She had copies made and completed her book of recipes with sections for Main Dishes, Salads, Sweets, Vegetables and Dietetic. I’ll have to do more about her cookbook later on and I’ll share some of the pages from inside the book then. Needless to say… I loved it. She even added a beautiful handwritten note inside and GAVE me this copy of her book. Aren’t auction friends great?
I came home and sat right down to go through the book. It didn’t take long to decide what I wanted to try. Sally, that sits behind me, told me she was going to bring me some Blueberries the following week. Seems she had a couple of bushes that were overflowing with berries. She asked me if I liked them and when I said “Yes,” she told me she would bring me some. Genelle’s Blueberry Bread was moved to the top of the list of recipes to prepare.
Sure enough, Sally brought the berries and I was in the kitchen the next evening baking up a loaf of Blueberry Bread from the cookbook. It turned out wonderfully, even though it’s more like cake than a bread. Much like Banana Bread is cake as opposed to bread. I do think you’ll really enjoy it though and I hope you’ll give the recipe a try.
So, Thank You Genelle for sharing your cookbook with me. I have developed a genuine love and appreciation for handwritten recipes and even though these are typed, it still counts. Thank you for your friendship and for sharing your recipes with me and with Taste of Southern. I’m still jealous though.
Ready to give Genelle’s Blueberry Bread recipe a try? Alright then… Let’s Get Cooking!

Blueberry Bread Recipe: You’ll need these ingredients.

Begin by placing Flour in your sifter. Sift the flour into a large mixing bowl.

Use a spoon and scoop the sifted flour into a measuring cup. Use a knife to level the flour and measure out the needed amount of LEVEL cups of flour into another mixing bowl. Flour is always measured as level cups when baking and is measured after it’s been sifted.

Add the Baking Powder, also as a level Tablespoon.

Add the Baking Soda.

Add the Salt.

Use a whisk to mix all the dry ingredients together. Then, set the bowl aside.

Use a knife and slice the room temperature Margarine into slices. I kept out that small slice on the right and saved the wrapper, I’ll show you that shortly.

Place the Margarine in a medium sized mixing bowl and then add the Sugar.

Use a fork and cream the Margarine and Sugar together. This will take a minute or two but it beats having to clean up the mixer.

Add the Eggs into the bowl.
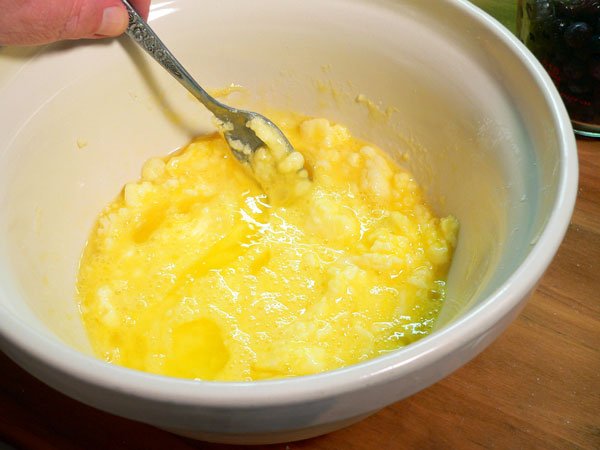
Using a fork, stir the Eggs into the Margarine and Sugar.

Add the Milk to the bowl.

Add the Vanilla Extract.

Mix together.

Place about one third of the flour in the bowl. Stir together.

Repeat the process of adding a little flour at a time and stir it together as you go.

Mix the batter together just until the flour is incorporated well. A few remaining lumps will not matter, don’t overwork it.

Rinse your berries and remove any stems that might be attached. Drain the berries then pour them into a couple of Tablespoons of flour.

Gently toss the Blueberries and flour together until the berries are coated. This is suppose to help keep all the berries from sinking to the bottom of the baking pan as the bread begins to bake.

Use a spatula or large spoon and gently fold the berries into the batter. Folding is the process of scooping down into the bottom of the bowl and gently lifting the dough up and over on top of itself a time or two so the berries get worked into the batter. Try not to just stir the berries and batter together as it will break many of the berries open.

Here’s that small pat of margarine I saved when I sliced up the stick above. Place it in your baking pan.

The wrapper is good to help spread the margarine all around on the inside of the pan. Give the pan an even coating along the bottom, in the corners and all the way up the sides.

Place several Tablespoons of flour in the pan. Turn the pan so the bottom and the sides get an even coating of flour.

Just hold the pan over your bowl and turn it around so the flour slides across the bottom and all the sides. Be sure to work it in the corners and edges as you go.

Gently tap the pan on your counter top to remove any excess amounts of flour. If you leave a buildup of flour in the corners, it will keep the edges of the bread from being as smooth as possible. Try not to let your fingers rub away any of the coating inside of the pan.

Spoon the batter into the center of the pan and gently spread it out towards the edges. I always try to work from the center of the batter out, making sure the batter touches into the corners and all the edges. Get it as smooth and even as you can but don’t let the spoon scrape away any of the flour coating along the inside of the pan.

Lift the pan a couple of inches off the counter and just drop it. Do this a time or two to help settle the batter in the pan. It’s now ready to bake.

Bake at 350º: About 35-45 minutes or until it passes the toothpick test to make it sure its done.

To test the bread: Insert a wooden toothpick into the center of the bread when you think it’s done. If the toothpick pulls out clean, the bread is done. If it still has small crumbs attached, you need to let it continue to bake a little longer. Just keep a close watch on the top of the bread and don’t let it burn.

When the bread is fully baked, remove it from the oven and place on a wire rack or folded towel to cool. The bread should be almost completely cooled before you try to remove it from the pan.
I didn’t do any steps in how to remove the bread but this is basically how it goes. Place a wire rack or dish on top of the bread pan and gently flip them both over. You should be able to feel if the bread falls out of the pan as you turn it. If it doesn’t, don’t despair. Gently tap all along the bottom of the pan until you hear the bread drop. If that doesn’t work, you might need to turn the pan back over and run a butter knife all around the inside edges of the pan to help loosen the bread. Flip it back upside down and it should drop right out.

Enjoy!
I’ve got a printable recipe below and I hope that you’ll leave some comments about our recipe in the section below that. Keep any leftover bread in an airtight container for up to 2-3 days.