When you’re ready for something sweet, but without all the frosting, this Banana Bread with Crumb Topping is sure to satisfy the craving. You’ll find lots of variations on how to make Banana Bread, and we’ll probably be sharing some other recipes as we go along, because we have several favorites of our own. It’s just the right amount of sweetness that’s perfect with a hot cup of coffee or a cold glass of milk. Is it bread or dessert?
…
I’ve always loved banana’s. I’ve always really loved bread. And, I’ve certainly had my fair share of banana sandwiches that’s for sure. Two slices of white bread, a ripe banana and some Duke’s Mayonnaise are all I need for a complete meal. So when you can combine the aspects of two of my all time favorites into a delicious dessert….I mean bread….then you’ve got my attention. I really like this particular recipe because it makes a delicious Banana Bread that’s not crumbly, but firm and moist…and delicious. And did I mention, it has a crumb topping? The topping is a mixture of brown sugar and butter and it really adds a lot to the bread.
It would be very simple to add some walnuts and turn this into a Banana Nut Bread, but we’ve opted to leave them out. Don’t worry, we’ll have one with the nuts coming up in the future because I really like it that way also. This isn’t one of those high rising type of breads either that some other recipes might make. It’s too moist for that I think. I do hope you’ll give it a try and see just what I’m talking about. When you do, leave us a comment below and let me know how you like it. You’ll also find a printable recipe after the step-by-step photo instructions.
So what are you waiting for? Grab some ripe bananas and Let’s Get Cooking!

Recipe: Banana Bread with Crumb Topping. You’ll need these ingredients. And no, my bananas aren’t rotten. Those are sugar spots and they’ll make this bread all that much the better. You’ll see.

We’ll begin by placing one cup of All Purpose Flour in a large sized mixing bowl.

Then we’ll add the sugar.
(Please resist the urge to play Connect the Dots on my bananas.)

Add one teaspoon of baking powder.

Add the baking soda.

Add the salt.
(Hmmmm…the bananas DO have a lot of sugar spots don’t they?)

Now mix all the dry ingredients together.

You’ll need to melt half a stick of butter. I did this in the microwave. You’ll just want to place the butter in a small cup or dish and use very short times to melt the butter a little at the time. Don’t walk away from the microwave during this process. If you just set the timer and walk away, you’ll probably end up with butter splattered all over the inside of your microwave. Now, I’m not saying that I’ve actually done that….I’m just saying…well….take my advice….and heat it up with short little bursts of power at a time. You can thank me later. Or, you could also melt it in a small pot on the stove.

Now, add the butter to the dry ingredients.

The buttermilk needs to be added next. You’ll want to have that at about room temperature.

Use a wooden spoon or spatula and stir it all together.

Break one egg into a small dish and stir it up.

Pour the egg into the batter.

Stir it all up real good.

Peel the two bananas. See, they weren’t rotten….they’re just right. They need to be soft for the recipe.

Take a fork and mash up the bananas.

Use the same fork and scrape the bananas into the batter.

Add in the vanilla extract.

Give it another quick stir to incorporate it all together.

I used a little Crisco Shortening to grease up my loaf pan. Butter would work just as well, or some of that spray stuff in the can.

Pour the batter into the loaf pan. I always hold the pan a couple of inches off the counter top and just drop it a time or two. It helps to settle the batter. Besides, it’s fun….try it.

Topping: Now, lets’ whip up the topping for the bread. Just place One Tablespoon of flour in a small bowl.

Add in the brown sugar.

Add the cinn-ah-min-amon. Cinnamon is good for you….you did know that right? It’s just hard to spell.
Actually, I was reading just last night about how you could heat a cup of water, add about one teaspoon of cinnamon to the water, cover it and let it sit for 30 minutes. Then, you’re suppose to add a teaspoon of honey and drink this mixture about 30 minutes before breakfast. They said it would help you lose weight. I haven’t tried it yet, but then…that’s another story and I don’t really know why I even mentioned it here. Just forget I even brought it up please.

Add the nutmeg.

Add just a pinch or two of salt. I didn’t use the full 1/4 teaspoon of salt…just about half that.

Add the room temperature butter. You’ll need one big Tablespoon.

Use a fork and just mix the butter into the other ingredients. Stir it around good to incorporate it all together.

Just use the fork and drop little globs of the topping all across the top of the batter in the loaf pan. (Note: “Globs” is a culinary technical term)
BAKE: Place the pan in a pre-heated oven set at 300º degrees. You’ll want to bake the Banana Bread for about 40-45 minutes, or until a cake tester comes out clean. “Cake tester” is another culinary term. Its just a fancy term for….wooden toothpick. Once the bread has been in the oven for the alloted time, stick a toothpick into the center of the bread and pull it back out. If it comes out clean, your bread is done. If it’s a got a little doughy mix on it, just bake it a few more minutes and test it again.
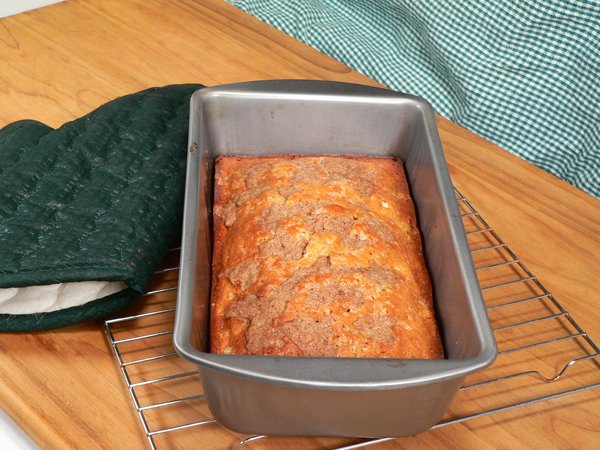
When the toothpick comes out clean, remove the baked bread from the oven and sit it on a cooling rack or on a cloth placed on your counter top. Let the bread cool in the pan for about 10 minutes.

After it’s cooled in the pan for 10 minutes, turn the bread out onto a wire rack. Carefully flip it over and let it cool on the rack for awhile longer. “Awhile longer” is yet another culinary term we’ve learned today. That means….for as long as you can possibly wait without just slicing off a big old hunk of this bread. It’s gonna be difficult but try to exercise real constraint. What’s even much harder is to let the bread rest overnight. I promise you….it’s gonna be even better tomorrow. That is, if you have any left.

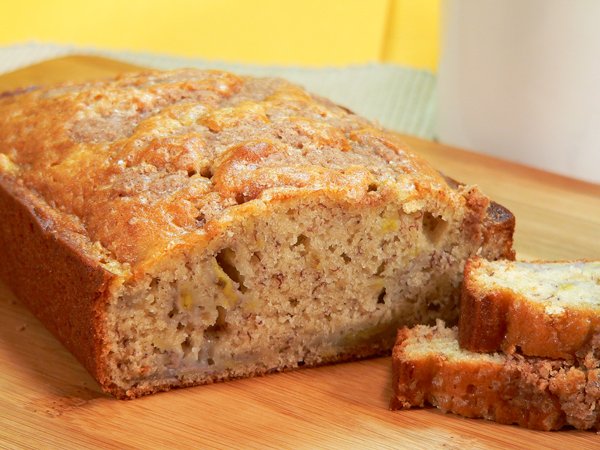
Slice it up…Serve….and Enjoy!
Culinary terms we’ve learned today:
Globs
Cake Tester
Awhile Longer