Follow our step-by-step, photo illustrated instructions for this delicious Apple Butter Recipe. This is just another in our Canning 101 series of recipes for preserving our heritage, one jar at a time. Apple Butter is really easy to make despite the fact that it takes a little bit of time to slow cook it to perfection. Your family will love it and, it makes a great gift item for those special folks on your gift giving list.

I love seeing a beautiful display of apples in baskets. I’m not sure why that is but, it just makes the world look all that much better. It also makes me want to just go up and pick up one apple from each basket and take a big bite out of it. I have to resist that temptation though.
Visits to the State Farmers Market in Raleigh, here in North Carolina, always bring back lots of memories from my childhood. Its about an hours drive from where I live but, I visit there as much as I can. I may not buy a lot but I sure do enjoy walking through the open market area, talking with vendors and, trying a few of the samples they are always eager to share.
It was super cold this past week when I visited the market. Although the vendors are under a long shelter, the market is open on both sides and there aren’t many days of “perfect” weather for them to enjoy. It’s either way cold or sizzling hot but, many of them are there all the year around.
I saw lots of sweet potatoes, collard greens, turnip greens, some onions and other root vegetables. Shelled pecans were abundant albeit a little pricey but, they were fresh and that made them worth their price I think. I paid 9.00 for a one pound bag. A few strawberries were available and of course… apples.

This basket really caught my attention. They were reduced because of a few bad spots but, overall, they looked to be in pretty good shape to me and tasted great as well. That got me to thinking about how I never made that Apple Butter I had wanted to make back in the fall so, I quickly purchased about 6lbs. About the time I started going through this basket, the lady piled another bunch right on top and they looked even better. I wish now I had bought more but, that’s the way it goes.
I could see the coldness in the ladies fingers as she handed me my change. I have to admire those folks for all the hard work they do to bring all their goods to market. Not only do they work hard in the orchards and fields, they have to fight the elements just to make a sale. I hope you’ll support the local farmers in your area every chance you get.
She kept smiling though and even offered me a sample of the Apple Cider that was in the jugs you can see in the photo. I thanked her for it but told her I’d have to wait on that until next time around. It was delicious though.
As a child, my father worked several garden areas and sold produce from a roadside stand in front of our house. I had it easy as he let me run the fruit stand most of the time and that meant I got to watch cartoons in between customers stopping by. We didn’t grow apples but we did sell them. Daddy bought them from trucks that came all the way from the mountains with fresh apples about once a week. Yep, I ate my fair share of them as well. Apples from the grocery store these days don’t even come close to what we had back then. Today, they’re just suppose to look good and taste has to take a back seat to looks. Sad but… true.

Apple Butter Recipe:
Most people suggest you use a couple of different varieties of apples when making Apple Butter. I decided I’d just stick with the Jonagold variety that I found for .49 cents a pound. I might be a bit frugal that way.
As it turns out, they made for some delicious Apple Butter and, I now I’m really wishing I had bought more. Maybe I can find them again before the supply dwindles too far. I used 5 pounds of raw apples and could have made 5 half pint jars of Apple Butter from this recipe. I didn’t have the half pint jars on hand so, I went ahead and filled a couple of pint jars instead.
It may seem like a lot of work for 2-1/2 pints of Apple Butter but it really isn’t. Had I had the half pint jars, I’d been able to make some for me and some to share. I’ve been enjoying the open jar for the past couple of days and I’ll hang on to the pints for awhile longer. Just in case I don’t get to make more, I’ll have two pints that I can enter into competition when our local and State Fair roll around. I seriously doubt they will last until Fall so I guess I need to be on the look out for some more apples very soon.
I will point out that it took me about 6 hours to cook these down. I did it over two days though so it wasn’t a problem. Besides, your kitchen and your whole house will smell absolutely DELICIOUS for days afterwards. I’d also like to point out that while I added the Lemon zest and juice of one whole lemon, the Apple Butter had a bit of a tart taste to it throughout much of the cooking process. I was afraid it might have been too much but now that it’s been in the refrigerator for a few days, I like it all that much the better. It pretty much blended right in.
While this isn’t a really in depth recipe for the canning process, I’ll show you how it’s done. You can print out the full recipe at the bottom for making the Apple Butter. It can also be frozen if you’d rather do that instead of canning it. Either way, I’m sure you’ll enjoy it. So, if you’re ready… Let’s Get Cooking.
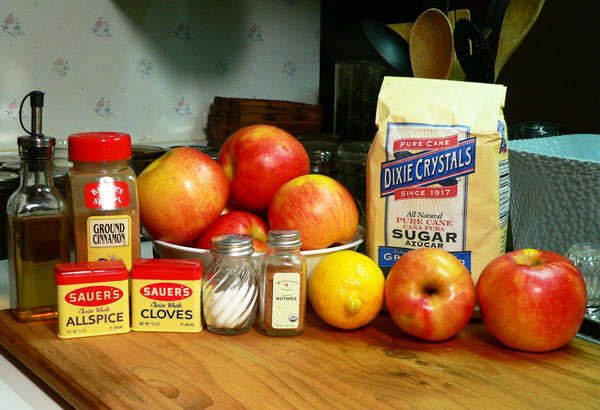
Apple Butter Recipe: You’ll need these ingredients.
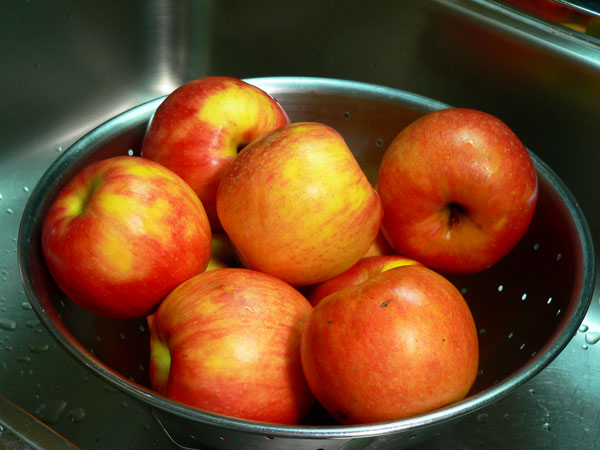
I’m using 5 pounds of apples. Its enough for a “small batch” of Apple Butter. Begin by washing the apples very well under cool running water.

Slice the apples into quarters or, smaller size pieces if the apples are really large. You don’t have to worry about peeling them or coring them. You could of course but, why waste the flavor in the skins or the pectin in the core. The Jonagold apples I’m using here were fairly soft, too soft in fact to peel with the Apple-Peeler-Corer-Slicer, made by Pampered Chef, that I picked up a few months back at a local auction for $4.00. I’ll spare you that picture.

Grab a large sauce pot and add 3 cups of water.

Add the vinegar.

Place the sauce pot over Medium-High heat and bring the mixture to a slight rolling boil.

Toss the apples in. As you can see, this amount filled my pot pretty good.

Cover the pot, reduce the heat to Medium and, let them simmer for about 30-45 minutes. You’ll need to stir them down about every 10 minutes or so. Just make sure they all get into the hot liquid at some point and, they will need to continue to cook until they’re soft enough to mash with a fork.

They will eventually break down and begin to look something like this.

You will need a food mill or a sieve to press the apples through. I bought this one at the auction for 2.00 but it didn’t have the stand or the pestle.
In case you don’t have either of these, you can still make Apple Butter. I’d suggest that you go ahead and peel and core the apples before cooking. Place the peelings and the core pieces in some cheesecloth and toss it into the pot while the apples cook so you’ll still get the benefits from the flavor of those pieces. Then, you can just toss them when the apples have cooked down. At that point, you could use a food processor or Immersion Blender to continue to break down the cooked apples. Just don’t liquefy it. While it’s probably the simplest way of doing it, I just wanted to do it the hard way. After All, I bought this seive to use for something and this seemed like a good something to use it for.
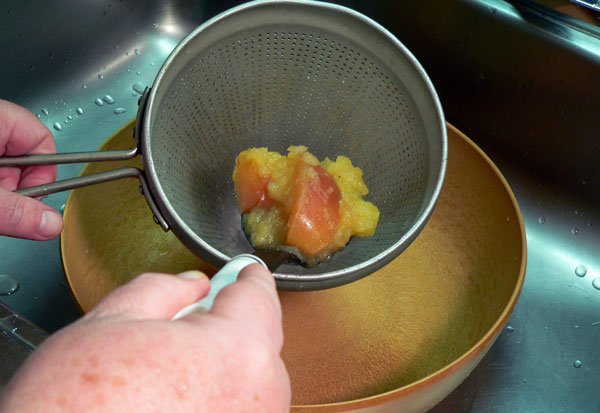
Spoon some of the apples into the sieve. Place it all over a big bowl because it can get a bit messy at this point.

I used the back of a wooden spoon to press the apples since I didn’t have the pestle that actually goes with the sieve. It worked very well though and didn’t take very long to process the entire batch.
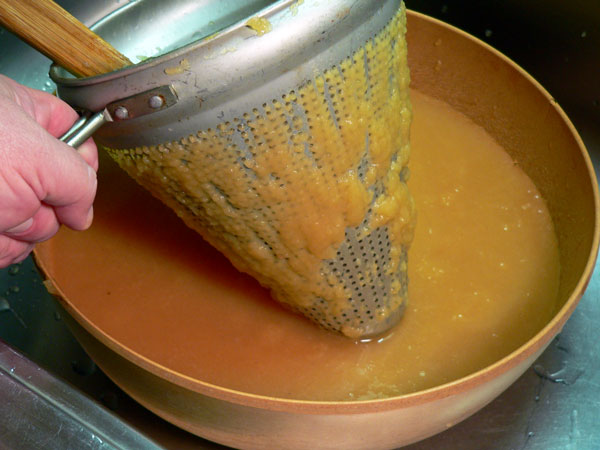
The holes seemed so small that, at first, I wondered if anything would go through. It didn’t take long though before the bowl started filling up.
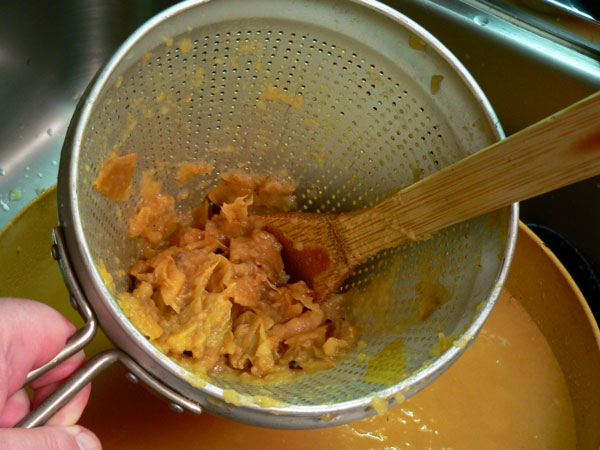
I ran all the apples through the sieve, including the juice that was left in the pot. After about 10-15 minutes, if that long, I had pressed all of the apples through the sieve and had just a handful of apple peels and the cores remaining. I tossed those away of course.
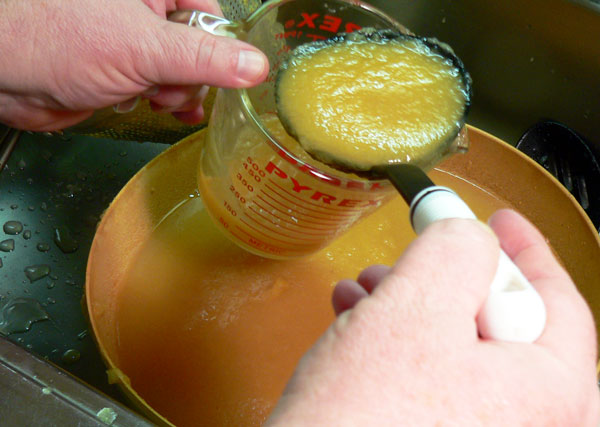
Measure the puree and make note of that amount. I just placed it back in the sauce pot at this point. And, I had 9 cups of puree.

I also had to improvise a bit with a couple of spices. I didn’t have Ground Allspice or Ground Cloves but, I did have the Whole Allspice and Whole Cloves. I took a small piece of cheesecloth and placed the whole spices on top of that.

Then, I tied up the spices to make a small spice bag. The printable recipe calls for Ground Spices just so you will know.

Zest one small lemon. Be sure to roll the lemon on your countertop a few times first. You’re going to get the juice from it in the next steps. A Microplane comes in very handy for zesting lemons.

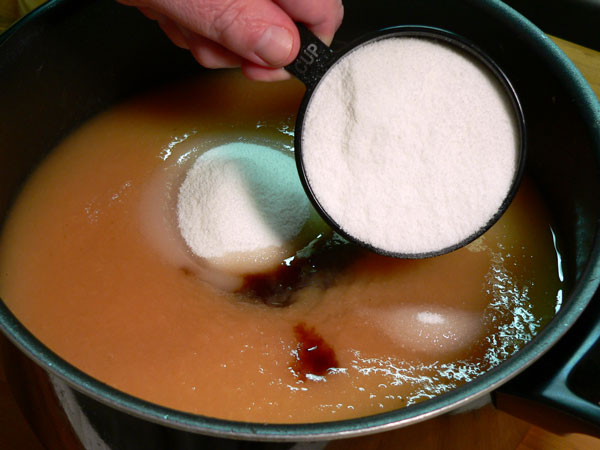
Add 1/2 cup of Brown Sugar to the pot of apple puree.
Please note this step carefully. The recipe calls for 1/2 cup of Sugar for every cup of puree. I wanted to add some Brown Sugar so my first 1/2 cup is Brown Sugar and the remainder of what I needed will be White Sugar. Make sense? I had 9 cups of Apple puree and I’m going to use 4 cups of sugar to complete the recipe. You could use even less sugar if desired… it’s up to you on this one. More or less sugar will not affect the outcome of the Apple Butter other than how sweet it actually tastes.

Now, I’m adding 1/2 cup of White Sugar. Thus far, that’s a total of ONE cup.
Add the remaining amount of sugar needed based on the actual amount of puree that you measured out previously.

Stir it around until the sugar dissolves.
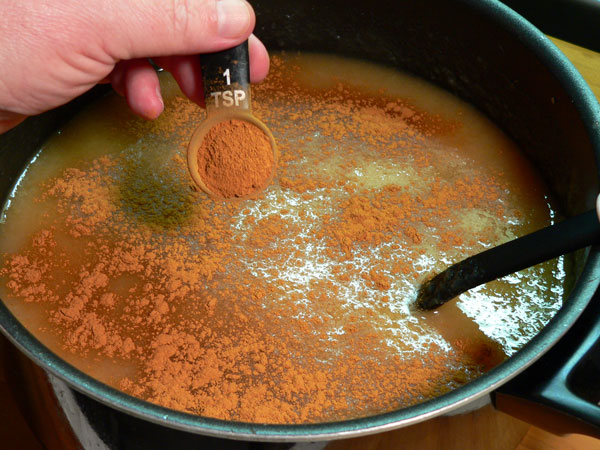
Add the Cinnamon. Stir it around until it’s well incorporated. Scoop up from the bottom and mix it in that way, otherwise, it’ll just float on top.

Add the Lemon zest. Did you know that lemon zest will eat holes in a Styrofoam plate if you let it sit for awhile? Trust me on this one.

Add the juice from the lemon, being careful to not let any seeds slip in.

Add the Nutmeg.
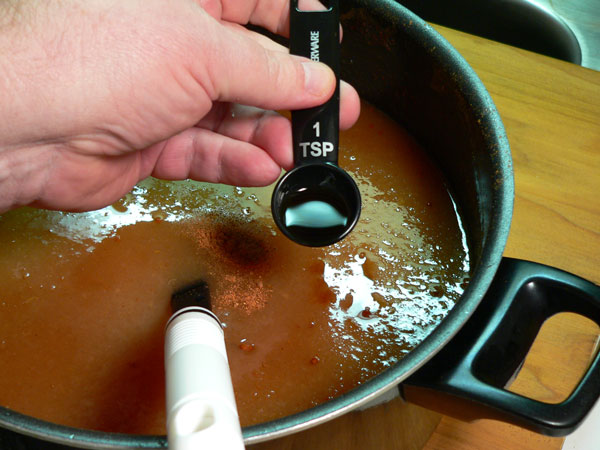
Add the Vanilla Extract.

Add the Ground Allspice and the Ground Cloves or, in my case, I’m adding the spice bag I made. I’ll take it out once it’s cooked down.

Add just a pinch of Salt.

Stir it all up really good. Congratulations… you’ve just made Applesauce.

At this point, I opted to cover mine and refrigerate it over night. Depending on the time of day, you could of course go ahead and start cooking it down instead. Lots of people use a crock pot to cook the puree down. That wasn’t my intentions though. I have a crock pot, I just didn’t have one large enough to hold all of the puree.
I wrapped the sauce pot in plastic wrap, placed the cover back on top and refrigerated the applesauce puree until the next day.

Let’s begin cooking our Apple Butter. As you can see, it is of the texture of Applesauce at this point. It’s a bit thin and watery and we need to cook that liquid pretty much out. After tasting it, I was a bit concerned that I had too much Lemon juice, it was pretty tart and, I was fearful I might have messed it up. The suspense mounts!
Place the sauce pot on a very LOW setting on your stove top. I was about two notches up from the lowest setting on my stove, yours may vary. You just want to cook it low and slow to evaporate the water out. This will take about 5-6 hours so plan your day accordingly. I used a timer and stirred the pot about every 30 minutes for the first 4 hours and then about every 15 minutes for the next 2 hours.
Please Note: Once the liquid starts to really cook out, the Apple Butter will start forming those volcanoes and can splatter EVERYWHERE. It’s also very HOT when it hits your skin. Just saying, not that I experienced any of this but, its my duty to tell you and warn you of such things as much ahead of time as I possibly can. You can thank me later.
Also note that your kitchen, your house, your neighbors house… will smell absolutely DELICIOUS throughout this entire process. I kept thinking I needed to go out and do some Christmas shopping or maybe sing some carols or something. It really did smell good through the whole process. Just keep stirring it so it doesn’t burn on the bottom, that would be terrible. It would ruin that lovely aroma as well I’m sure. Be sure to scrape the bottom each time so nothing is sticking as you go.
After about 3 hours, I placed a couple of wooden skewers across the top of the sauce pot and set the lid on top of that. This allowed the apples to cook down and vent any steam away. If you keep a tight lid on it, that just adds more moisture and prolongs the process. Keep this in mind also if you’re using a crock pot. You could do the same thing to prop open the lid a bit. Not too much though, remember, it WILL bubble and splatter.

After about 6 hours of slow cooking, this is what I had. It was getting late and again, I stopped for the day. I let it cool, wrapped it in clear plastic wrap again and set it in the refrigerator over night. Of course, depending on the time of day, you could move onto the next steps of canning if you desire to do that. Once it’s cooked down sufficiently, you could also just let it cool, place it in freezer cartons and freeze it. Your choice.

I’m going to can up mine even though its a small batch. This is my typical setup for canning just about anything that can be canned using the water bath process.
This will not be a complete tutorial on How-T0-Can but will give you the basics for it. If you have some canning experience it will be easy to follow but you’ll need to learn a few more things if this is your first attempt at canning. I’ve got some other recipes that go into a bit more detail and I invite you to check those out for more information.
Here’s the setup: On the front left side of the stove is my apple butter. I’m going to let it cook down a bit more before I actually can it up. The canning pot is filled with water and sits on the front right of the stove. On the back left hand side is a small pot with WARM water in which I keep on very low heat. This pot has my lids and bands in it. The back right side burner is just a pot of extra water that I always keep hot so I can add it to the canner as needed.
I washed my jars and bands in warm soapy water, rinsed them and placed them inside the canner to sterilize them. I’ll get this water up to a good rolling boil and let the jars stay in it for about 15 minutes to sterilize. You may have a dishwasher that has a setting that can do the same but, be sure of that before you try to use it to sterilize your jars.
I leave the jars in the hot water until I’m ready to use them. Just minutes before removing the Apple Butter from the burner, I use tongs to remove the jars and set them on a folded towel at my prep area. Then, I turn the canner pot back up to get the water to a rolling boil once again.

I’ve let the Apple Butter cook down some more and it’s very hot at this point. I’m having to stir it constantly because it’s making some large bubbles and yes, it’s hot when it hits your skin. You don’t want it to cook down too much but just enough to make it a good spreadable butter.
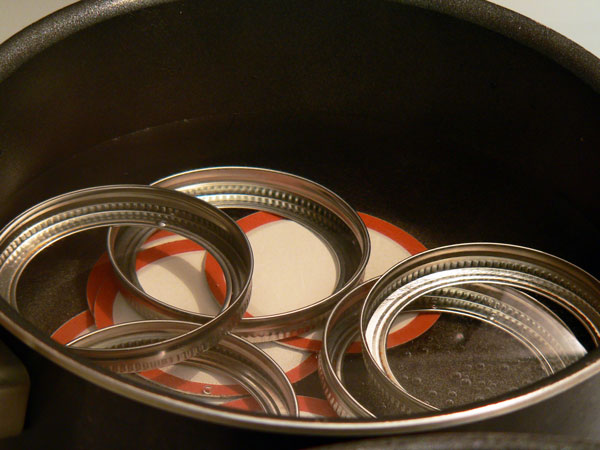
You must ALWAYS use NEW lids when canning anything. That’s the red and white, thin, flat part in the pot above. NEVER try to re-use lids when canning. The bands MAY be re-used many times however. Just be sure to wash them well, in soapy water and rinse them. As I stated, I place these in warm water and keep it on the lowest setting on my stove until ready to use. This warm water helps to soften that red rubber band that you see so it will seal with the jar. You should always check your jars and your bands for any chips in the glass or any dents in the bands that might prevent a proper seal. Again, these are just some basics and not intended to be a full explanation of the canning process.

I also like to get all the other items I’ll need ready so that once the Apple Butter is ready to process, I can move quickly to get the jars filled. I’ve got my jar lifter on the left, funnel, headspace measuring device, which also doubles as a unit to remove air bubbles… plus… the magnetic wand to lift lids and bands with. The plate just makes cleanup a bit easier.

Before I got too far along, I placed a saucer in the freezer part of my refrigerator. This is used to test the consistency of the Apple Butter and also is used as a way to test most jellies, jams and preserves. Remove the saucer from the freezer, add a spoonful of the apple butter then, swipe your finger through it. If it leaves a trail and doesn’t run back together, it’s a pretty sure bet that your butter is ready. You can also see a little runoff of water from the butter towards the bottom of the photo. It’s thick enough but needs to cook just a few minutes longer I think. If you over cook it though, it will become like plastic inside the jar and doesn’t turn out to be a very good spreadable butter.
I think most folks that can jams and jellies will admit, if being honest, they have at one time or another had this to happen to them. Its part of the learning process and even after years of canning, it can still happen. It has happened to me so I learn a little more each time. Just don’t be discouraged if it should happen. The product is probably still edible but not something you’d like to give as a gift. Just keep at it and next time will be better… I promise.

You’ll need a funnel for adding the butter into the jar. I have two plastic ones but I just love this old metal one that I have.

Carefully ladle the apple butter into your jars.

The “Ball Blue Book guide to preserving,” says Apple Butter needs a 1/4 inch amount of headspace. I’m using the tool that came with my canning kit to measure this as pictured above.

Next, I use a wooden skewer to remove any air bubbles that might be inside the jar. I just run it around the inside of the edges of the jar to let any bubbles travel up the skewer to the top where they can burst. I only saw one or two in the apple butter but sometimes, depending on what you’re working with, you can have a lot of them. You need to work out as many as possible for a good seal and good presentation.

Use a clean, damp cloth, to wipe the top rim of each jar. Also, carefully wipe around the outside top of the threads on the jar. Make sure the top is totally clean so that there aren’t any food particles that might prevent the jar from sealing properly.

Use the magnetic lid lifter to remove one of the lids from the pot of warm water. Shake it gently, without touching the bottom side and, place the lid on top of the jar.

Use the magnetic wand again to remove one of the bands from the pot of warm water. Shake it gently to remove excess water and then center it over the lid on top of the jar. Some water droplets on the band and lid will not be a problem, it’s best not to towel dry them. Gently twist the band, making sure it’s going on correctly and tighten it just “finger tight,” on the jar. Do not over tighten it.

Place the wire rack inside your canner, hanging it on the first notches to the outside rim of the canner. This will support your jars mostly out of water as you load the canner. Use the jar lifter to carefully lift each jar and place it in the rack.
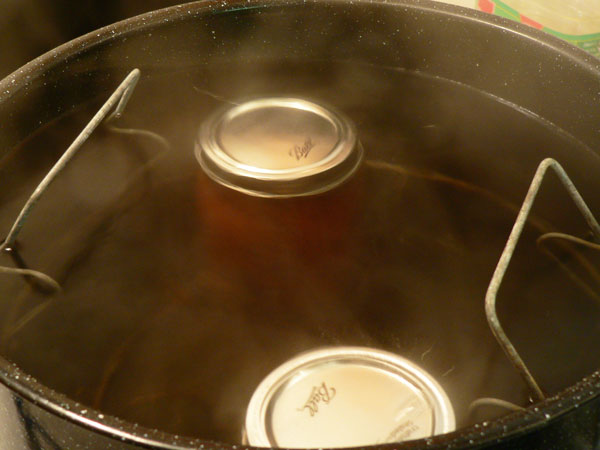
Use some oven mitts or, as I do, some tongs and, lower the entire rack into the canner. The jars need to be under at least one inch of water. This is why I keep extra water heating up on my back burner. After I’ve sterilized my jars, the water level has dropped. I can use that hot water to quickly get the water back to a rolling boil inside the canner.

Place the cover on the canner and process the jars as directed. Process times will vary depending on the Altitude of where you leave. That’s ALTITUDE and not Attitude of how you feel that day. (Smile) Be sure to check with the Ball Blue Book guide to preserving or your local Agricultural Extension Office for proper times to process for your area on anything you might intend to can up. For me, it was 10 minutes. Start timing it once the jars are under the proper amount of water and the water has started boiling.

After the jars have finished their processing time, remove the lid and set it aside. Using mitts or tongs again, carefully raise the handles of the rack and hook them back over the top of the canner pot. The jars need to sit here for about 5 minutes before you remove them.
With such little headspace, my jars were “pinging” just about as soon as they came out of the water. I’m not sure what it says about me but, I really do enjoy hearing those lids “ping” or, pop as the jars seal tight. It’s like a pat on the back or something that you’ve done it right. As a child, I remember waiting around in the kitchen when Mama took jars out of the canner. She always wanted me to count the number of pings so we could be sure each jar had sealed properly.
After 5 minutes, use the jar lifter and carefully lift each jar from the canner. Place the jars on a folded towel placed on your counter top. Jars should be placed in a draft free area and allowed to sit, undisturbed, for 24 hours. You need them on a folded towel because so many folks these days have Granite Counter tops. Placing a hot jar on one of those cool counter tops is likely to cause the jars to burst. It would be a shame to lose them now after all the work you’ve done. Always be cautious when working with hot jars.
Resist the urge to press the tops of the jars if you don’t hear them ping right away. After the 24 hours, you can press the center of the lid to see if it has stayed down. If it has, you can safely store the Apple Butter for up to a year or longer in a cabinet or pantry. If the jar doesn’t seal, place the product in you refrigerator and use it first. It will still be safe to eat. Congratulations… you’ve done good!

Apple Butter is delicious spread on toast, biscuits, English Muffins, pound cake, all kinds of things. It can also be used in many recipes as well. The taste is awesome and I think you’ll like this recipe if you’ll give it a try. That lemon I was worried about cooked right out and left me with a delicious tasting Apple Butter. I can’t wait to make some more.
Keep any opened jar in the refrigerator until it’s all consumed. That may not take very long… its just that good.
Please consult your area Agriculture Extension Office for more information on canning. I also highly recommend you take some classes in canning if they offer them. They’re usually very economical and only last a couple of hours at the most. The Ball Blue Book guide to preserving has some excellent recipes and instructions to help you along in your journey to canning, preserving and freezing. You’ll be very happy you took the time to learn.
Enjoy!